


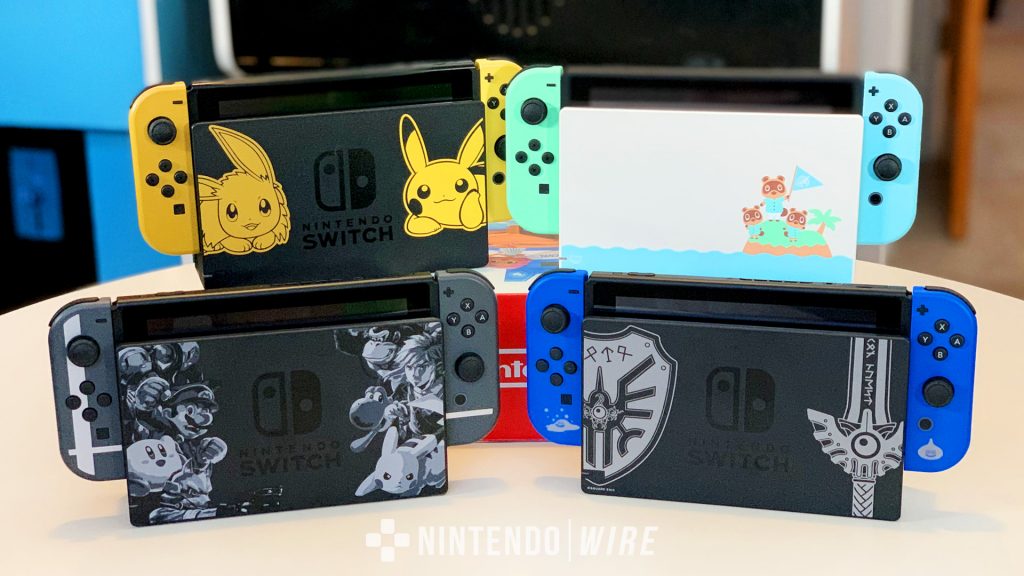
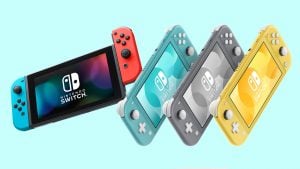
It’s that time of year, folks: New special edition Nintendo Switch consoles are being released, which means you might be looking to trade-in your basic console! If so, chances you’ll want to transfer your system data from one Switch to another. If that sounds like a daunting task – because, let’s face it, Nintendo sometimes makes things complicated – fear not! We’ll walk you through everything with our Nintendo Switch system transfer guide.
What you need to start a Nintendo Switch data transfer
Before we begin, one note: this entire process is only necessary if you’re wanting to change your “main” Nintendo Switch console. That is, only one Switch is allowed to have all features enabled at a time.
That said, there are a few basic requirements to start this process, highlighted below:
- Each Nintendo Switch console involved must be updated to firmware 4.0.0 (so, both your current console and new console).
- Your Nintendo Account must be connected to your current console, and it cannot be set up on the new Switch console yet.
- The new Switch needs to have sufficient storage for the User data to be transferred, which will include game downloads and saves.
- It’s unrealistic that a new Switch console would have more than seven users already, but to transfer Switch data you’ll need six users or less on the new console.
- Both the new and current Switch consoles need to be plugged into AC power and connected to the internet to complete the switch (sorry — pun intended).
Some notes about you and your Switch data
Transferring screenshots and recorded videos to a new Nintendo Switch system
While you can easily transfer your save data using the Switch’s built-in system transfer feature, screenshots and recorded videos won’t move to your new console with this process. If you want to transfer over your screenshots and recorded videos, you’ll need to do this manually. Do not place your same microSD card from your source system into the target system — the target system will erase the data on it!
If you want to move your Switch screenshots and videos over, follow these steps:
IF YOU WANT TO USE A DIFFERENT MICROSD CARD THAN THE ONE IN YOUR SOURCE SYSTEM: You’ll need to connect your microSD card to a PC. Make sure your Switch is turned off before removing the card, however. Once connected, copy the “Album” folder (inside the “Nintendo” folder) from the microSD card with the same path and extension name to your PC, move that to a fresh microSD card, and then place that in your “Target System.” If done properly, your screenshots and videos should be accessible on the new Switch.
IF YOU WANT TO USE THE SAME MICROSD CARD AS THE ONE IN YOUR SOURCE SYSTEM: All you need to do is pop in your microSD card to your target system once the transfer is complete. A prompt will appear asking you to delete the data. This will not delete your screenshots/videos. This will only delete things like downloadable games on your microSD card, which, of course, you can simply redownload from the eShop after you’ve completed the system transfer. After you’ve completed the microSD card data deletion process, you’ll find that all your existing screenshots and videos have survived.
Either way, we recommend backing up the contents of your microSD card to your computer. Better safe than sorry, right?
Some game save data won’t transfer
Sadly, Nintendo has made it impossible to transfer some game data via this method. As of now, the only game this applies to is Animal Crossing: New Horizons. To be clear: You cannot transfer your Animal Crossing: New Horizons save data to another Switch console. Nintendo has stated that it’s working on a solution for this, however, to be released in 2020.
Your play time data will reset
This is probably the biggest bummer about the transfer process. Play time data is tied to the console itself, not the user. And, technically, since we aren’t really transferring console data, the play time stays on the source console. That means when you boot up your target system, all your play time data for all your games will be reset — checking “Data Management” in your settings will confirm this sad fact. Those 350+ hours you spent on Super Smash Bros. Ultimate? All gone, unfortunately.
When you check your profile, though, it will look like all your play time data is retained. This is just an illusion, though: this play time data will not increase until you beat the record you had on your source system. So, for instance, if you had 350 hours of Super Smash Bros. Ultimate play time on your source system, you would have to play 350 hours more on your target system until the count will start increasing again.
Seems a bit silly, doesn’t it? Unfortunately, Nintendo hasn’t implemented a fix for this, and it isn’t certain the company ever will. However, if you aren’t concerned about your play time data, then this doesn’t affect you!
Completing the deed – moving your Switch data successfully
1. Source System
Starting out with the current Switch, you’ll first head over to “System Settings,” then “Users,” and then tap on “Transfer Your User Data.” You’ll then tap “Next” on the next two screens, and then you’ll choose “Source Console.”
2. Target System
![]()
Once these are done, you can slide on over to the new console. Make sure you’ve powered on the console once, made a placeholder user, and have signed in to your Nintendo Account. Essentially, you’ll be doing the same thing again, but instead of “Source Console,” you’ll select “Target Console.”
3. Source System
![]()
After the new console is ready, it will start looking for the Source Console. Once they find each other, you’ll see a “Transfer” option pop up. Tap that and then you’re off and running.
The transfer process will start and your data will begin moving through space. This can take a while, so grab some popcorn. Once everything is finished, you’ll see a message on the “Source Console” stating, “User information and save data for [user name] has been transferred.”
You can tap “End,” and everything should be good from there.
If you followed these steps everything should’ve worked out great and your games and save data should all have been successfully transferred! If we missed anything, please let us know in the comments below!
More Nintendo Switch guides
Looking for more help with your Switch? Check out our other guides!


Written by Caleb Mina
A father, photographer, and husband, Caleb still finds time to create content about his favorite company Nintendo. You can still catch him riding a Tauros to hatch Shiny Pokémon eggs.