

Whether you’re building an epic team to quest with in Miitopia, want to battle as your great aunt on Super Smash Bros. Ultimate, or simply want to tear up the track as Reggie on Mario Kart 8 Deluxe, you’ll need quality Miis. While the Switch’s Mii maker is the most robust yet in terms of creative options, it’s not very obvious how to go about getting your favorite pre-existing Miis onto your shiny new Nintendo hybrid. With the Nintendo 3DS and Wii U, it was a snap to get any Mii you wanted using QR codes, yet there’s still no way to import Miis onto the Switch using such means as of the time of this guide’s writing.
As it stands, there are only two methods to get pre-existing Miis onto your Switch, including a workaround that allows QR code Miis to be moved to the console using the help of an amiibo. Before we get started, however, you’ll need to know where the Mii maker is. This may be the most feature-rich Mii maker yet, but it’s oddly buried in the Switch’s System Settings.
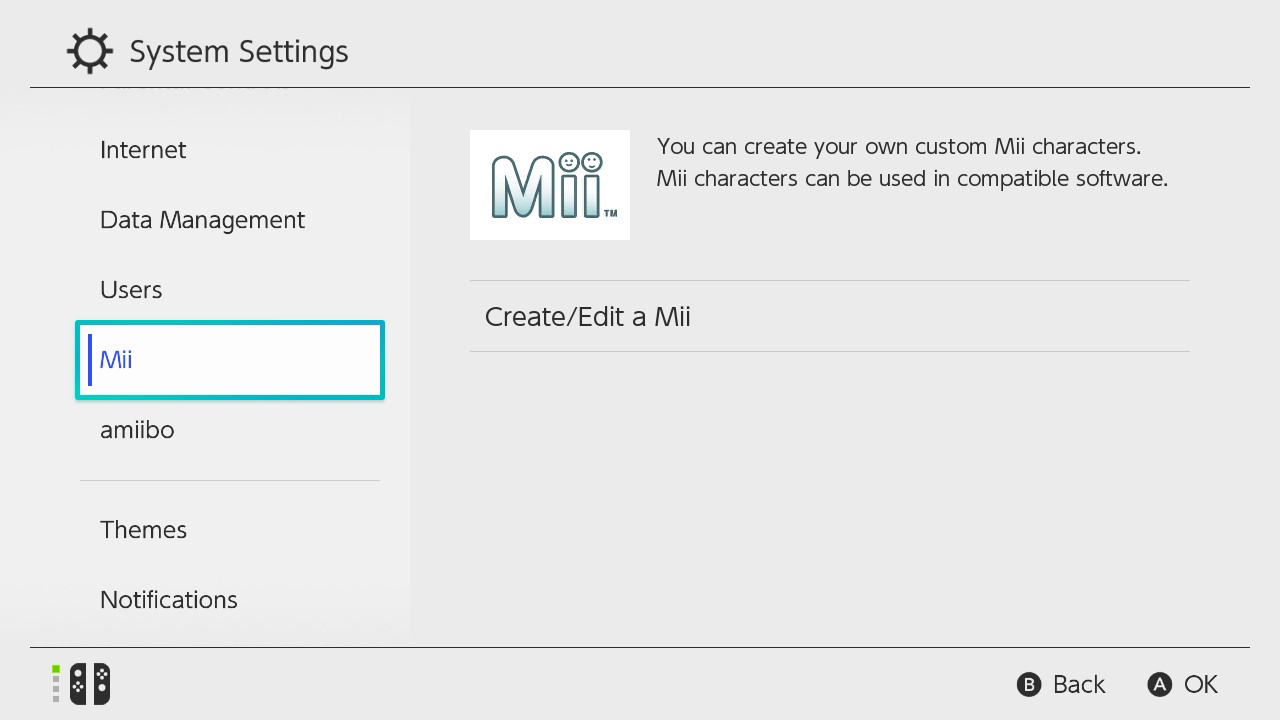
First, select the “Settings” icon from the bottom-right of the Switch’s home screen. Within the “Settings” app, scroll down the list on the left-hand side of the screen for a bit until you reach the “Mii” option, which is just below the “Users” option. Once the “Mii” option is highlighted, scroll to the right and select “Create/Edit a Mii”:
Now onto the fun part: Bringing over your Miis!
Directly sharing Miis
The first method is the most straightforward, but requires the use of a second Switch. This method is great for sharing Miis with your siblings and friends who live nearby.
From the Mii menu on both Switches, highlight the “Send/Receive” option, and then select “Search for Users to Connect With.”
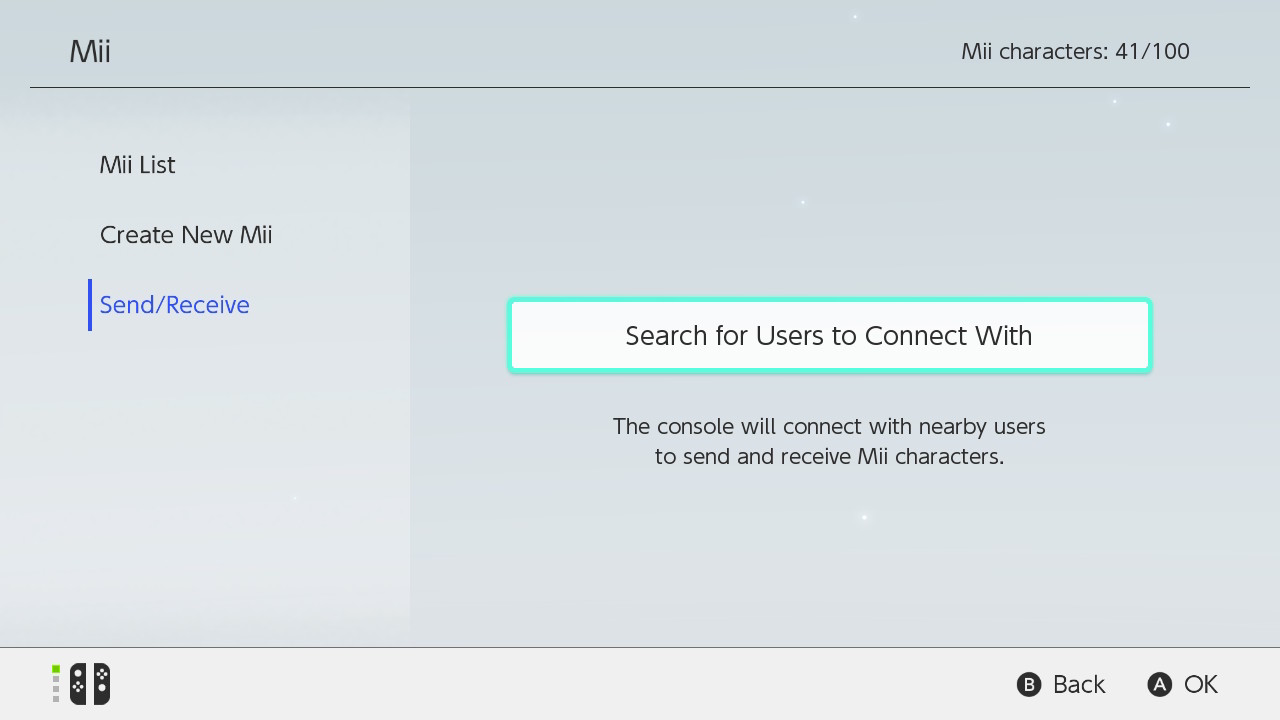
A new menu will appear showing all nearby Switches that have selected this option. From this menu, select the Switch you wish to connect with, and then do the same on the other Switch.
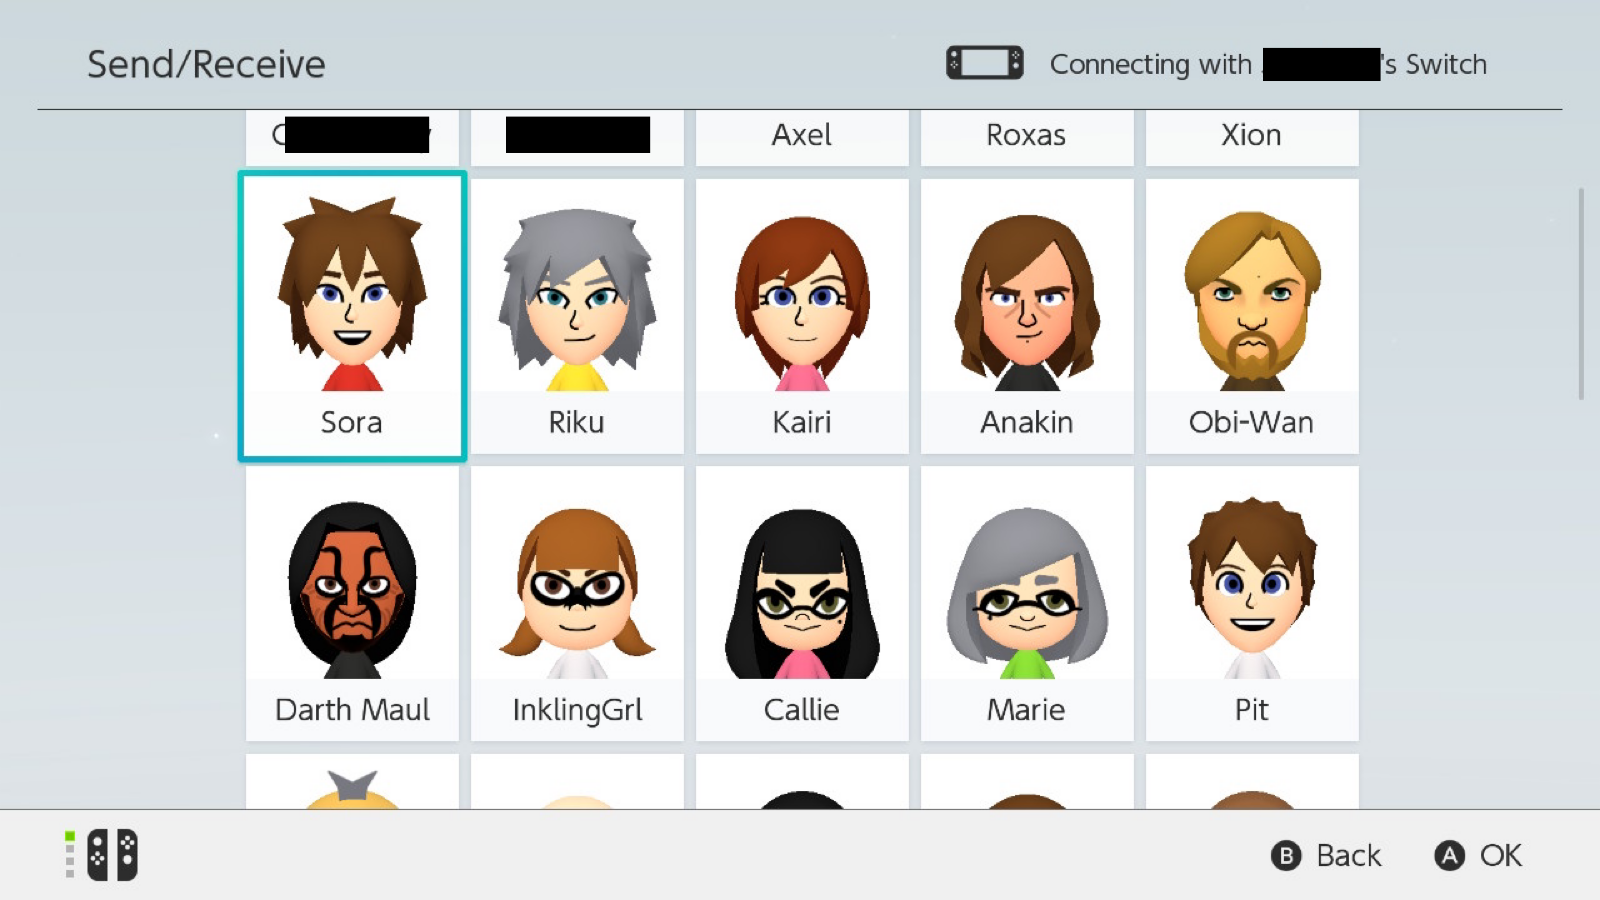
A menu will appear showcasing all the Miis you have saved on your Switch. From there, a simple tap of the “A” button will immediately send the highlighted Mii to the other user’s Switch!
You can send as many Miis to each other as you’d like, so long as neither player has reached the 100 Mii limit.
Transferring Miis using amiibo
The amiibo method is a bit more involved, but allows you to save Miis you’ve received from QR codes on 3DS and WiiU onto an amiibo and import them to your Switch! This method also works with transferring Miis between Switch units if the previous method of locally transferring Miis isn’t an option for you. Before we dig into this method, it’s important to remember that the NFC Reader/Writer accessory, a New Nintendo 3DS, or a Nintendo 2DS XL is required to transfer Miis from 3DS using an amiibo. Regular Nintendo 3DS, Nintendo 3DS XL, and Nintendo 2DS models do not have built-in amiibo support, so they’ll need the aforementioned NFC Reader/Writer accessory.
With that bit of info out of the way, it’s time to grab your favorite amiibo and bring your Miis home!
Transferring Miis from Nintendo 3DS using amiibo
From the 3DS home screen, select the “Home Menu Settings” icon located in the top-left-hand corner of the touch-screen. Within the settings menu that pops up, scroll nearly to the bottom where the “amiibo Settings” option is located and select it.
![]()
Once you’ve loaded into the amiibo Settings app, select “Register Owner and Nickname” and follow the on-screen prompts until you reach the screen in the image below. This screen will be the same regardless of whether the amiibo is new or has been registered by a user before.
![]()
On this screen, select the “Change” option in the “Owner” section, and select the Mii you would like to bring over to the Switch. Once you’ve confirmed your Mii selection, press the “Save” button in the bottom right-hand corner of the touch screen and once again follow the on-screen prompts.
Now return to your Switch and open the Mii settings. From there, highlight the “Create New Mii” option on the left side of the screen, and then select the “Copy Mii from amiibo” option that will appear on the right.
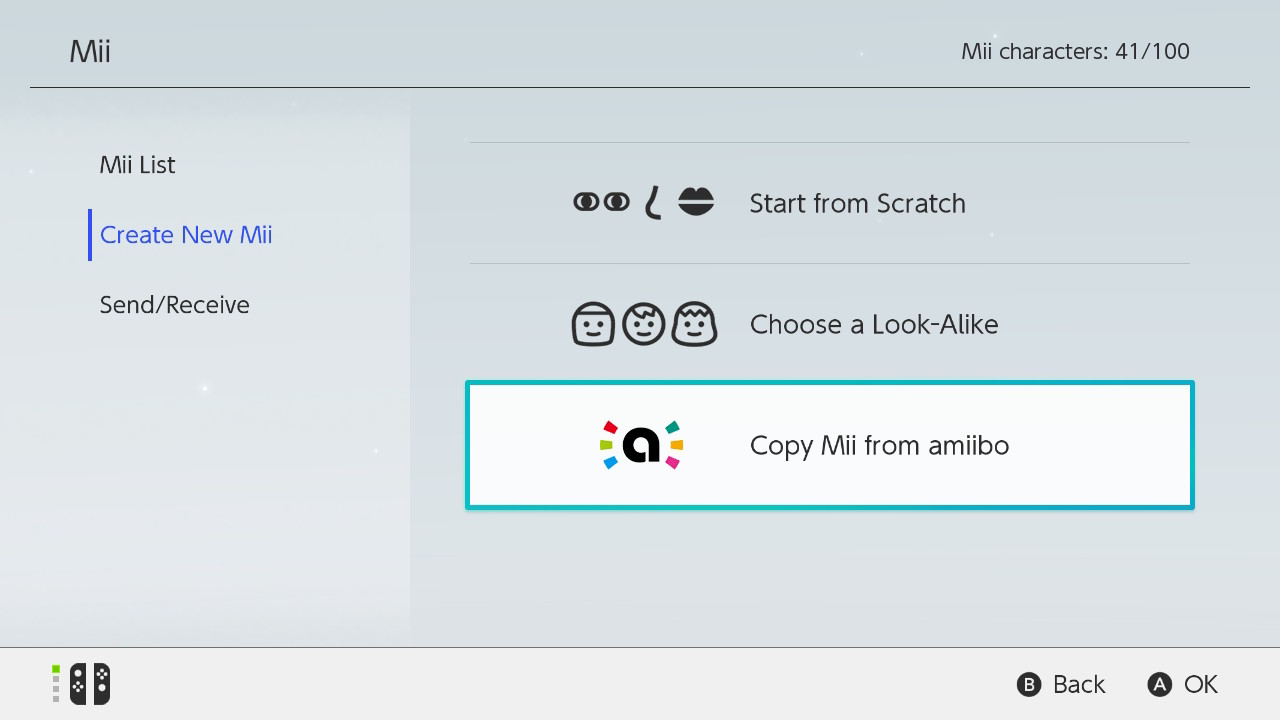
Follow the on-screen prompts using the amiibo you’ve saved your chosen Mii to and voila! You’ve officially imported your favorite Mii onto your Switch! To bring more Miis over, simply repeat the process from the beginning.
Transferring Miis from Wii U using amiibo
The process of moving Miis from WiiU and Switch is nearly identical to that of the 3DS, with the only difference being where the amiibo management app is located. On both the Wii U and Switch, the app is accessible via the console’s system settings.
Head to the “amiibo Settings” option within the options menu, then select “Register Owner and Nickname” and follow the on-screen prompts. This screen will be the same regardless of whether the amiibo is new or has been registered by a user before.
![]()
On this screen, select the “Change” option in the “Owner” section, and select the Mii you would like to bring over to the Switch. Once you’ve confirmed your Mii selection, press the “Save” button in the bottom right-hand corner of the touch screen and once again follow the on-screen prompts.
Now return to your Switch and open the Mii settings. From there, highlight the “Create New Mii” option on the left side of the screen, and then select the “Copy Mii from amiibo” option that will appear on the right.
Follow the on-screen prompts and you’re done! Easy peasy!
Things to remember
There is one caveat to the amiibo method that’s important to remember: Special Miis cannot be set as the owner of an amiibo, and thus are trapped on the previous generation of Nintendo’s hardware. That includes special distribution Miis, such as Reggie’s official Mii. Thankfully, there are plenty of Mii QR code databases online such as HeyImHeroic’s extensive Mii Library, which is working toward cataloging every official Nintendo Mii and sharing them via QR codes. This includes Switch-exclusive Miis such as Nina from Super Mario Maker 2 and Aerith from the Final Fantasy VII DLC for Smash Bros. Ultimate.
Transferring Miis from your Wii
Yes, you can even transfer your age-old Wii Miis over to your Nintendo Switch, although the process is a bit long — and requires you following the steps for transferring via amiibo from your Nintendo 3DS or Wii U to ultimately get them on your Nintendo Switch. Transferring Miis from your Wii to your Nintendo Switch is a two-part process. First you need to transfer them from your Wii to your Nintendo 3DS or Wii U, and then you’ll need to transfer them from your Nintendo 3DS or Wii U to your Switch.
Transferring Miis from Wii to Nintendo Switch: The Nintendo 3DS method
Step 1: Turn on your Wii console and go to the “Mii” channel.
Step 2: Turn on your 3DS and open the “Mii Maker” app.
Step 3: On your 3DS, select the “Send/Receive” option and then select “Mii Channel (Wii).”
Step 4: On your Wii, select “Connect to DS” on the right side of the screen. The two should automatically sync. If they don’t, press the “A,” “B,” and “1” buttons on your Wii remote (in that order), then press and hold the “2” button.
Step 5: Once your Wii and Nintendo 3DS are connected, press and hold the “A” and “B” buttons, pick up each desired Mii and drag it to the empty box at the top of the screen.
Step 6: Hit “OK” to initiate the transfer.
After that, you’ll need to follow the steps above for transferring your Mii from your 3DS to your Switch using an amiibo!
Transferring Miis from Wii to Nintendo Switch: The Wii U method
There are some things to remember before transferring Miis from your Wii to Wii U. First, if you did not do a system transfer from your original Wii to your Wii U, you’ll need to do that. There is no way to get your Miis off your Wii if it hasn’t been system transferred to your Wii U. However, if you never had an original Wii system and instead just made Miis in Wii mode on your Wii U, or if you’ve already done a system transfer, you should be good to go.
Step 1: From the Wii U Menu, select “Mii Maker.”
Step 2: Using the Wii U GamePad, tap “Send/Receive Mii.”
Step 3: Select “Copy from Wii Menu.”
Step 4: Follow the on-screen instructions to complete the process. Note that you must copy all Mii characters from Wii mode at once, and you cannot select them individually!
After that, you’ll need to follow the steps above for transferring your Mii from your Wii U to your Switch using an amiibo!
Time to play!
If you’ve followed this guide and have successfully transferred over a Mii, then congratulations! You can now play as your favorite Miis in games like Super Smash Bros Ultimate, Mario Kart 8 Deluxe, Miitopia, Mario Golf: Super Rush, and any other game that supports Nintendo‘s avatars!
More Nintendo Switch guides
Looking for more help with your Switch? Check out our other guides!


Written by Marcus Ramirez
A writer and dreamer who loves all things tropical, bright, colorful, and shiny. Marcus is obsessed with Kingdom Hearts and patiently awaits its triumphant return to Nintendo hardware. He has a (totally real) court order that requires him to always have a 3DS or Switch on his person when leaving the house for more than a few hours.