

Super Mario 3D World + Bowser’s Fury may have one of the biggest bad guys Mario has ever faced off with thanks to Fury Bowser, but he’s not the only boss you’ll square up against. Read on to learn about the encounters from the Wii U original and how to come out on top as you explore the Sprixie Kingdom.
As a note, this guide will include the final boss of Super Mario 3D World, as well. It’s definitely worth encountering on your own first, so if you care about spoilers, consider yourself warned.
Bowser

Mario’s arch enemy is also 3D World’s very first boss fight. At the end of World 1 will be Bowser’s Highway Showdown. You’ll find yourself running towards the Koopa King as he stands atop his swagwagon (aka, his sweet car). He’ll occasionally toss soccer ball shaped bombs at you, which can be kicked back to damage him. This is the only way to hurt him, so don’t try and run up on the car (called the Koopa Chase) itself. Hit Bowser enough times and he’ll start to spit fireballs as well, leaving flames on the road that can damage you. Just keep an eye out for the bombs, and he’ll be done in no time.
You’ll encounter Bowser and his ride once more at World Castle. The strategy is the same in this fight, but he’ll be spitting fire much more often and tossing bombs less. Avoid the flame spots and be patient!
Boom Boom
One of Bowser’s top lackeys, Boom Boom is back and ready to spin-punch Mario once again. You’ll fight him at the end of World 2 and World 6, as the boss of their tank stages. He’ll have different tricks each time, but can be dispatched with a few jumps on the head. Three hits will do in all of Boom Boom’s fights.
His pattern involves spinning in place to try and land some punches before tucking into his shell and trying to mow you down. He’s only vulnerable when his head is out, so if he’s withdrawn into his shell just focus on avoiding. Fighting him during World 2, Boom Boom will turn invisible as the fight goes on to make hitting and dodging harder. In World 6, he’ll instead make duplicates of his shell to clutter the battlefield.
You’ll also fight against Cat Boom Boom during Bowser’s Fury at Clawswipe Colosseum. He’ll use the above mentioned tactics during those fights as well. Focus on getting the requisite three head stomps in and you’ll be fine.
Pom Pom
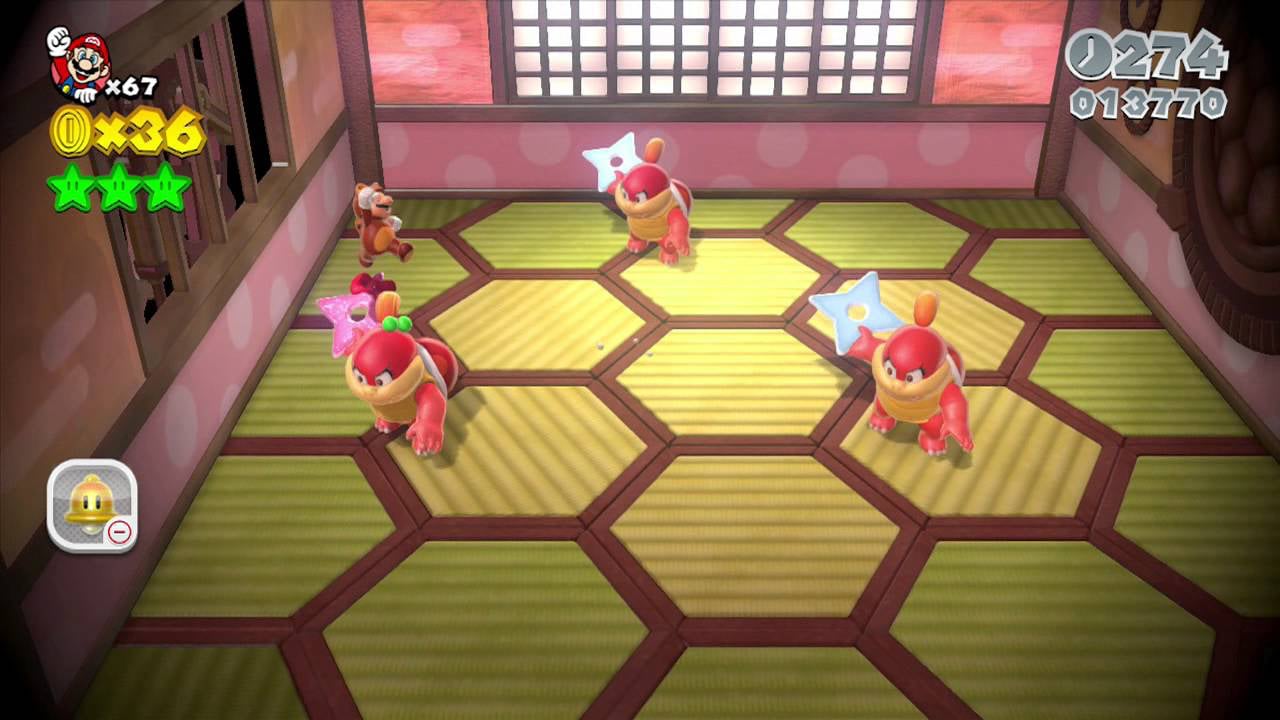
Returning from 3D Land and endearing herself further is Pom Pom! She’s traded her boomerang for a shuriken, and fittingly is working some other ninja trickery into her fights. You’ll run into her first during World 3, with a rematch later in the game during World Bowser. Both of these are found at the end of their train based stages.
Pom Pom’s pattern is pretty simple: she’ll vanish before creating shadow clones of herself, which will attack together. You can only damage the real Pom Pom, who can be identified a few ways. She’s the only one that will hold her pink shuriken, her smoke cloud has pink sparkles mixed in, and Pom Pom will be the only one with her hairbow. Keep an eye on these tells and you can safely jump on the real deal before she can even attack!
Like Boom Boom, she can also be found in Bowser’s Fury at Clawswipe Colosseum. The main difference across each of her fights is the amount of clones she generates, and how quickly she moves. It’s also worth noting that things can get a little crowded if you’re playing multiplayer against all these doppelgangers in 3D World, but that makes stopping her clone based offense easier too.
Hisstocrat
This regal reptilian is the first of our bosses that was new to Super Mario 3D World. Hisstocrat is quite large, meaning you’ll only ever be dealing with his head. He won’t be fighting alone, though, as many more snakes will pop up to both help and hinder during this faceoff. He’ll be your final challenge in World 3.
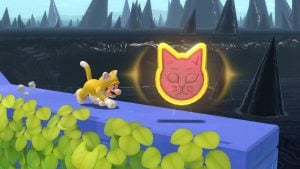
The Super Bell is your key to victory here. If you aren’t already Cat-powered, don’t worry. Sometimes the snakes that assist Hisstocrat will pop up at jumping height with Super Bells for you to power up with. Once you’re suitably cute, climb up the taller snakes with plates on their noses so you can dive attack Hisstocrat’s head right on the big X mark.
Just be aware that you’ll want to keep an eye on the plate platforms these snakes bring. If it’s in tact, you’re good to stand on it indefinitely. If there are cracks, it will eventually break and you’ll both take a hit and lose your footing. Between the snake portions (always signaled by a distinct snake charmer sound effect), dodge the raining boulders and you’ll be through this one in no time.
When you face off with Hisstocrat during World Bowser, they’ll be looking a little different but the fight will be more or less the same. The pink version is fond of fireballs instead of boulders, so avoid their flame attacks and the leftover embers they leave behind. The same strategy of climbing up snakes and pouncing her head with the Cat suit will serve you well.
Boss Brolder
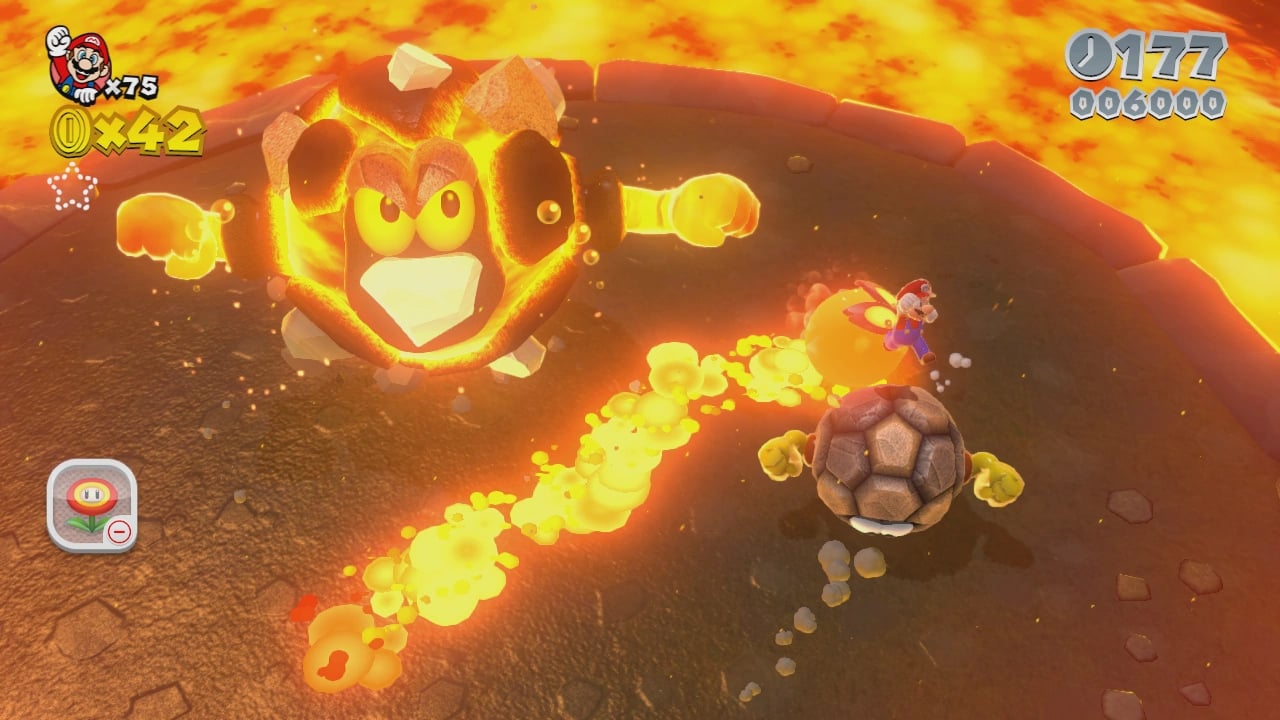
Mario’s no stranger to sediment, but this boulder of a boss isn’t fighting alone. Good thing, though, as its habit of summoning smaller Brolders is its downfall. When you encounter Boss Brolder in World 4, do your best to avoid his attacks and the rolling minions at his disposal. When you’re able to, strike a smaller Brolder and then throw it at the Boss. This is the only way to damage him, and after three hits you’ll be in the clear. The same techniques will get you through his rematch in World Castle, though this time even more fiery obstacles will be present.
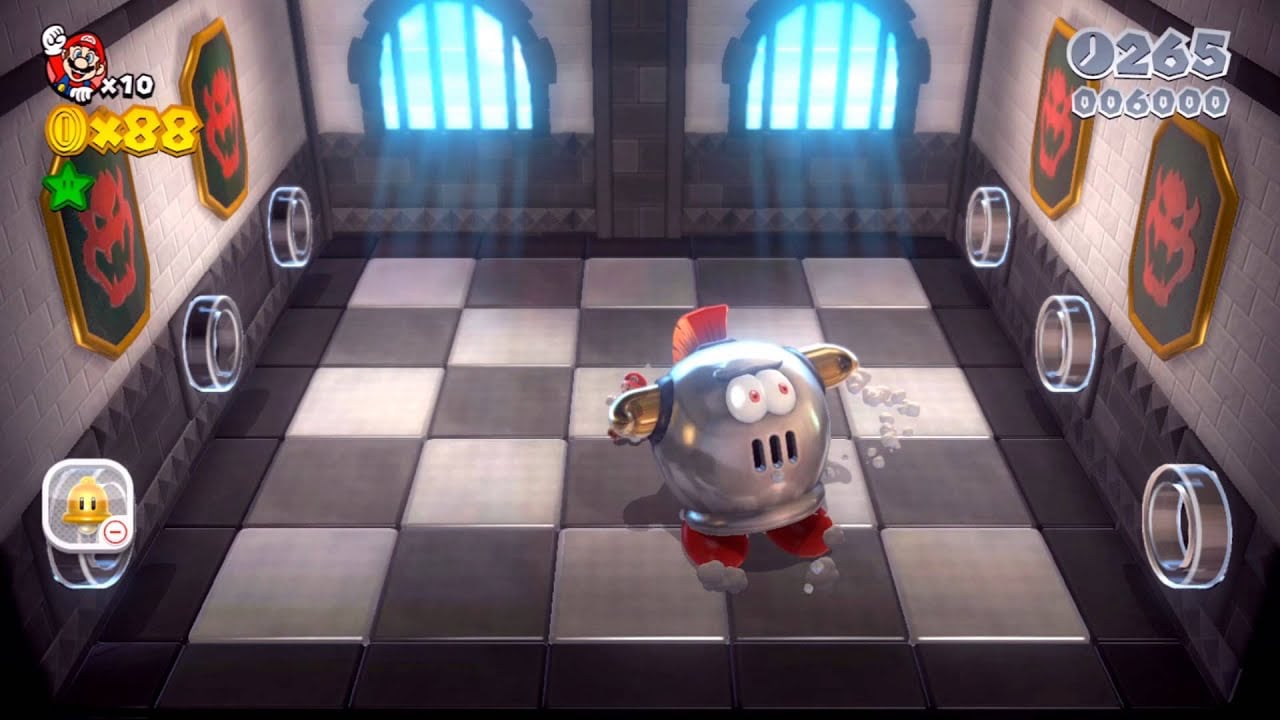
King Ka-thunk
One of the more uniquely designed of all 3D World’s bosses, King Ka-thunk can be found at the end of World 5. That interesting look is offset by the simplicity of the fight, as all you have to do is avoid his movements. Every time the King moves to a new portion of the battlefield, where he and his frame will fall will be lit up clearly. Make sure you’re standing in a spot that isn’t lit up, and you’ll avoid getting hit. Once he’s face down thanks to his slam attacks, ground pound his exposed backside.
As the fight goes on, the amount of times he repositions before a slam will increase, as will his movement speed. The real danger though is that sections of the battlefield will crumble away. Think about how to bait King Ka-thunk to move towards you so his weak spot is vulnerable and winning is as easy as 1, 2, 3.
Prince Bully
Unlike the other bosses in the game, Prince Bully appears as an enemy encounter on the World Map instead of at the end of a course. You’ll first cross paths in World 6, with a repeat showing during World Castle.
In the first face off, he’s one of the easier bosses in the game. Like all other Bully type enemies, hitting him will make him stumble and keep him from acting. Keep the offense going, and he won’t be able to act. If he does get a chance, avoid the fireballs he spits. You can fight fire with fire for a good strategy, tossing your own fireballs to push him towards the Clear Pipes along the room’s edges.
Knocking the Prince into one of these pipes will send him through and spit him out at another spot. Once he’s in this more cylindrical shape, kick the can and you’ll be one step closer to a Green Star. It takes three hits to finish him off in both fights. The second time around, he’ll have more frequent and tricky fire attacks to dodge, so stay on your toes and watch out for those.
Motley Bossblob
Fought at the end of World 6 and then later in World Bowser, Motley Bossblob makes quite the impression with his jester-like appearance and blob-based trickery. When he’s absorbed all the blobs and is in his giant, liquid metal clown form you won’t be able to harm the boss. After a few leaping attacks, though, they’ll break into many smaller blobs and the small, true body of the jester.
The goal at this point is to attack the jester itself, but jumping on the individual blobs will pop them and keep the clown from reforming to its full size. The more you bop, the smaller Motley Bossblob will be when it does assimilate. You can wipe them out even quicker by grabbing the Double Cherries that appear during these parts of the fight. All you have to look out for are the clown’s jumps, and misaligning your own when you get your chance to strike. During the rematch, he’ll also have shockwaves added during the clown portion of the fight, so be sure to jump over those as well.
Boss Blitz – World Flower-12
Each listing above mentions when you’ll fight these bosses both initially and any rematches. However, there’s a special stage in World Flower that puts you up against five of them in a row! This Boss Blitz is unique in that you’re able to choose the order of the fights based on which Warp Box you enter. These are, from left to right:
- King Ka-thunk
- Pom Pom
- Both Hisstocrats at once
- Boss Brolder
- Boom Boom
Clearing these will give you key coins to unlock the last box, which will lead to the final face-off with Motley Bossblob. The same strategies will all still work, but look out for some of their rematch specific techniques. The Hisstocrats in particular are unique in that they fight in tandem, but the same plan will get you through this gauntlet.
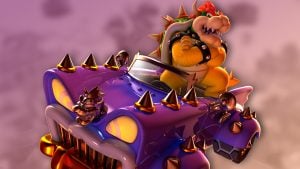
Final Boss: Meowser
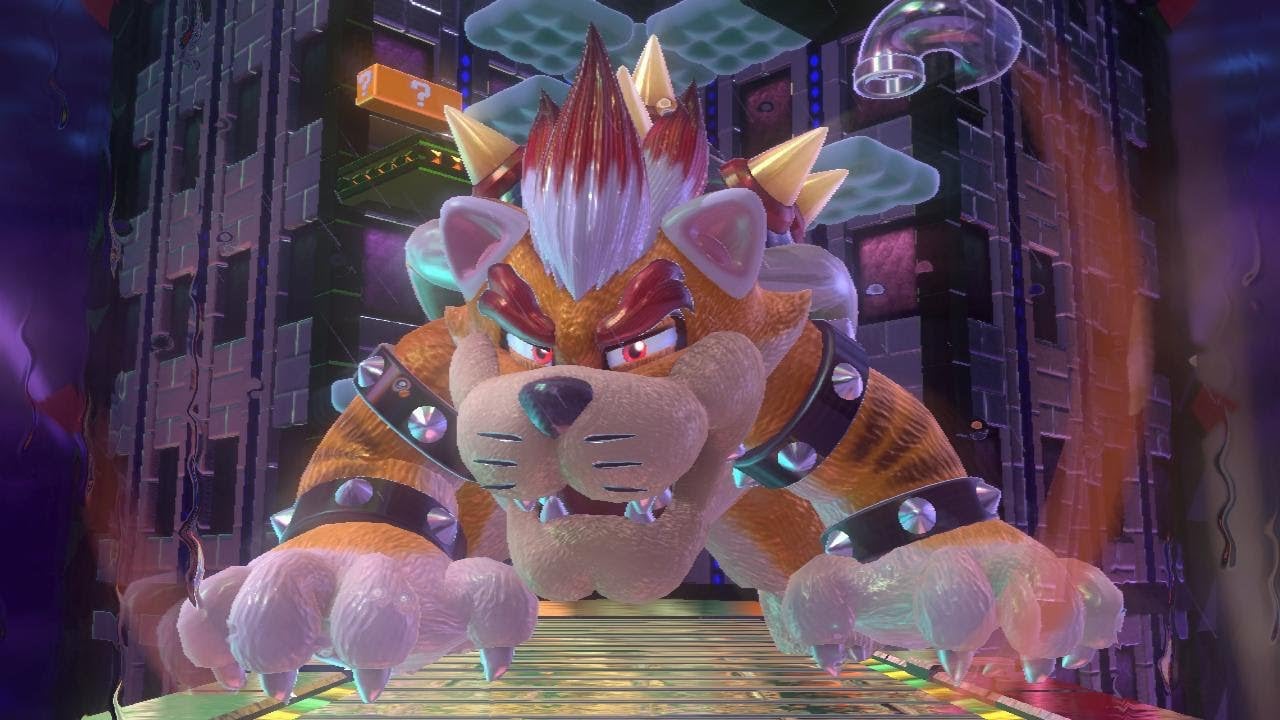
The game’s grand finale has you face off with Bowser once again, in the World Bowser stage The Great Tower of Bowser Land. This time he’s ditched the car and grabbed something else – a Super Bell! Yes, Bowser will be using your Power-Ups against you, becoming the unique and actually kinda cute foe known as Meowser.
This fight is less a direct confrontation and more a platforming based chase, though you will have to avoid plenty of claw swipes and tail thwaks as you climb the tower. Just like when you use the Super Bell, Meowser will slide down the walls periodically and can both hit you and make the cloud platforms disappear. Try and keep pace with the tower’s scrolling during the first portion of the fight to avoid any surprise collisions.
If you’ve taken a hit or two, don’t worry. There are multiple Super Bells you can potentially collect during the fight inside blocks. You’ll also come across a Green Star Ring, letting you grab one of this stage’s three Green Stars if you can grab all eight Green Star Coins.
Midway up, Meowser will perch atop a POW Block. Avoid the streams of fire breath he leaves along the ground, and then strike the Block to clear the way to the next portion of the fight. Grab the extra time clock and then hop into the Clear Pipe for another surprise…
That’s right, Bowser’s got Double Cherries too! Now multiple Meowsers will be popping up and out of the tower itself. At this point you’ll want to keep an eye out for any signs he’ll crack through the walls and try and hit you, and keep making your way to the top. Once you’re at the end, you’ll see the true Meowser as landed on a massive POW Block. Hit it repeatedly, then sit back and enjoy the ending of Super Mario 3D World!
More Super Mario 3D World + Bowser’s Fury guides
Looking for more help with Super Mario 3D World + Bowser’s Fury? Check out our other guides!


Written by Ricky Berg
When he isn’t writing for Nintendo Wire, Ricky’s anticipating the next Kirby, Fire Emblem, or if the stars ever align, Mother 3 to be released. Till then he’ll have the warm comfort of Super Smash Bros. to keep him going.