

Before I discovered a love of games, my go-to means of entertainment were Lego. Building sets and thinking up original ideas for these colorful bricks were cornerstones of my childhood, and something I’ve kept a fondness for even as I’ve grown. Seeing the Super Mario line of sets grow has been a treat, but it was the big yellow cube that really caught my eye.
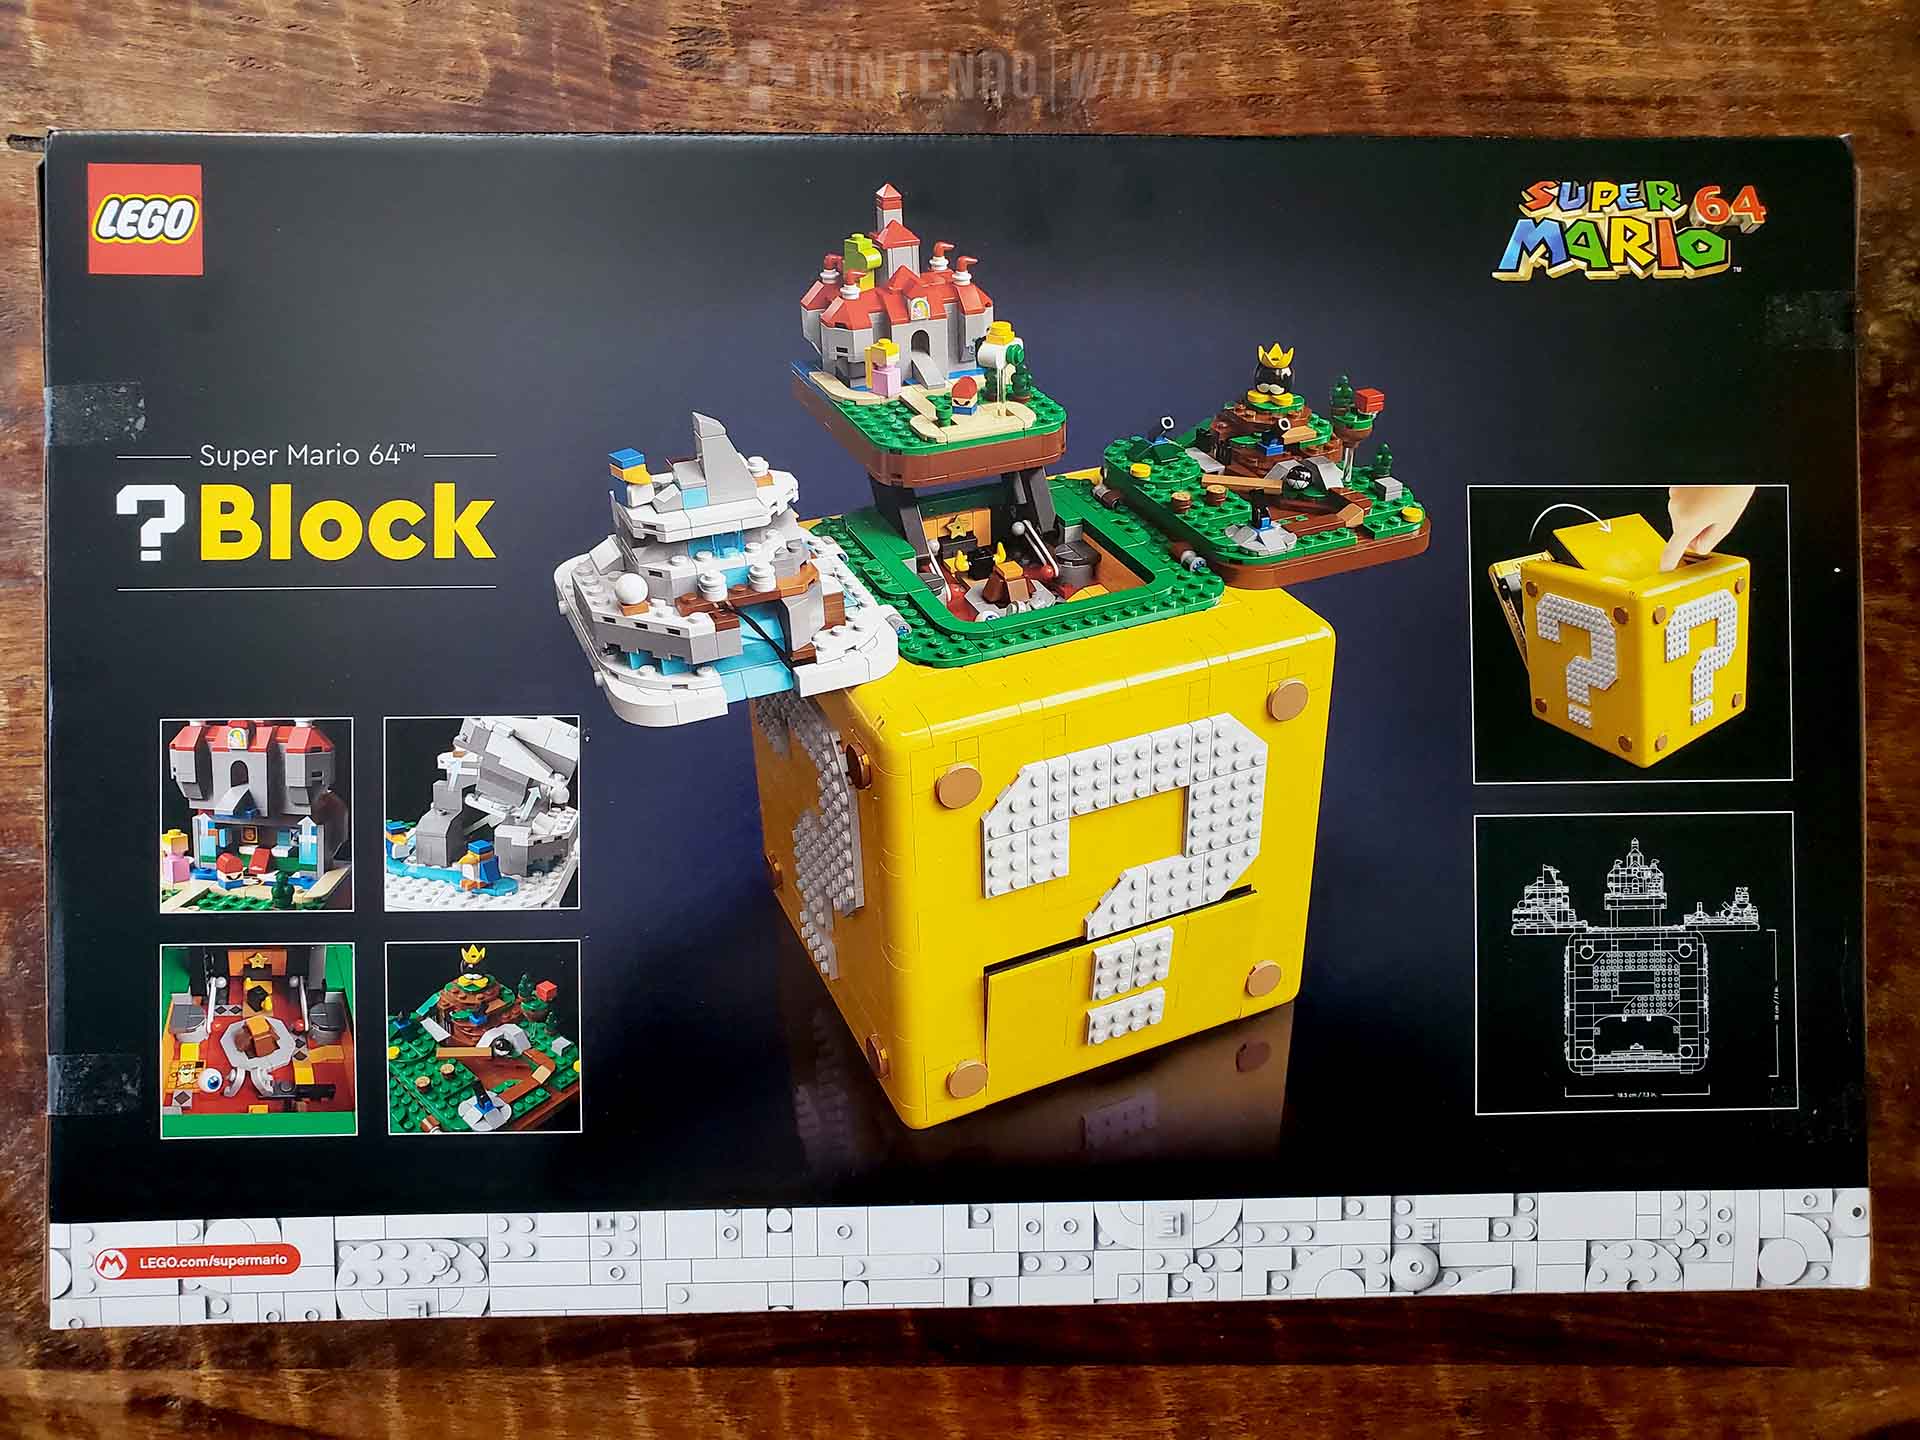
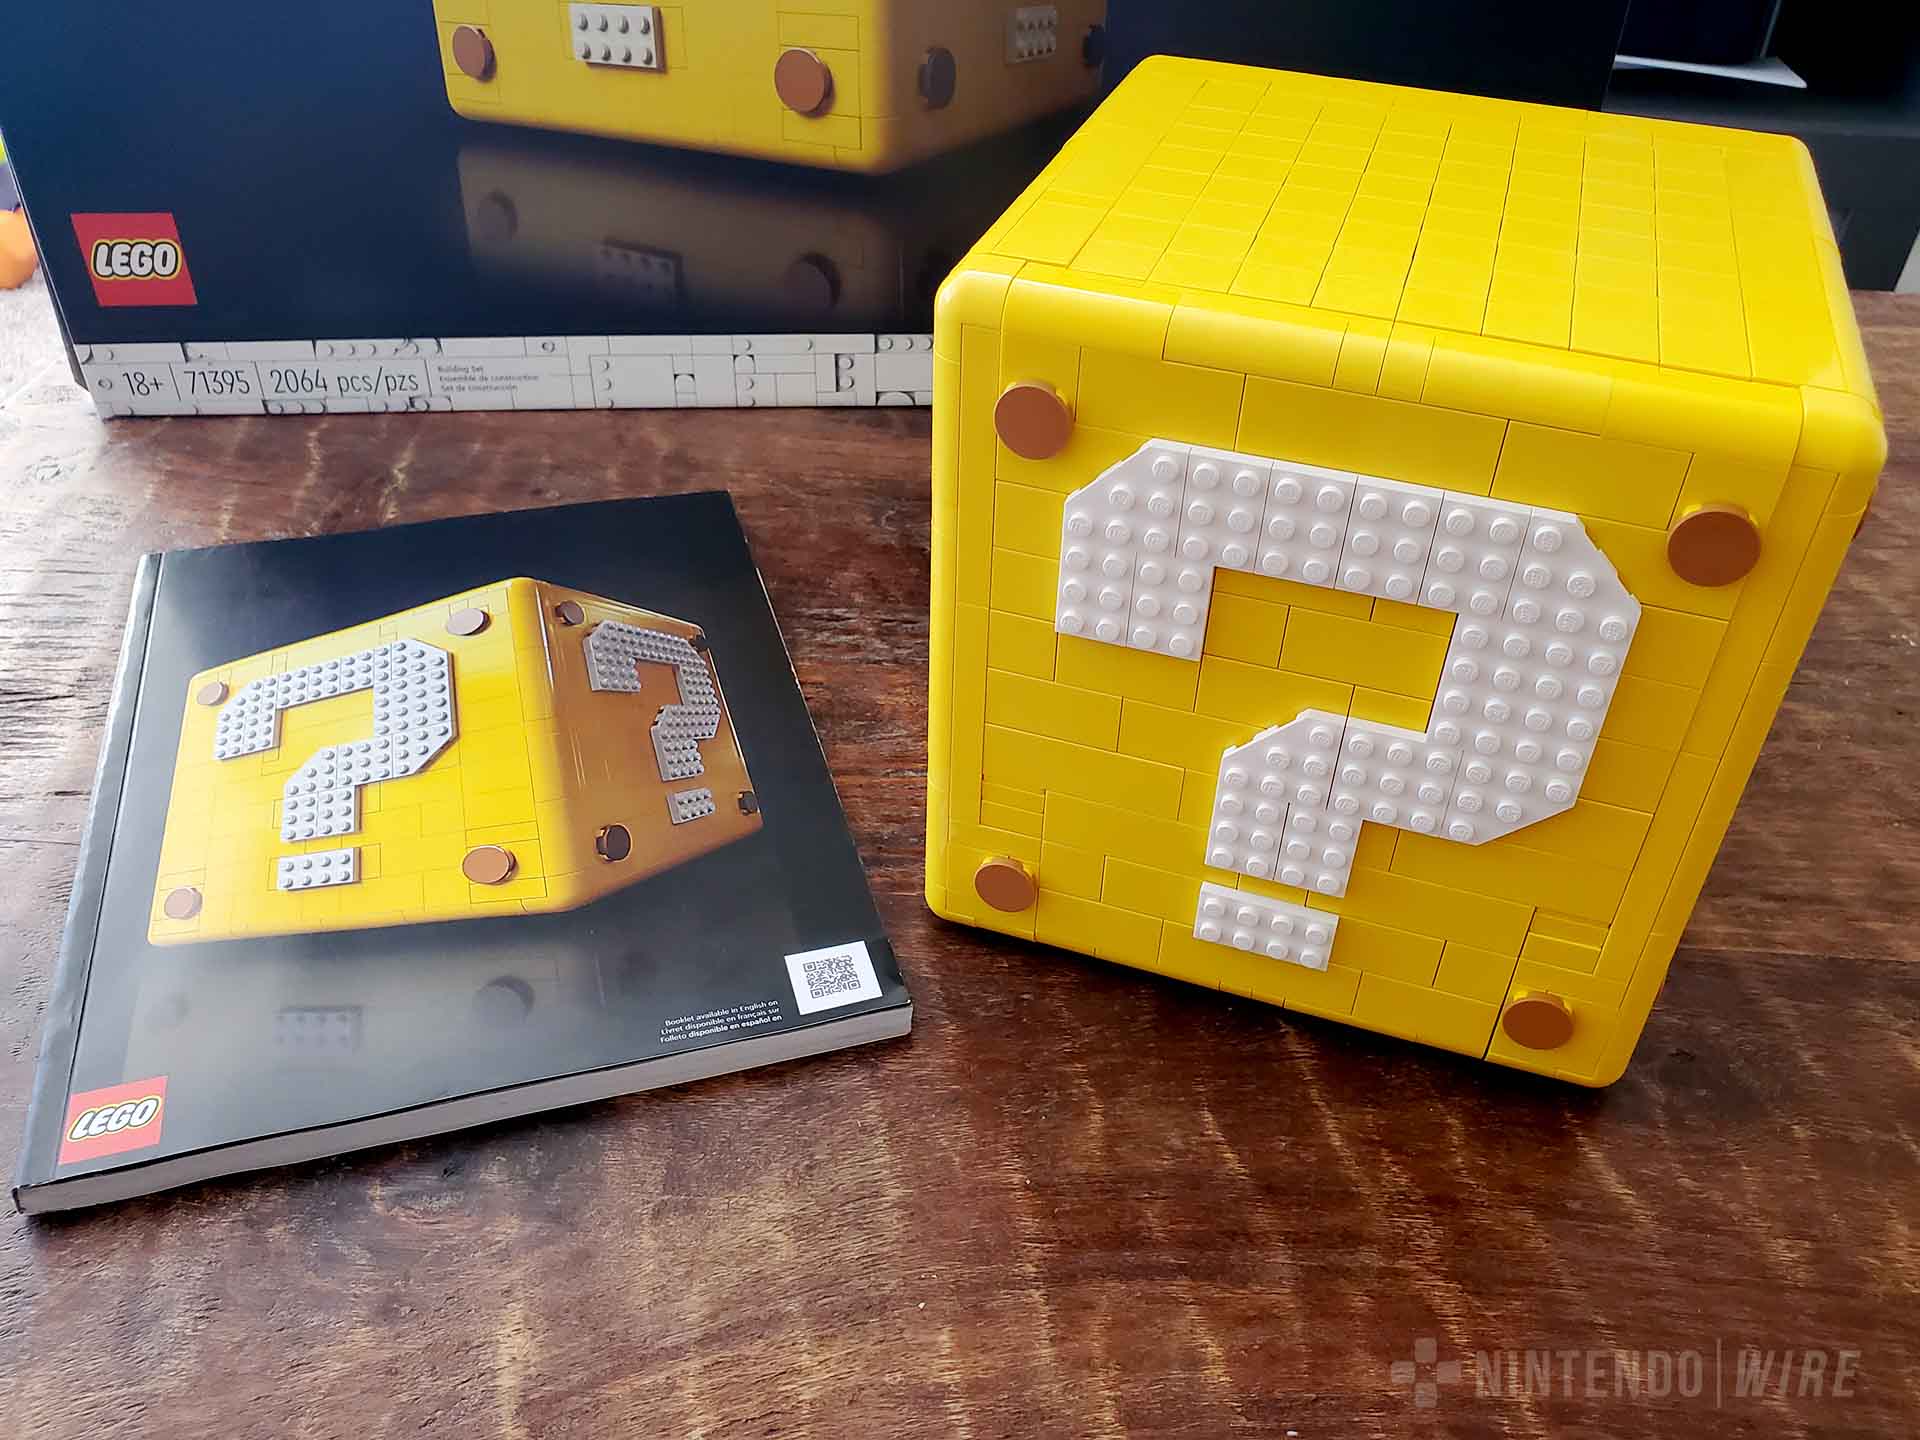
The recently released Lego Super Mario 64 Question Mark Block has an intriguing idea behind it, that being to take a familiar Mario element and use that as a means to celebrate one of the greatest and most beloved games of all-time. Now that I’ve had the chance to take this set on and piece together some thoughts, I can comfortably say that it definitely succeeds as a tribute. The real question, then, is this: does it succeed as a build?
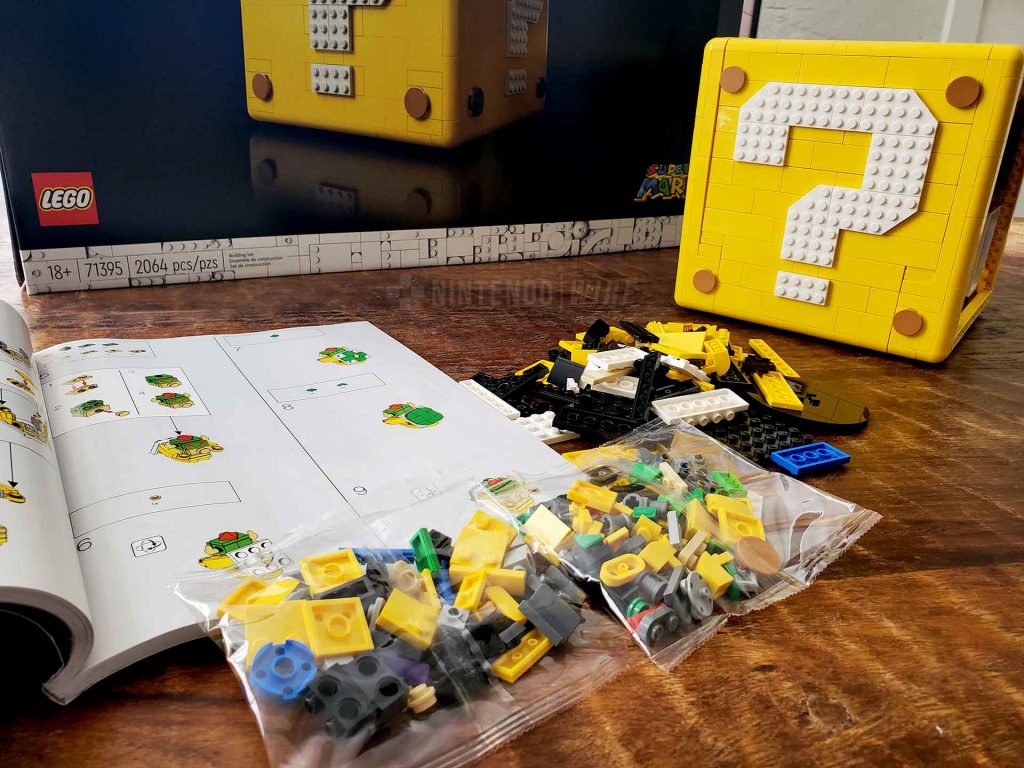
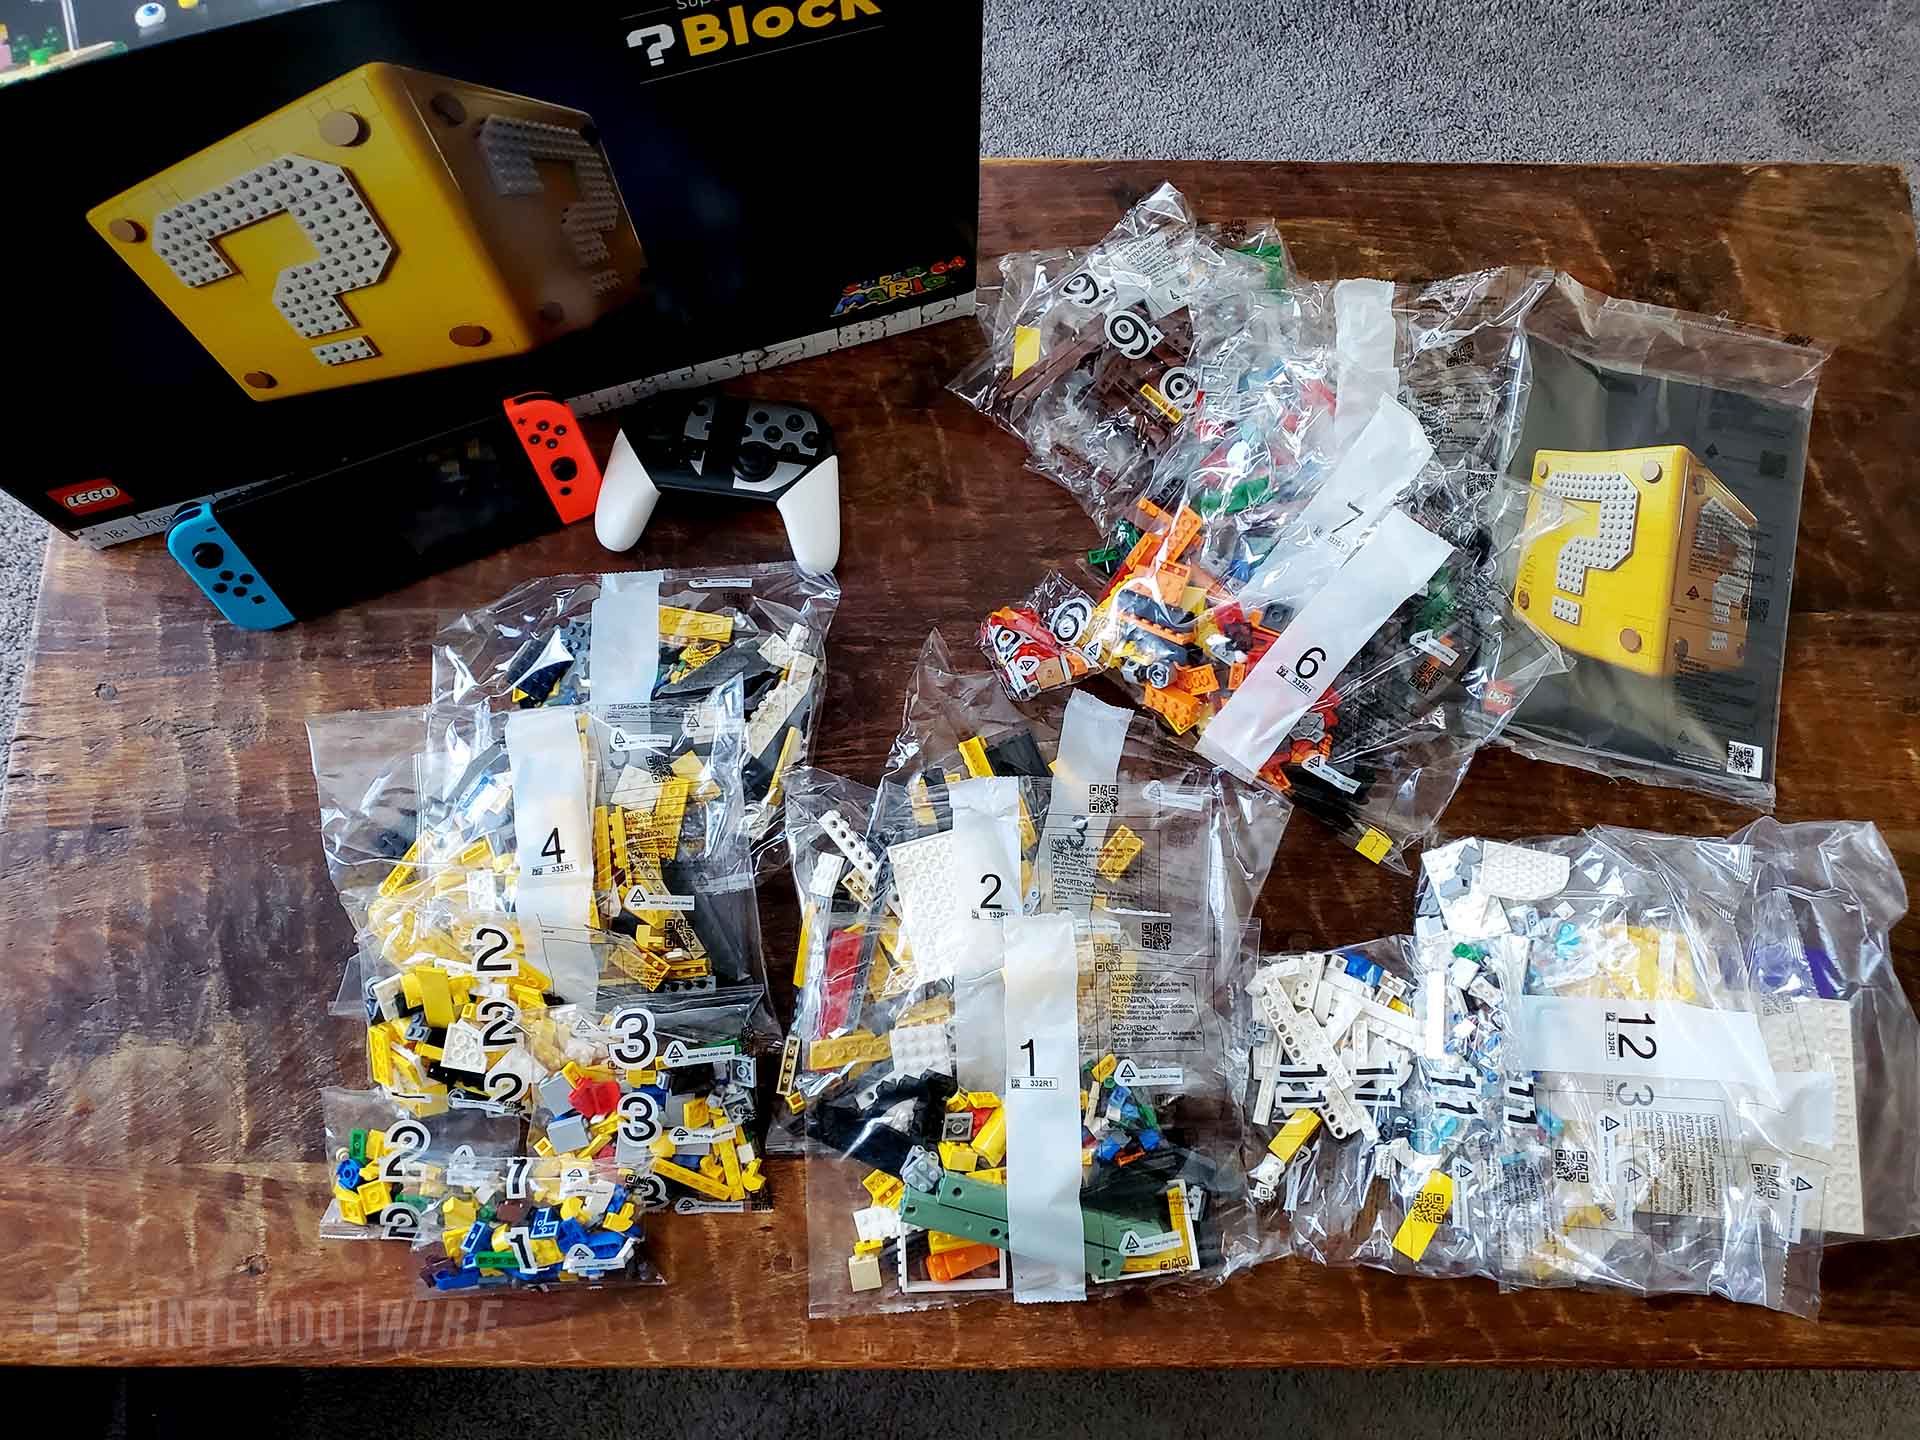
Opening the box, I was greeted by nearly two dozen bags of bricks (some numbers repeat, or have smaller bags inside) and one of the thickest set of instructions I’ve dealt with. Scanning those bags in order, it seemed pretty clear where the “worlds” were, and there were an abundance of yellow plates throughout. After reading through the booklet’s introduction — including some history and facts about Mario 64 as well as insight from the set’s designers — I opened up the first of those bags and got to work.

Things began with the block’s foundation. It may not have been the flashiest part of the experience, but I couldn’t help but get sucked back in by the double dose of nostalgia. Anytime I came across studs facing a reverse angle or pieces that looked like they’d lead to some kind of movement or unique feature, I caught myself wondering what would come next. We’ll call this the honeymoon stage of the build — but where things got interesting was in the next couple of bags.
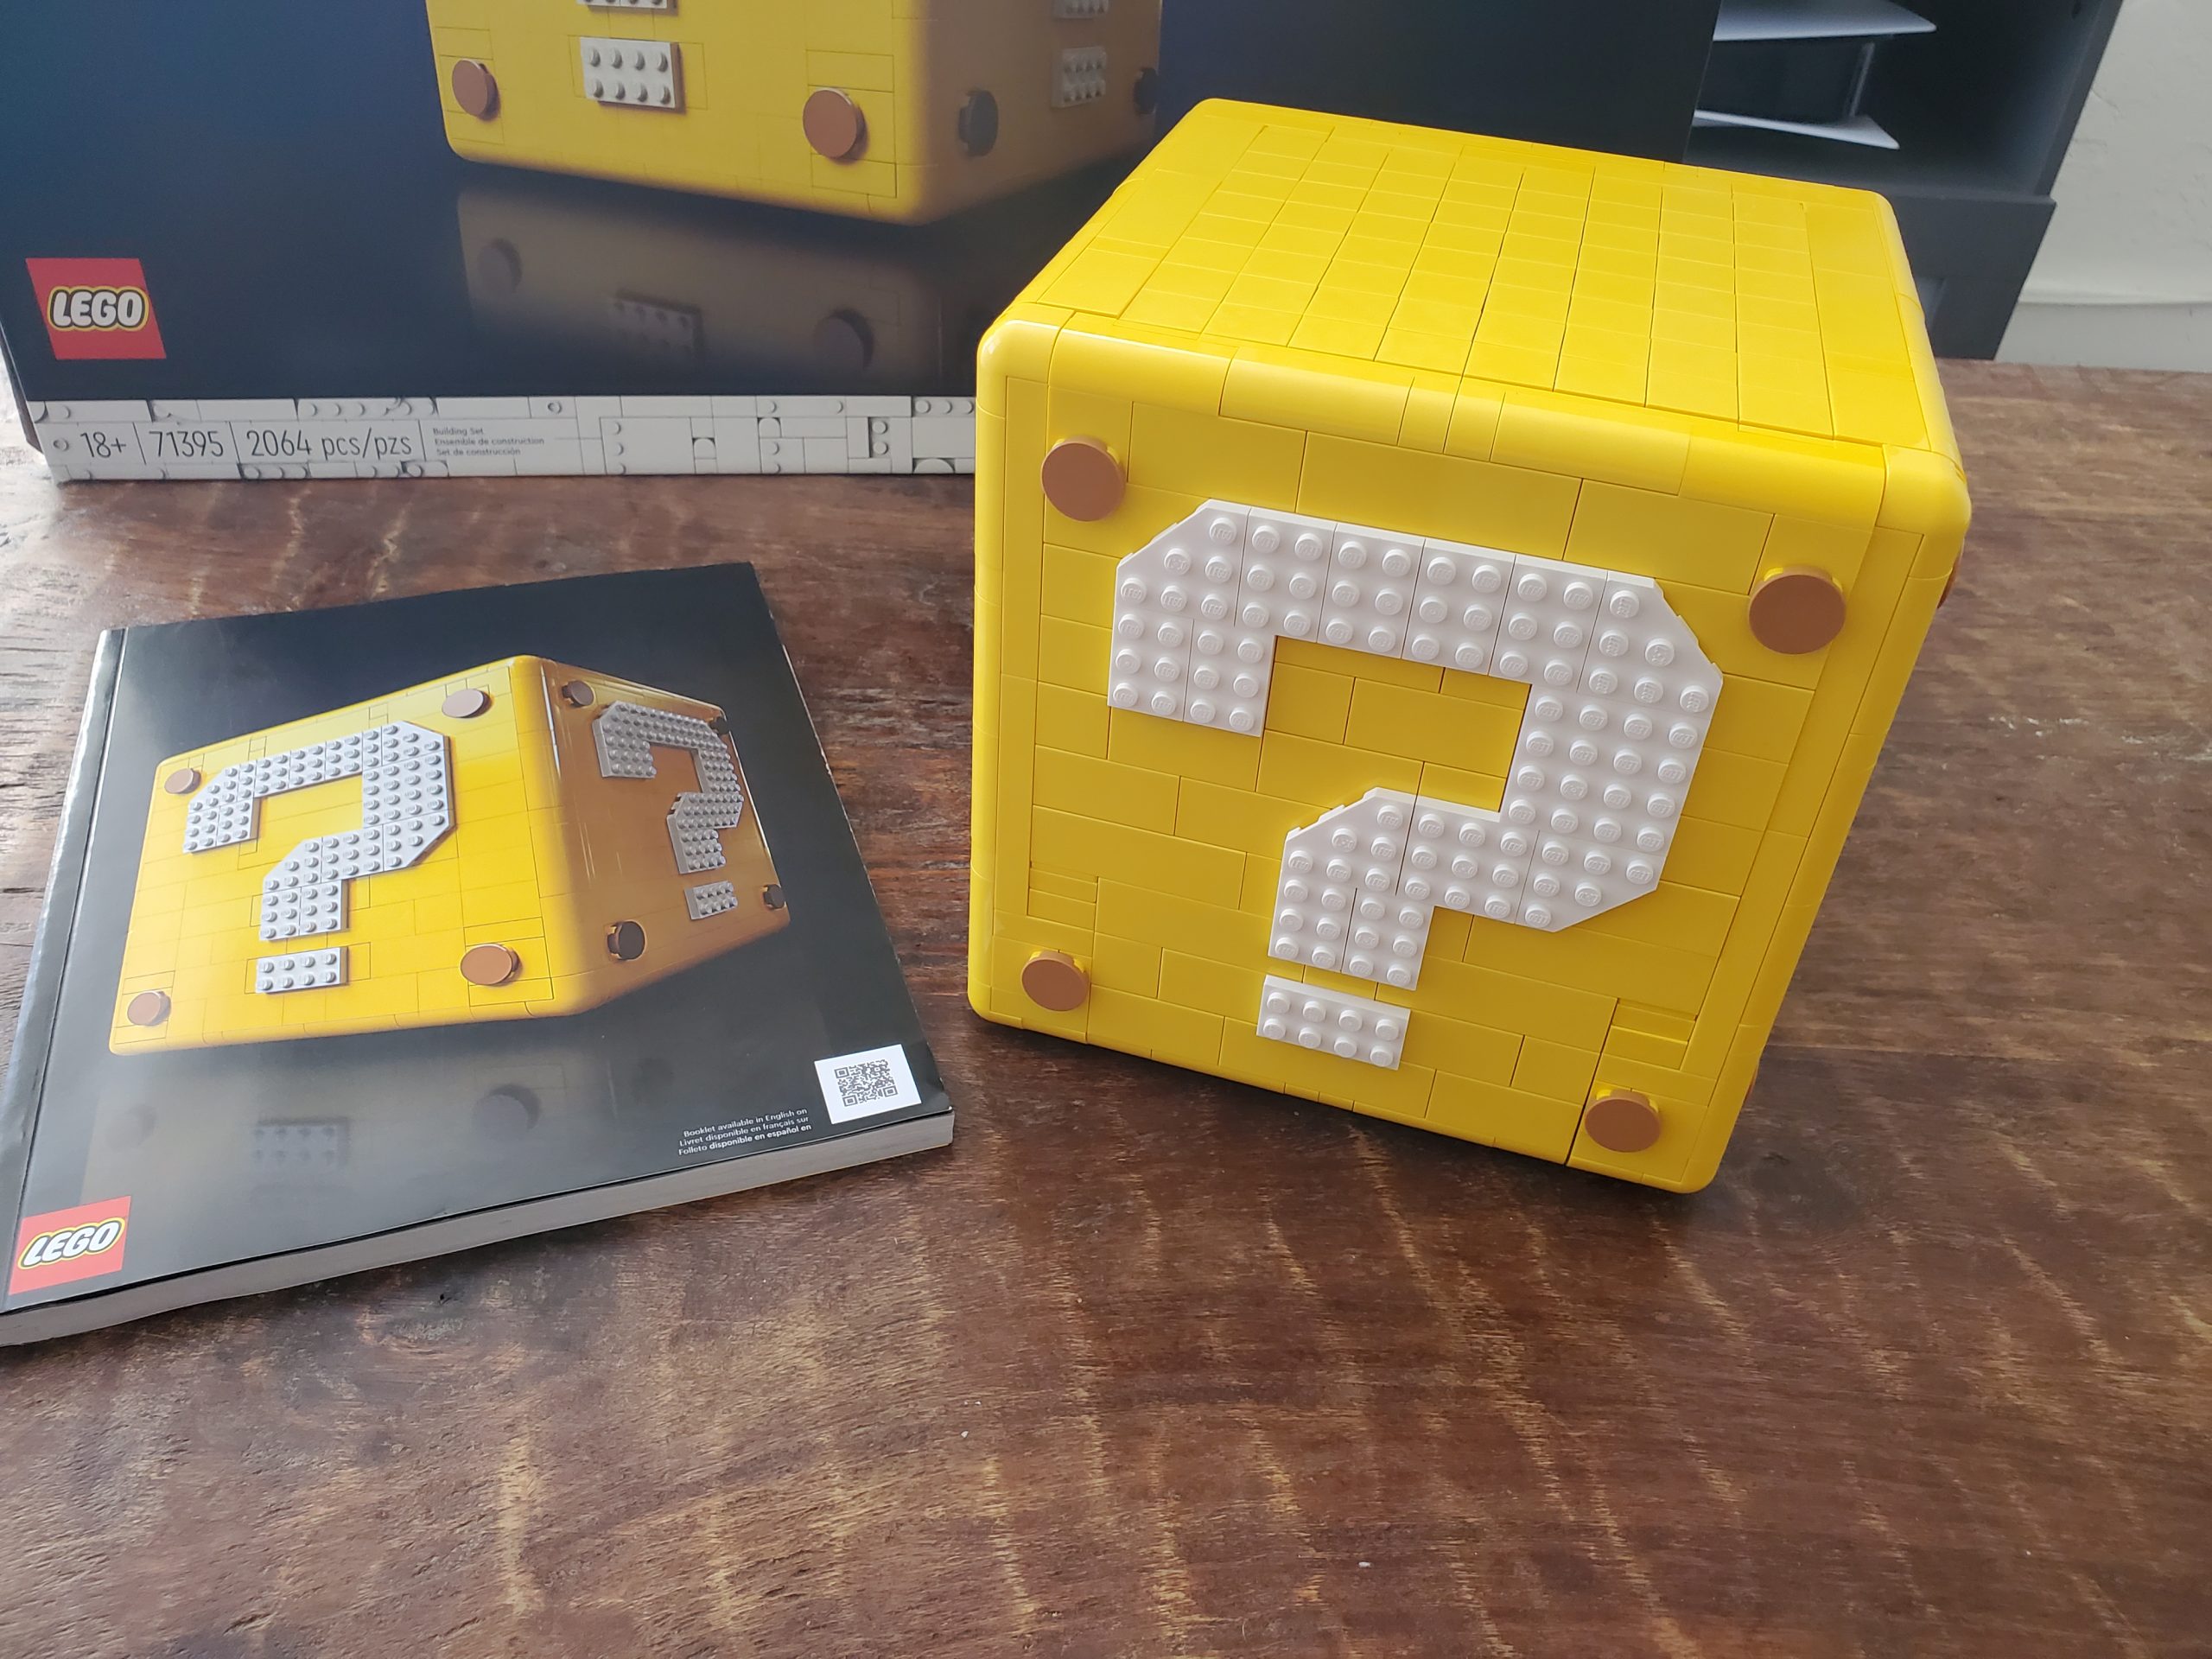
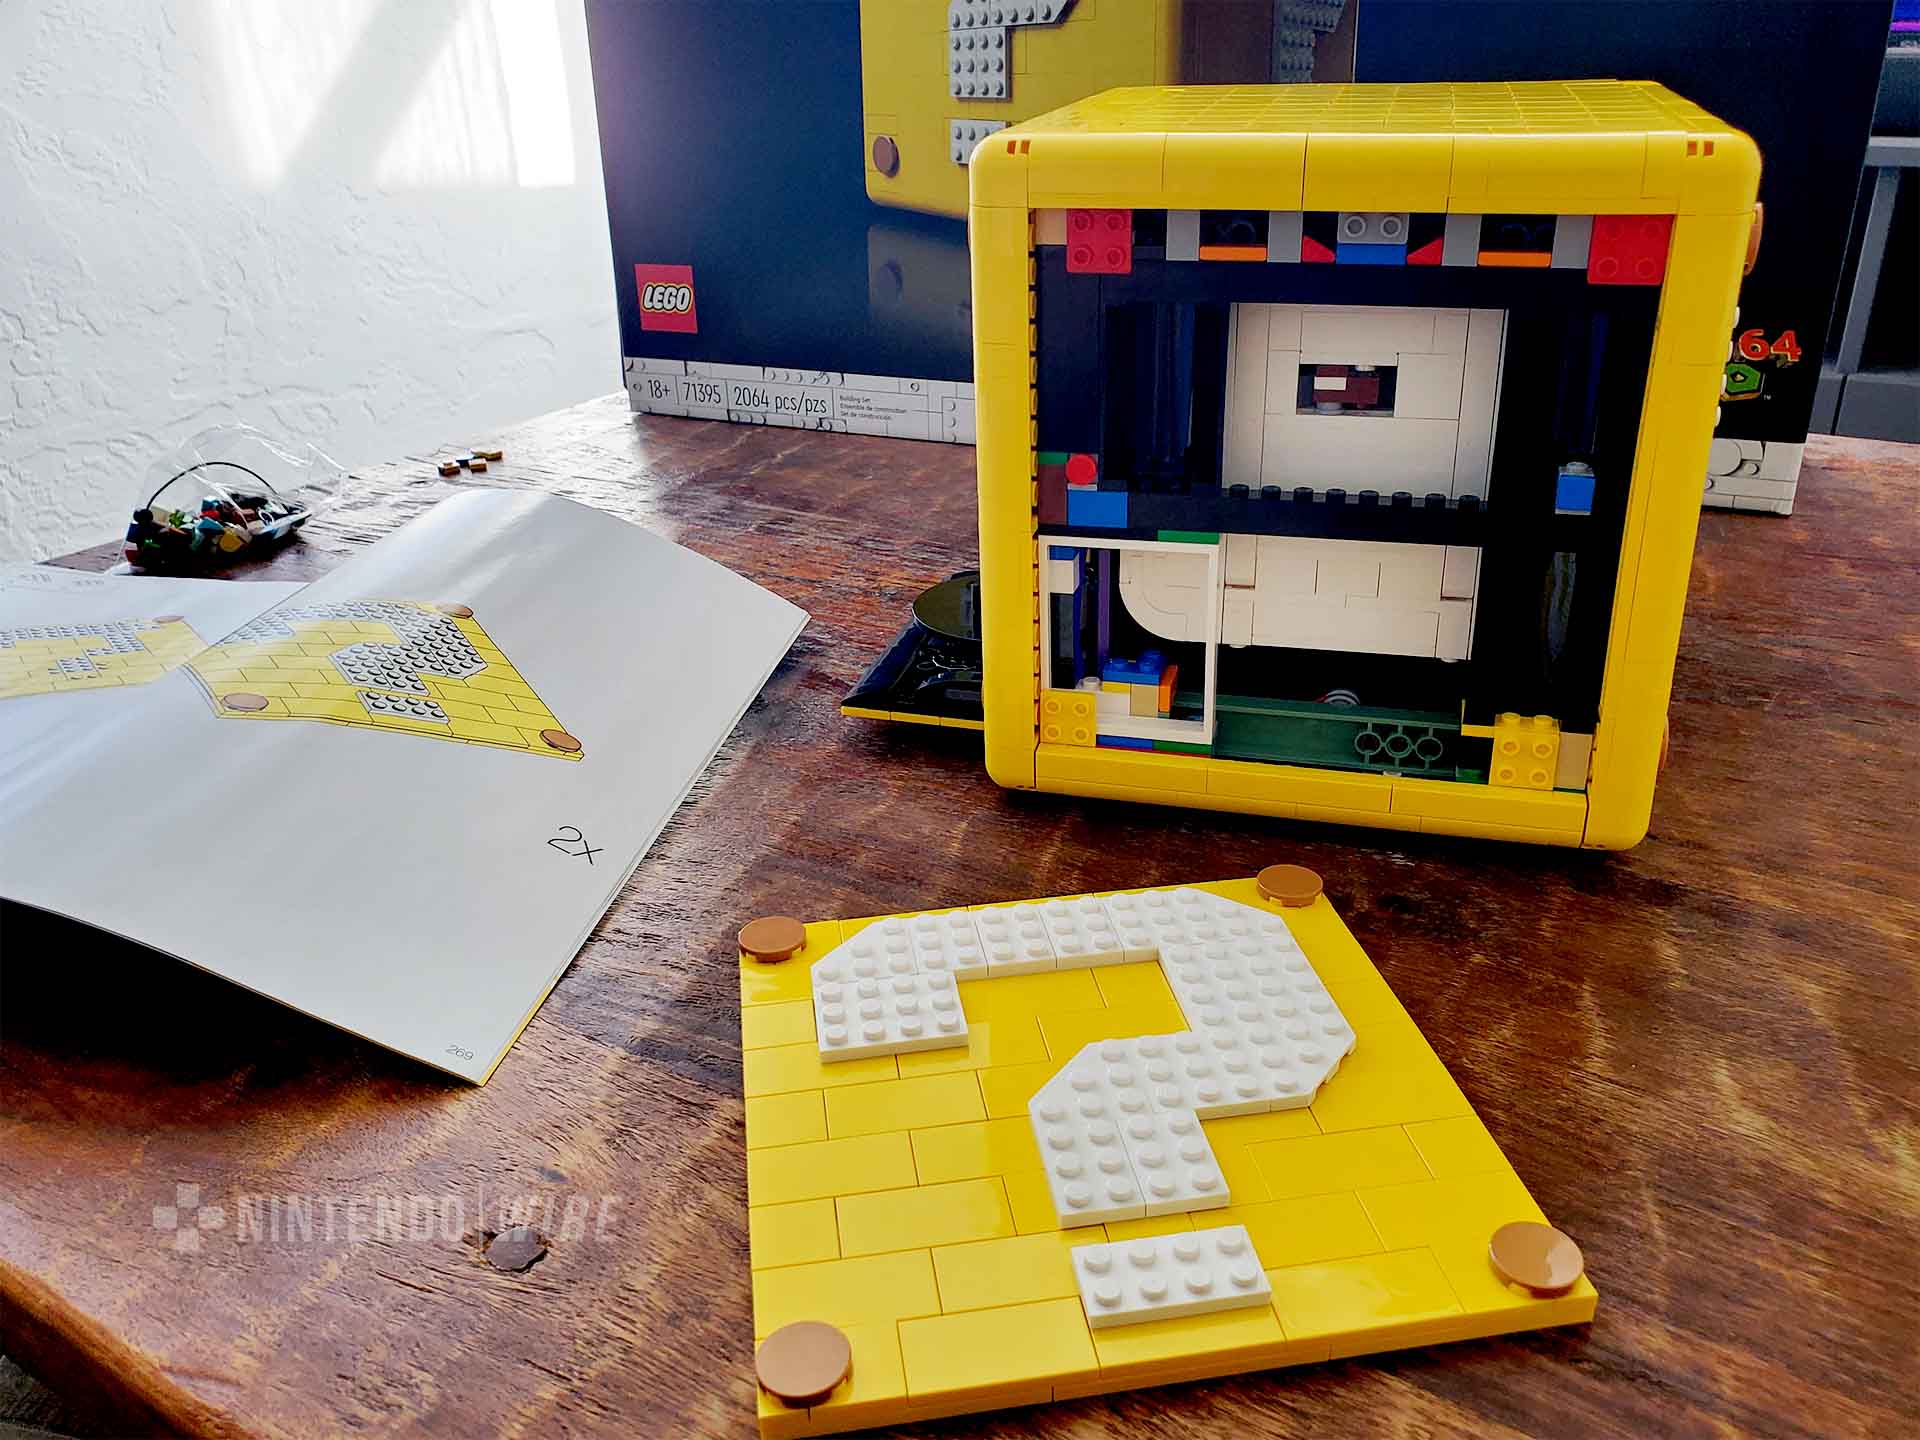
Moving onward, I went from the base of the block to what would end up its frontmost face. Unlike the stable bottom of this cube in the making, the face was both something familiar and mechanical. Remember those yellow plates I mentioned? I finally got to put those to work, along with that big ‘ol punctuation symbol. There was something charming about how simple the question mark actually is, just being a collective of white plates slightly raised atop the yellow.
A little less simple was the inner workings, which were starting to interconnect in ways that would give rise to the set’s most distinct element from a build standpoint: its moving parts. Though they were loose for the time being, rails and wheels were in the mix now that would allow this front face to “open” forward to an extent, like pulling a lever. It would take some time before this was possible, as the block needed to be built upward and have its edges added. Necessary as it was, I’d call this the least interesting portion of the process.
By the fourth bag I was starting to feel a bit of expected tedium set in, warranting a fresh cup of coffee and a quick break. Some of what was in there was familiar, but I was caught off guard by the presence of a sliding “window” along the block’s backside. It’s constructed with a missing portion, so to speak, which is then built separately and slotted in, like a secret compartment. By the next bag I knew exactly what would go in there, and while it may’ve been the caffeine kicking in, the set had pulled me back in just in time.
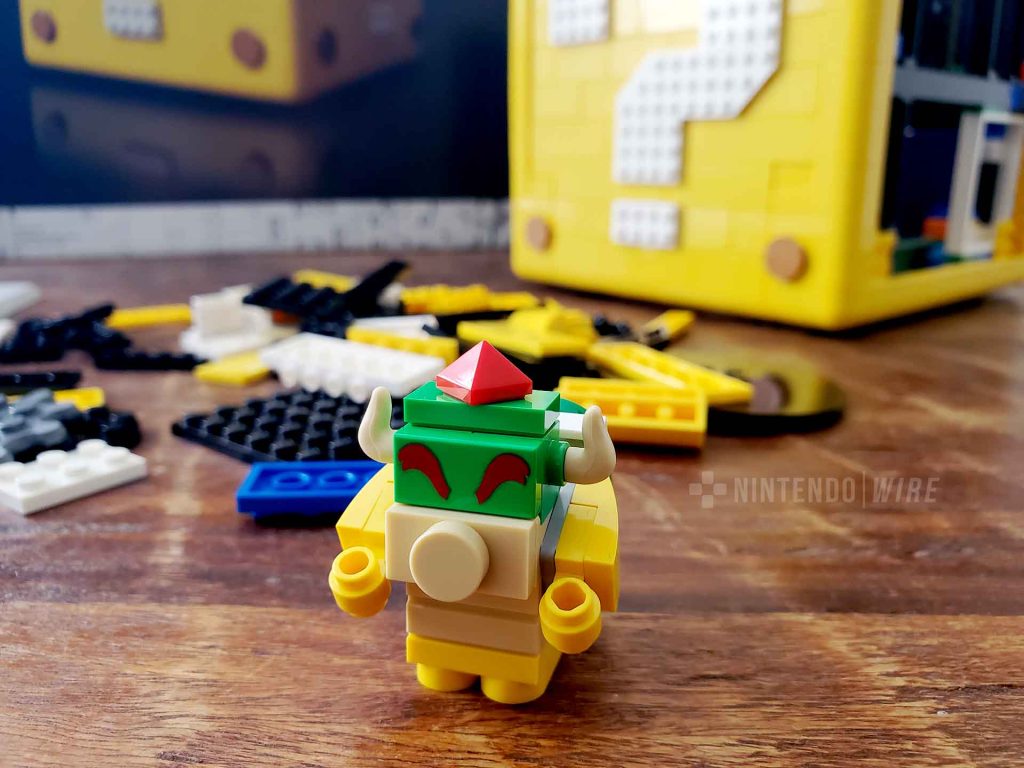
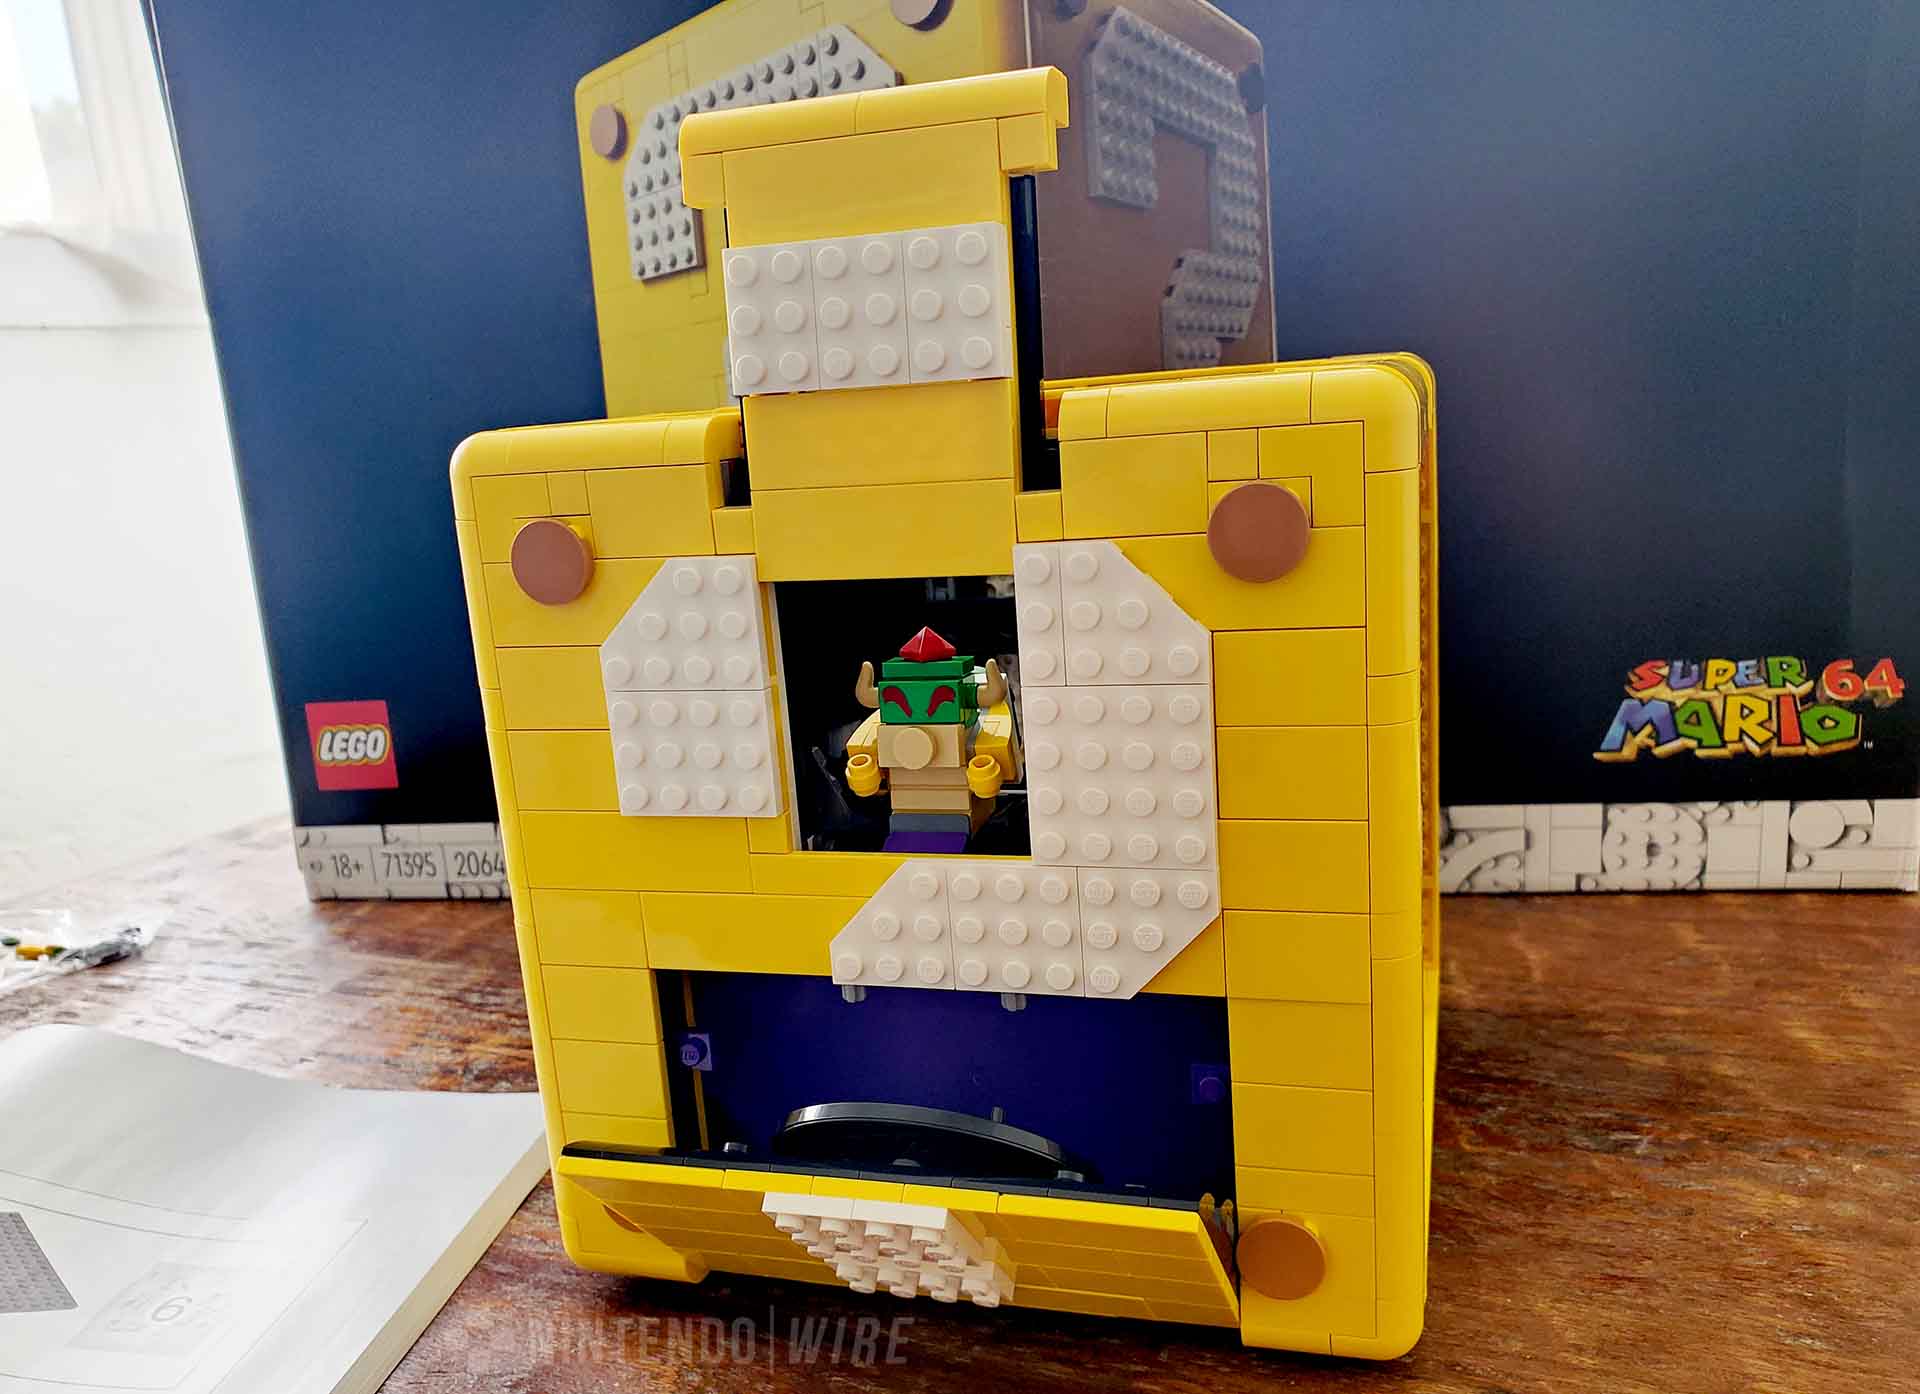
Yes, there he is — Bowser! The first Mario character encountered and it’s the final boss. Putting the King Koopa together was great, as it showed a strength of this set that would become even more apparent down the line. The simplicity of Bowser and the bricks chosen to portray him work splendidly. I’d take something like this over a big fig or one of the Lego Super Mario style characters any day. And just look at those eyebrows!
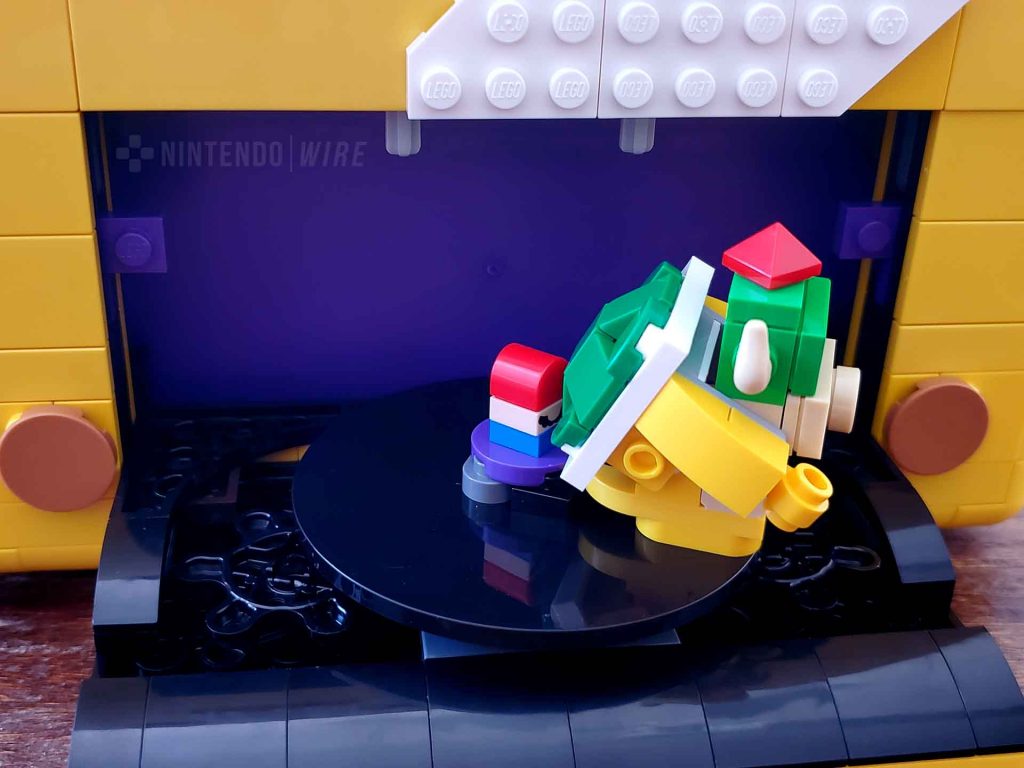
Once he was set in, a few more moving parts entered the mix. Further down the rear face is a hidden compartment, which opens up to reveal a gear-based turntable with a small crank. Nothing about this seemed too “Mario” to me and I struggled to think of what role it might serve for the block’s contraption-like functions. I wouldn’t get my answer until much later on, but at this point I had a front, back, and bottom put together along with the block’s skeleton.
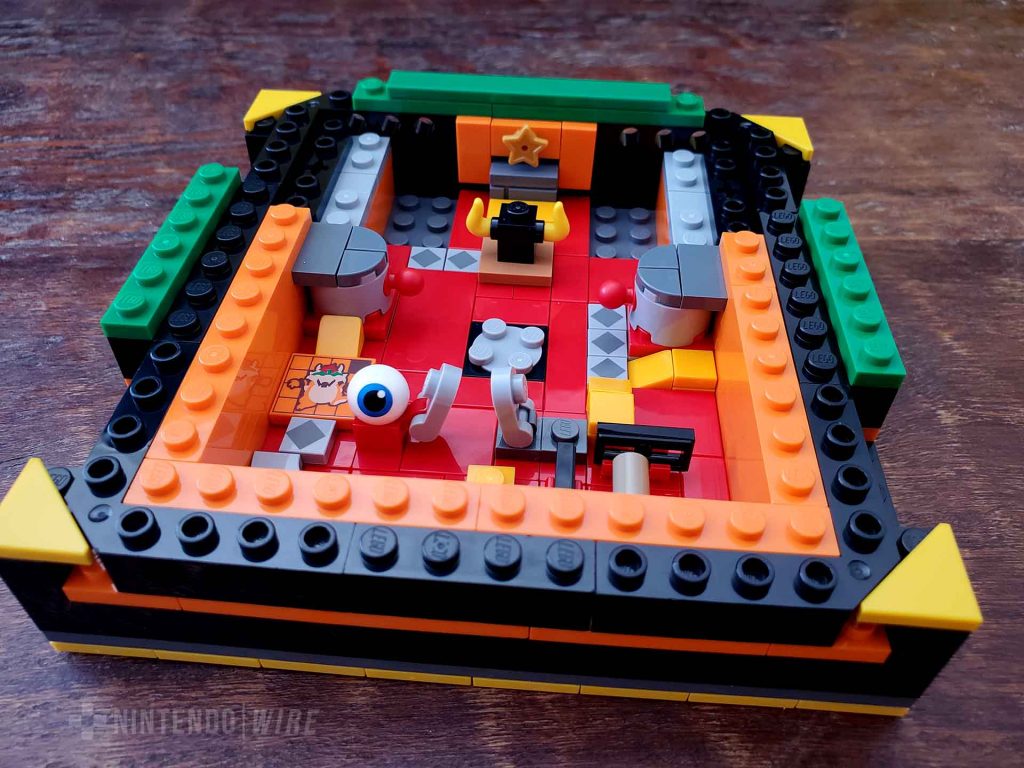
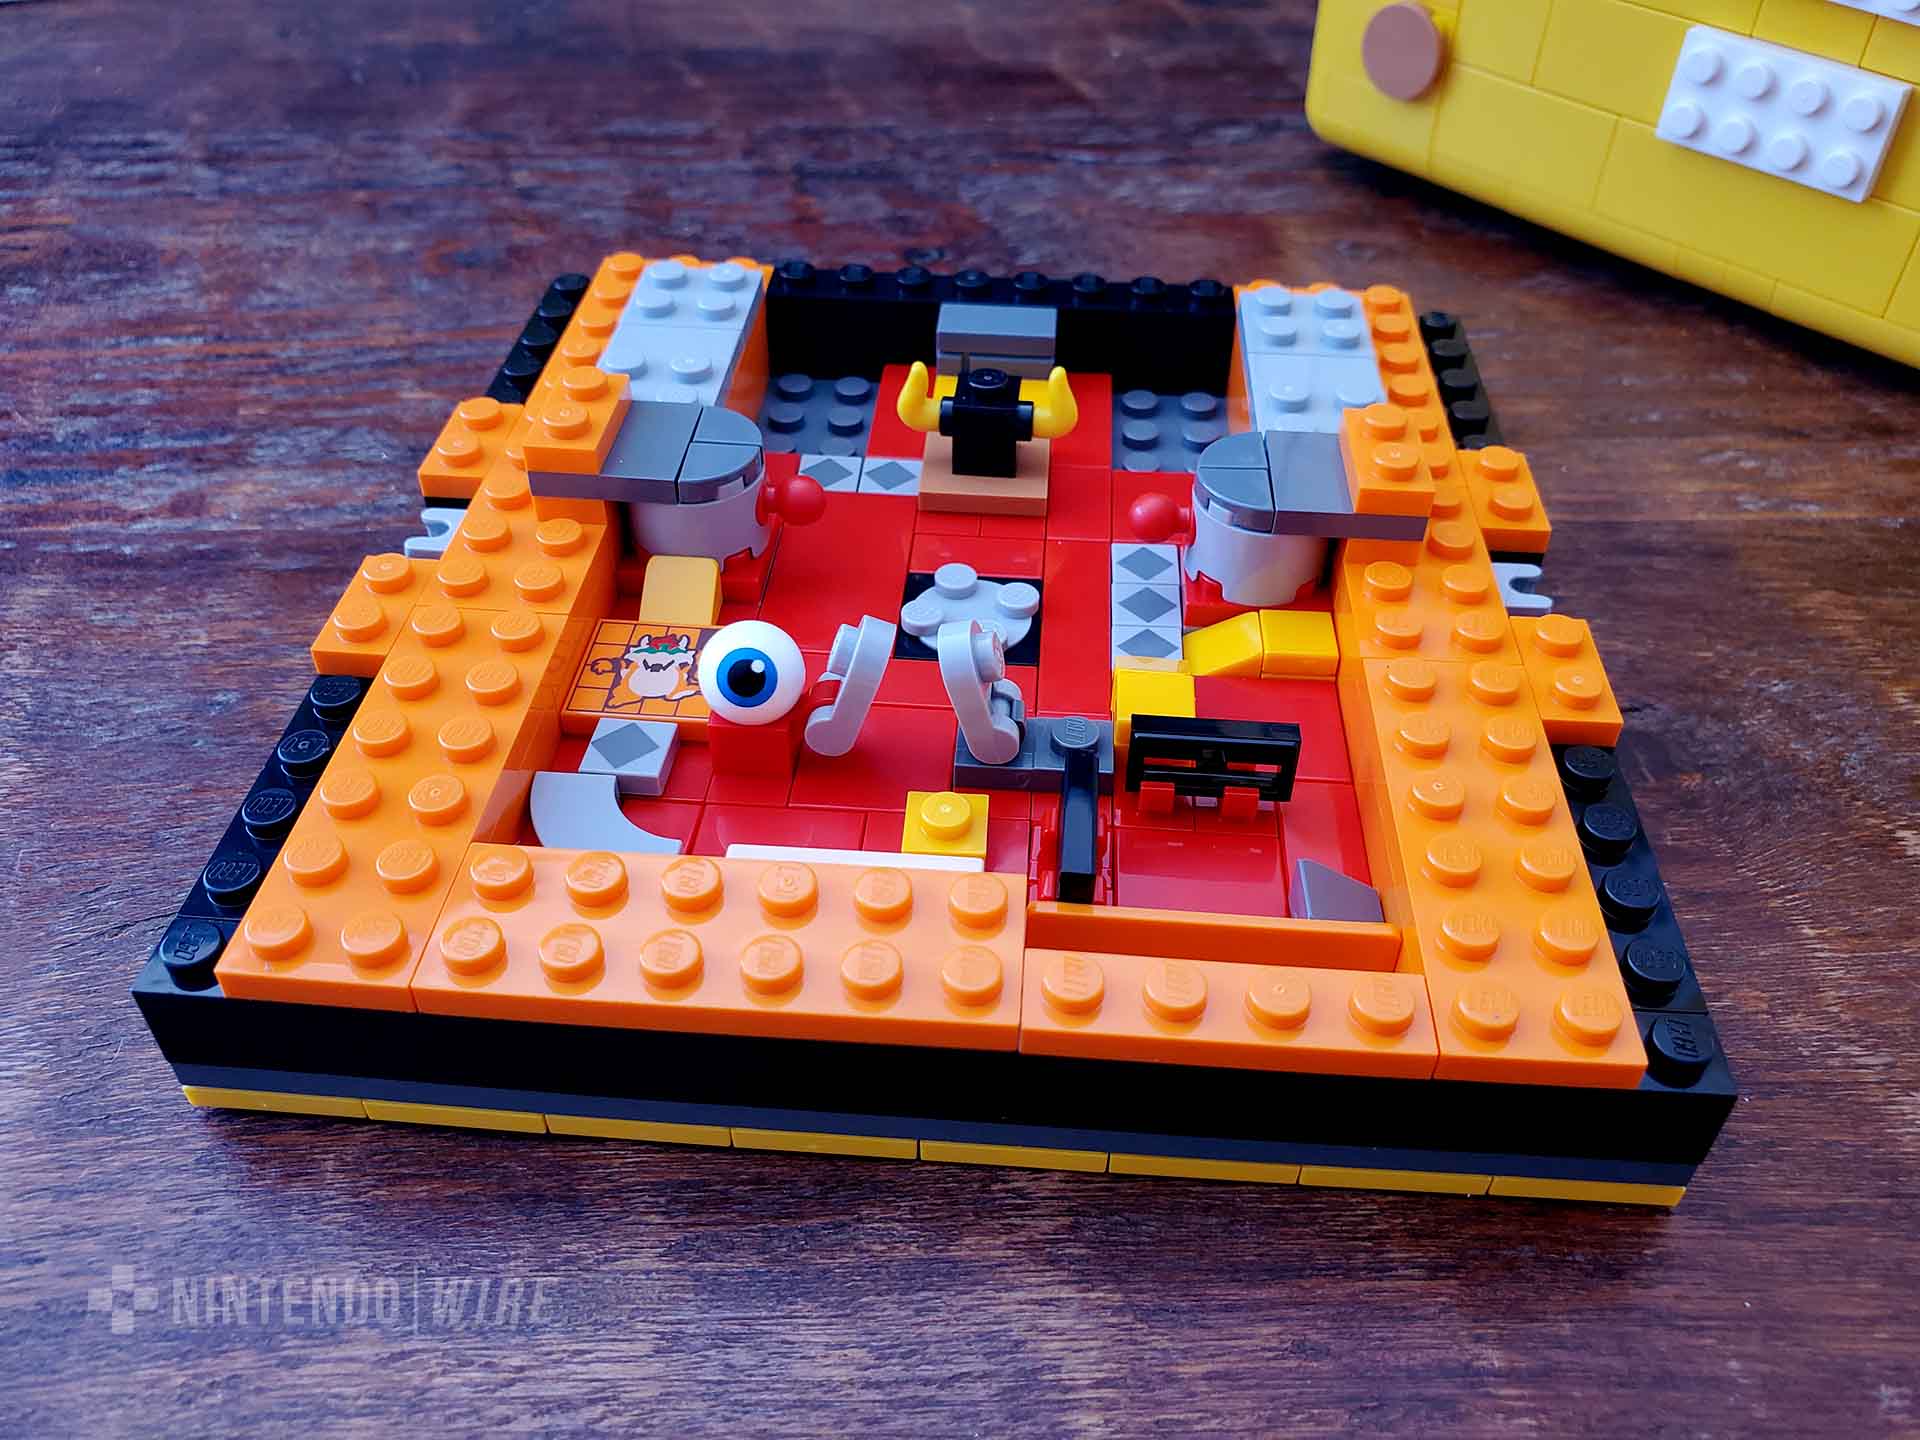
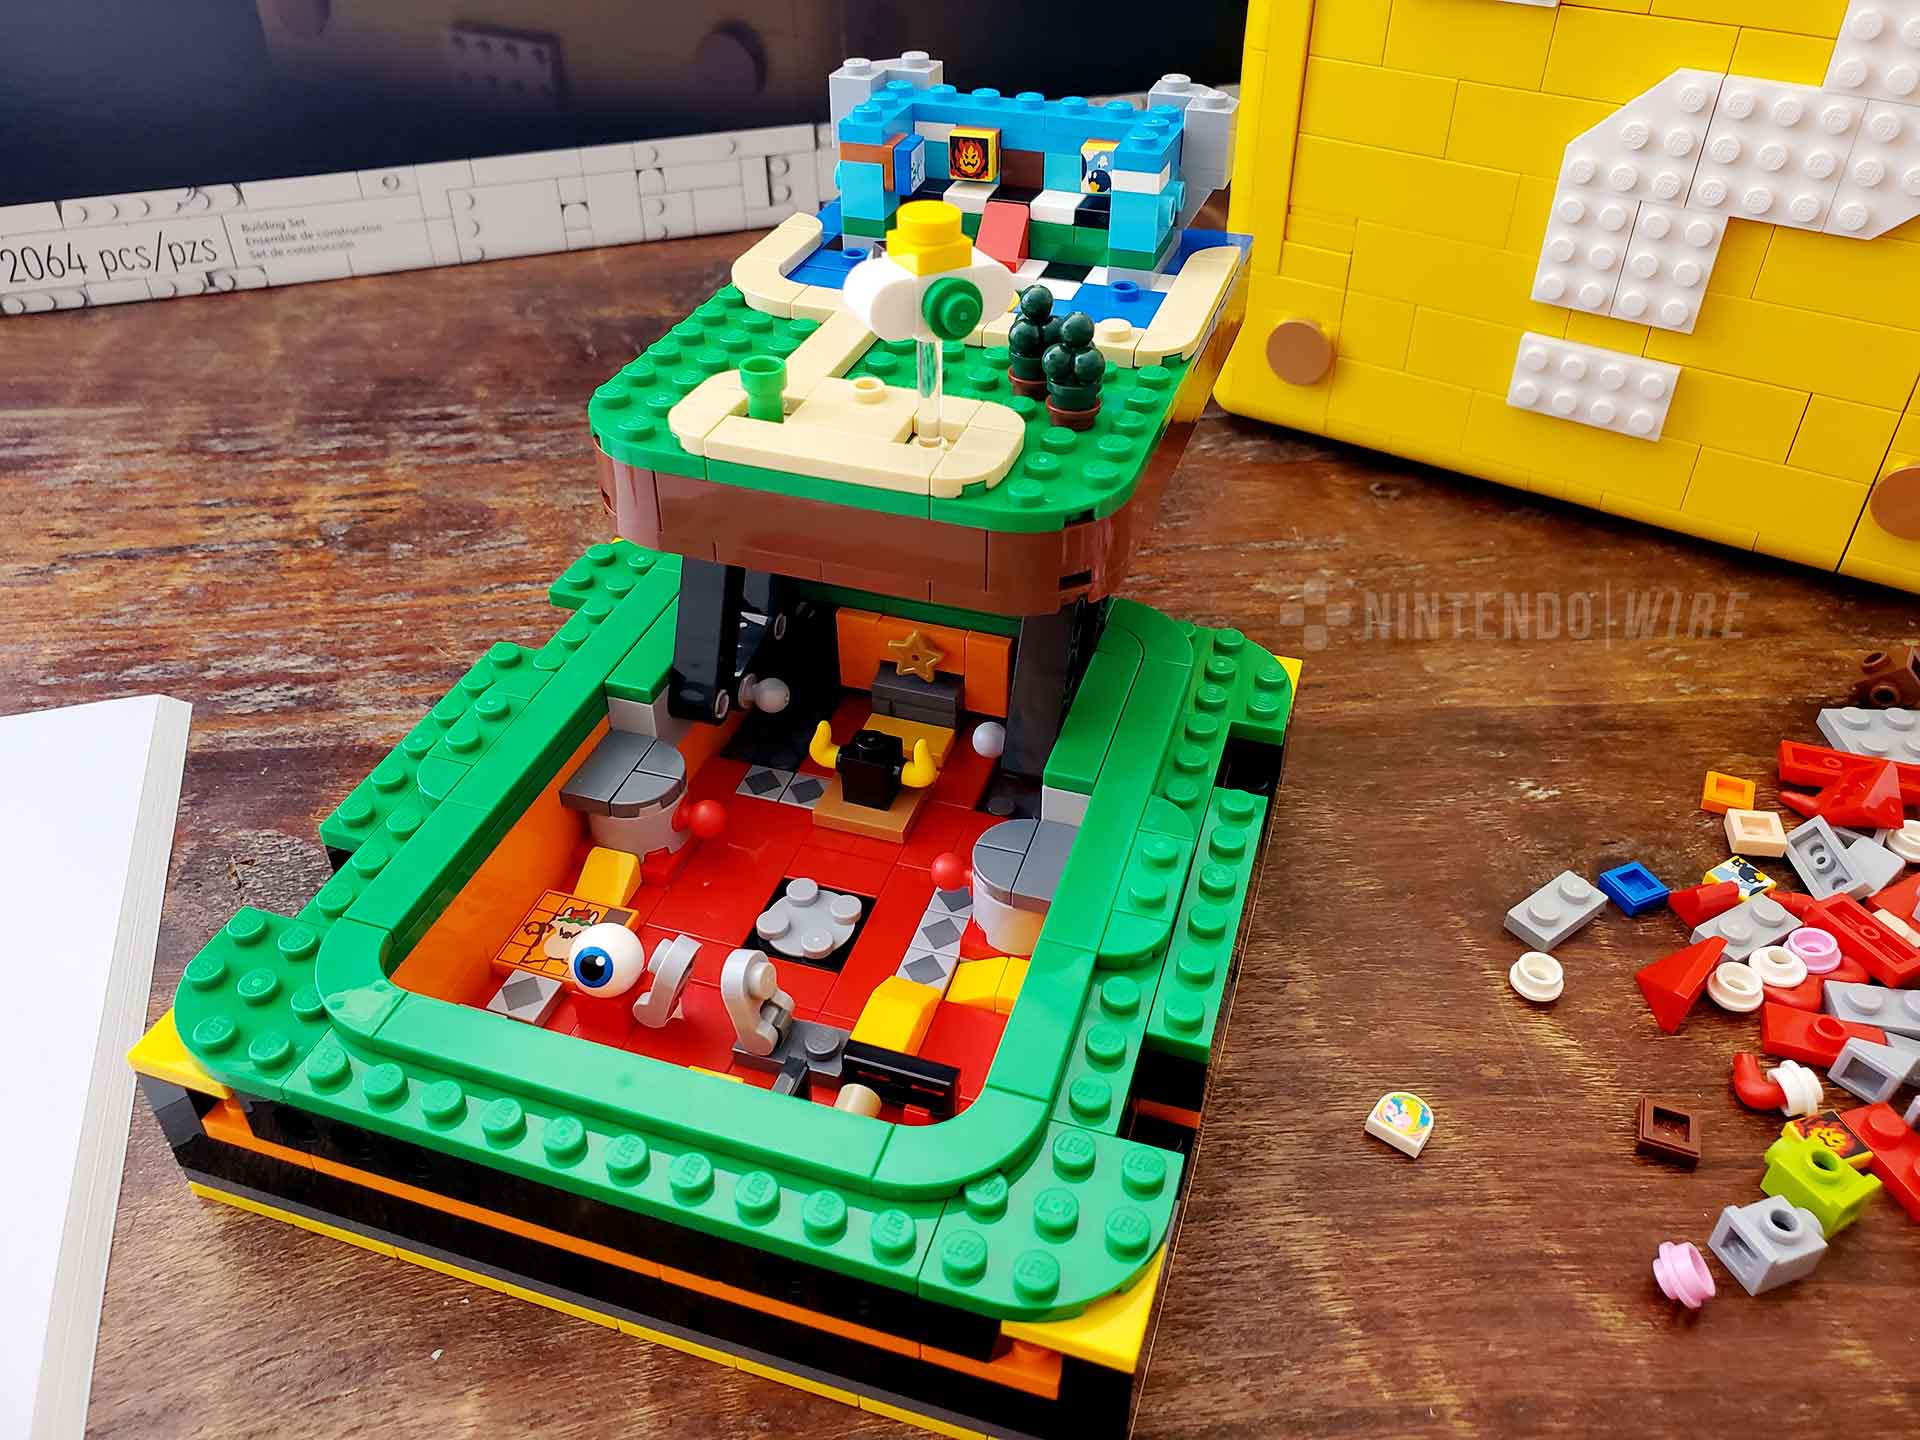
It’s at this point that the set’s turning point was reached, as bag six brought on something I’d been eager to encounter — the first world! All kinds of orange and red pieces were in front of me just waiting to become Lethal Lava Land, not to mention some more of the Mario-specific ones that were starting to appear a little more frequently. For now, this meant Mr. I and the sliding Bowser puzzle (sadly just a single plate). Also included, though made from more standard bricks, were a Big Bully and the (Red-Hot) rolling log.
As much as I enjoyed putting together a micro-sized Mario environment, this and some of the upcoming portions of the build started to wear on me. Unlike the larger pieces and clearer indications of the block itself, these steps warranted a more methodical approach. Some steps I absolutely had to separate the pieces, less for easy access and more to make sure I wasn’t skipping any of them. Tiny parts along with extra specific placement isn’t new to Lego, but it gives this particular set a split identity when compared to its saffron-hued housing.
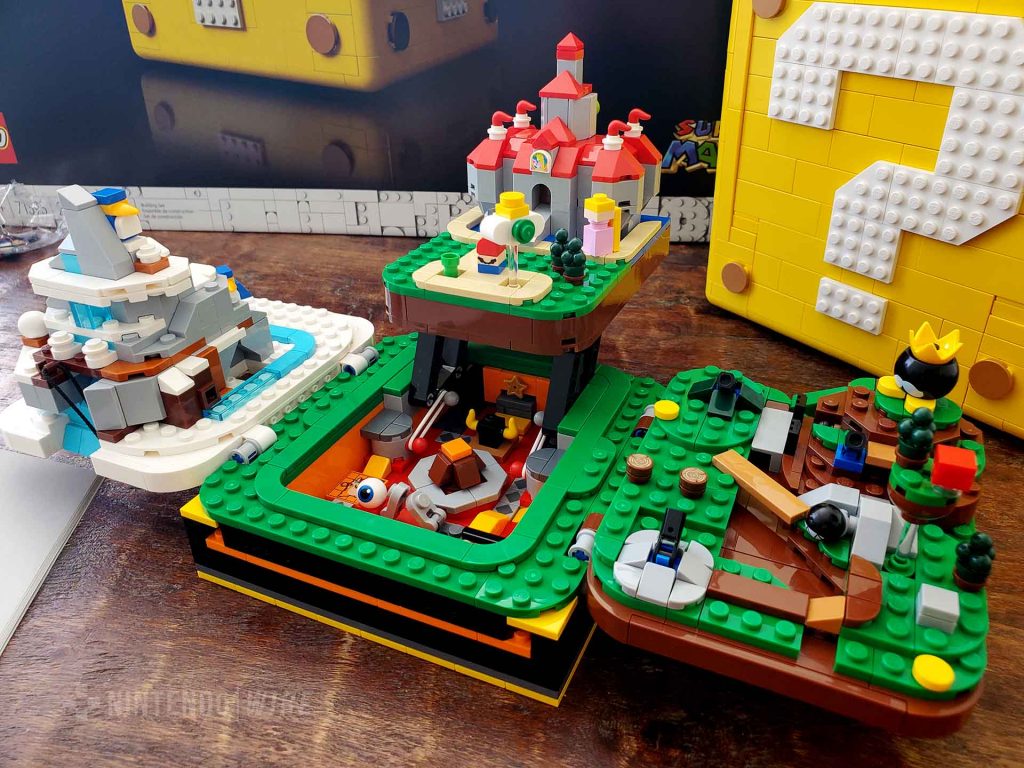
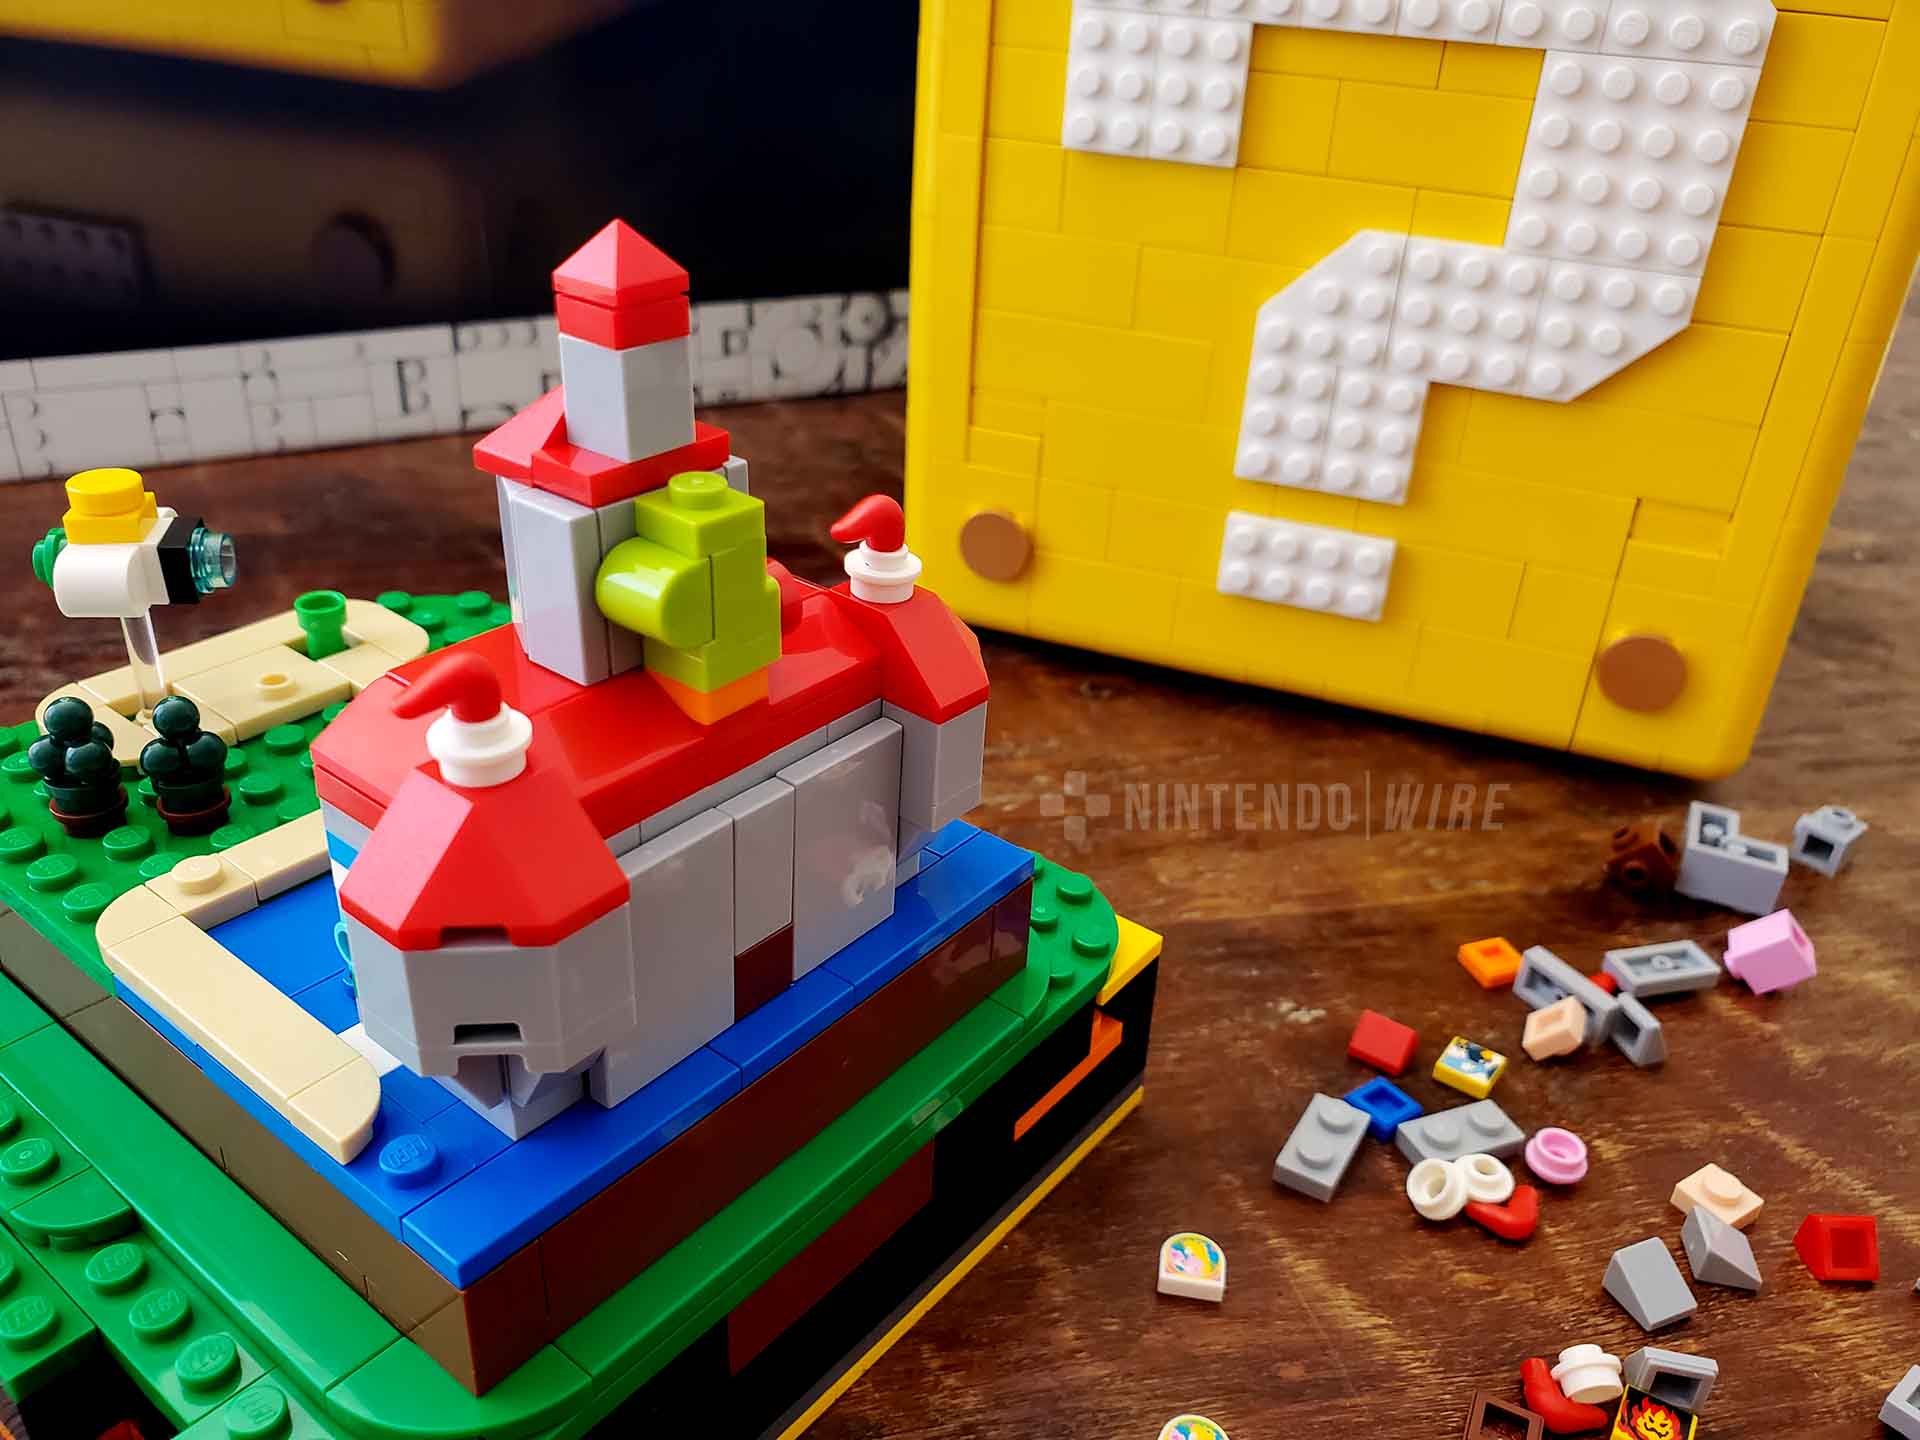
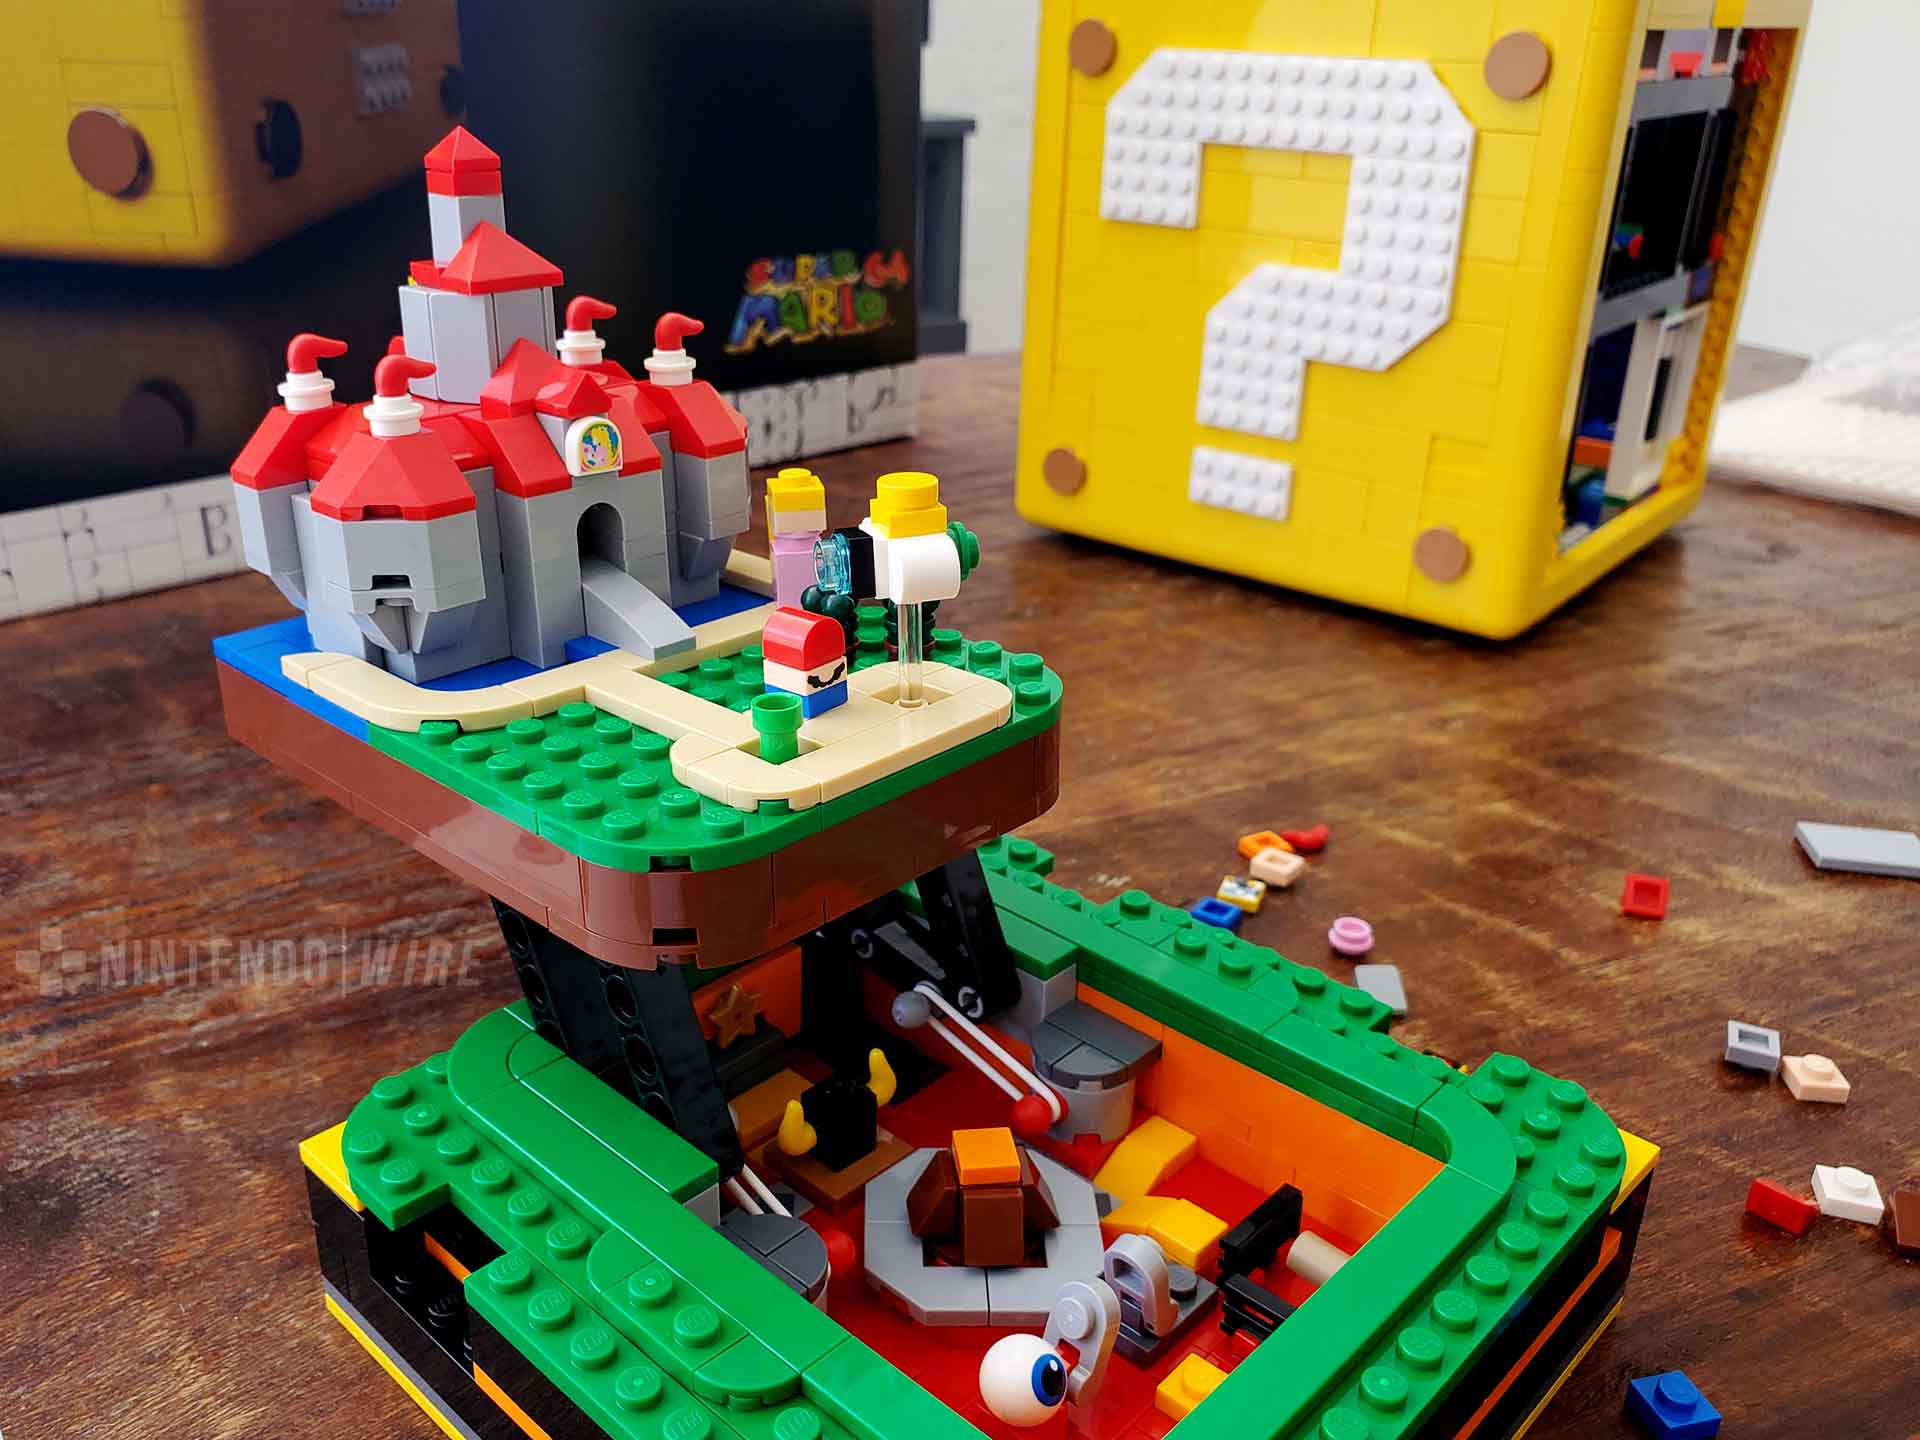
Once Lethal Lava Land was in order, it was time to move on to the game’s most iconic locale – Peach’s Castle! This cake-baking bastion was connected to Lethal Lava Land by some more Technic-like support beams and pegs, letting it actually rest on top. I thought this design was really interesting, both from a structural standpoint (using rubber bands for tension and restraint, establishing a platform that’s both separate from and a part of its base) and thematically. Even though we’re using magic paintings to get around, having a magma cauldron “underground” does make sense.
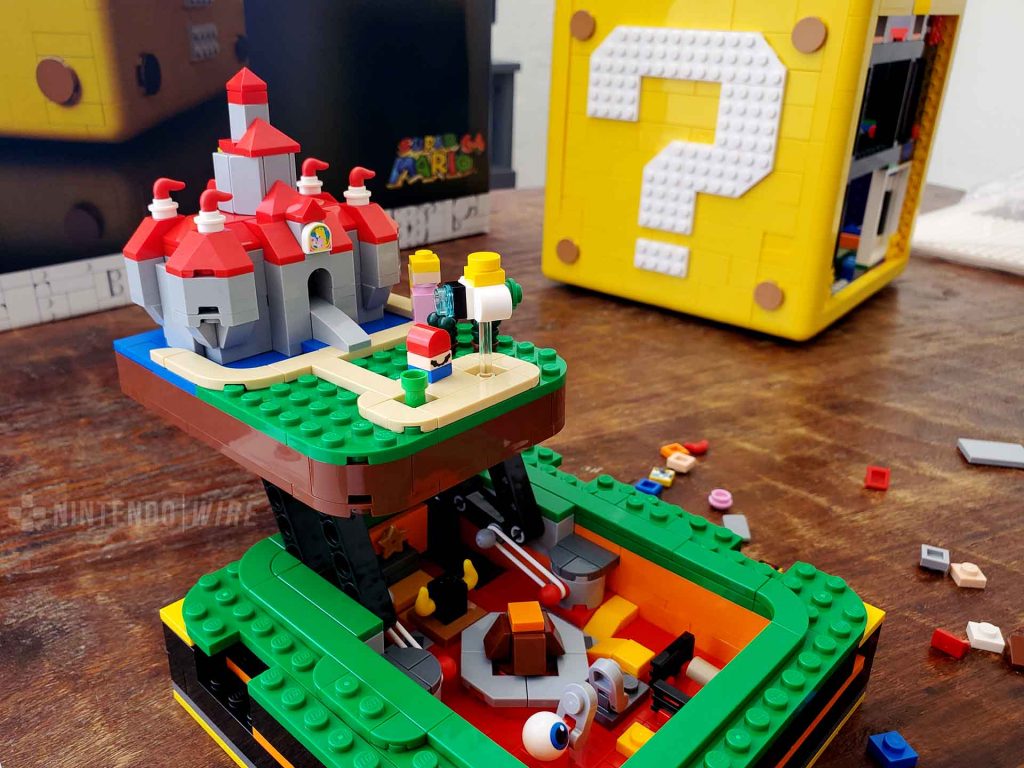
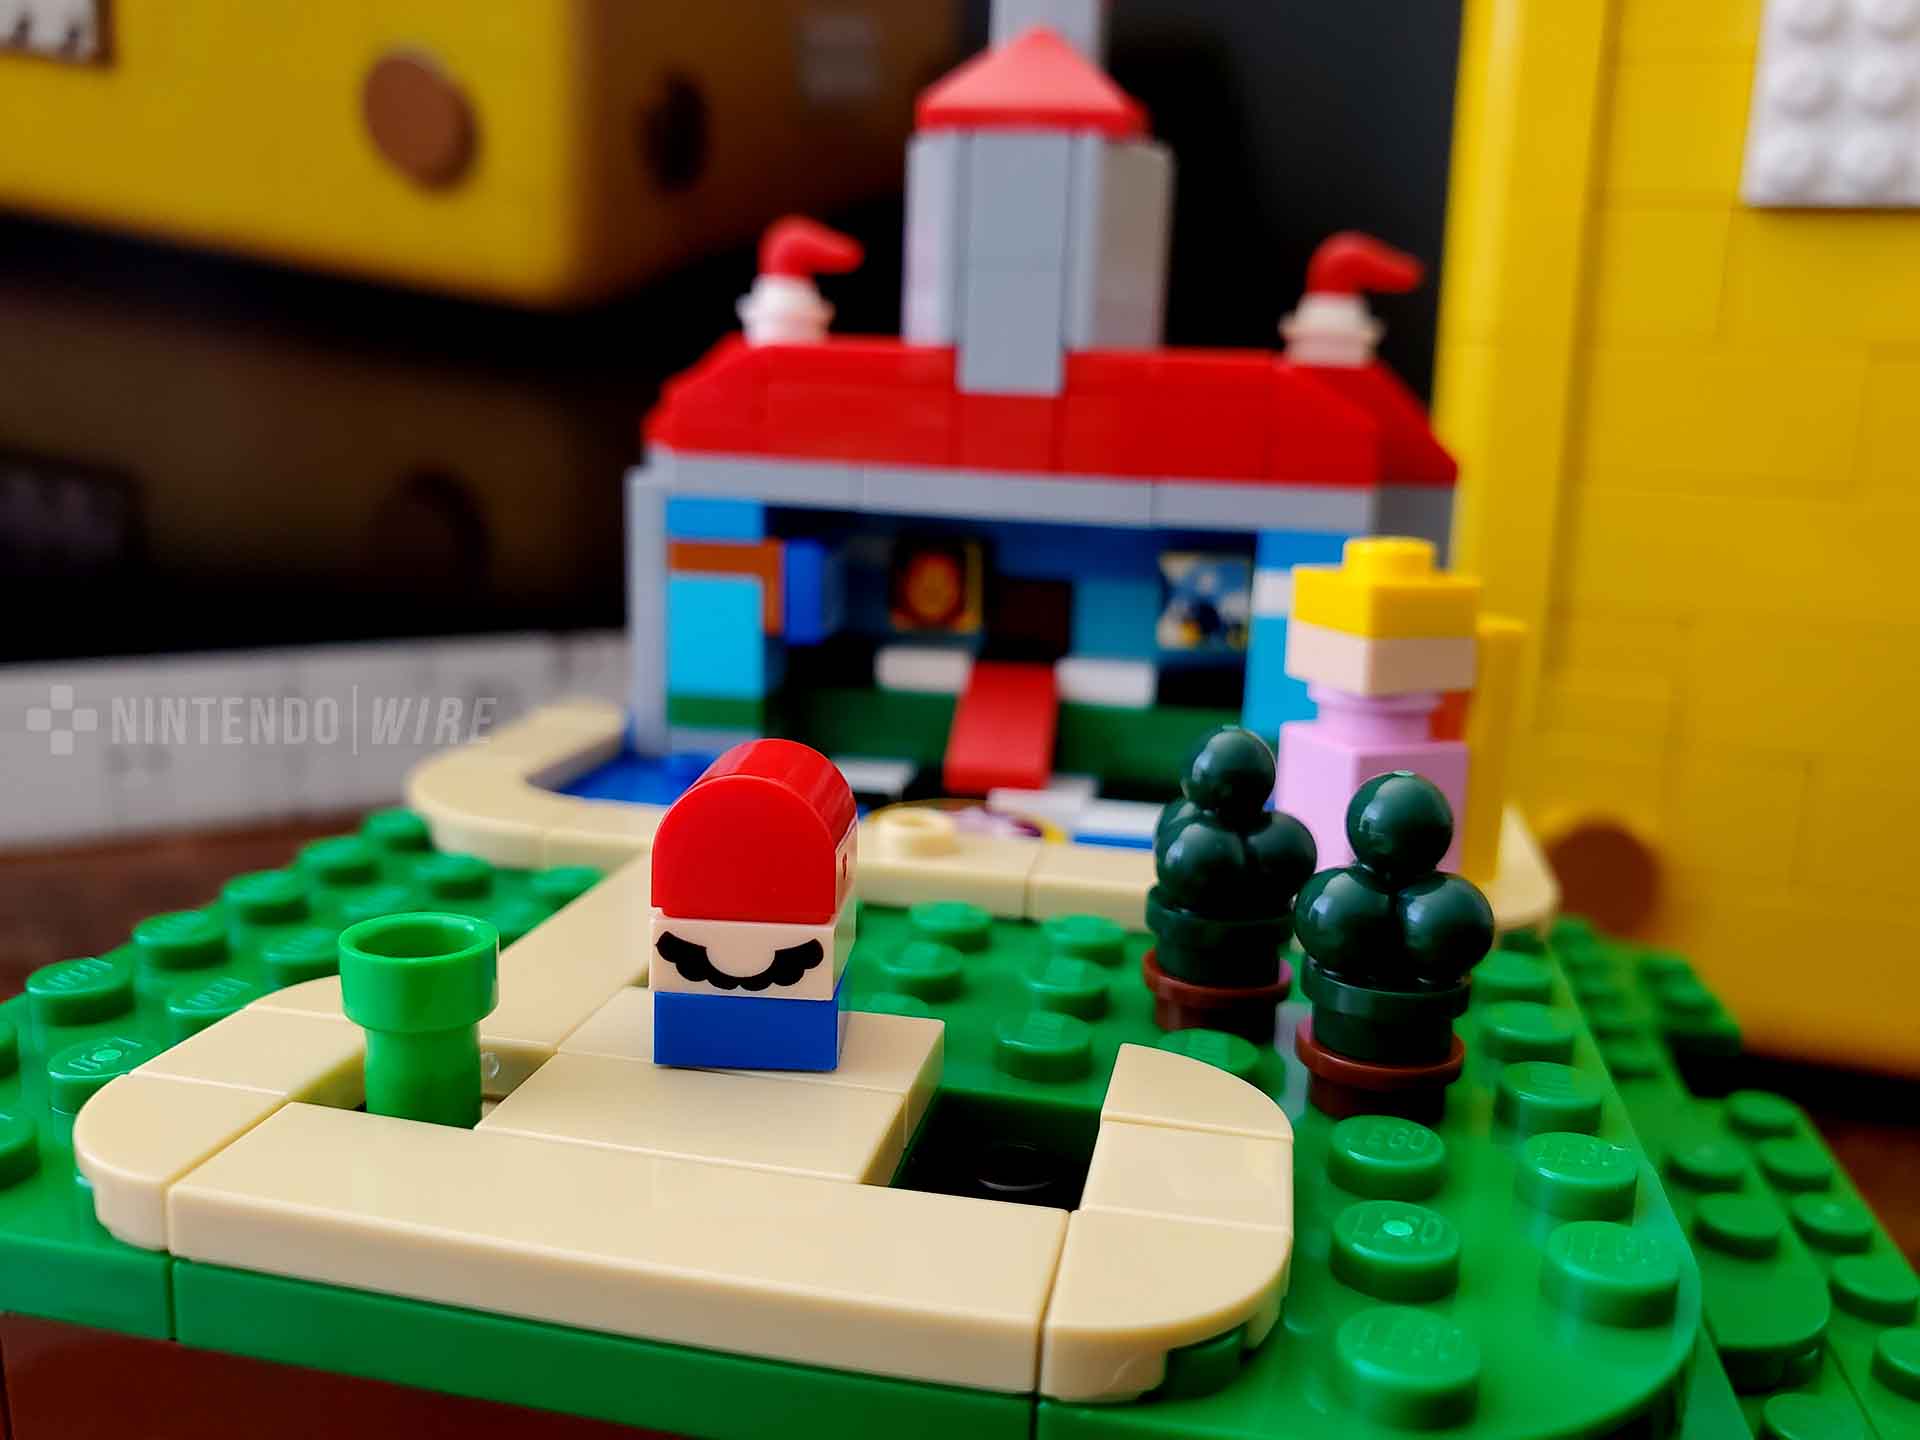
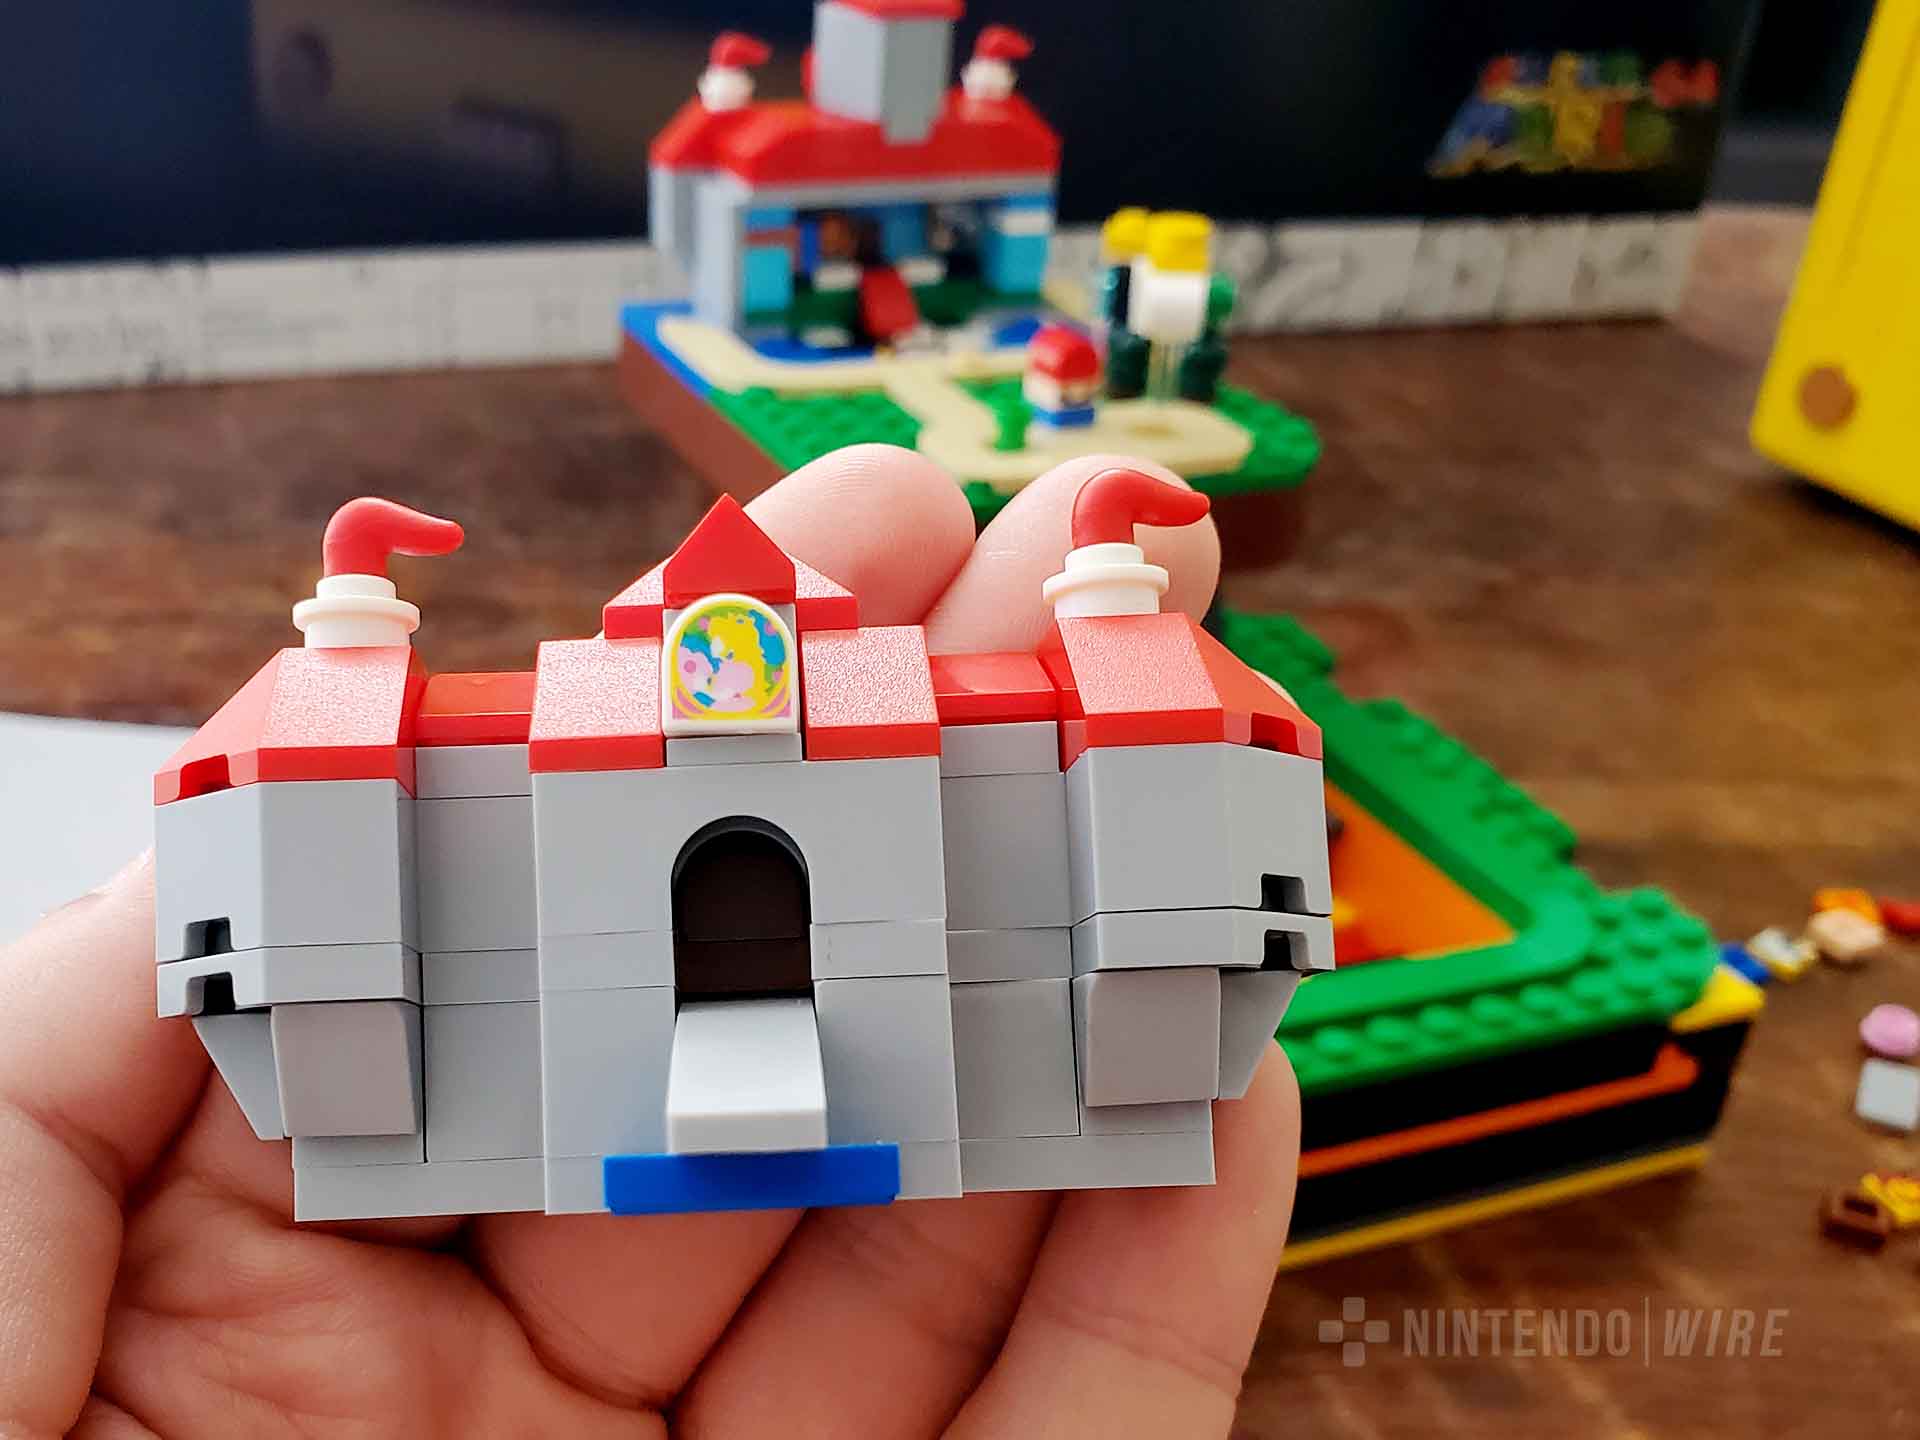
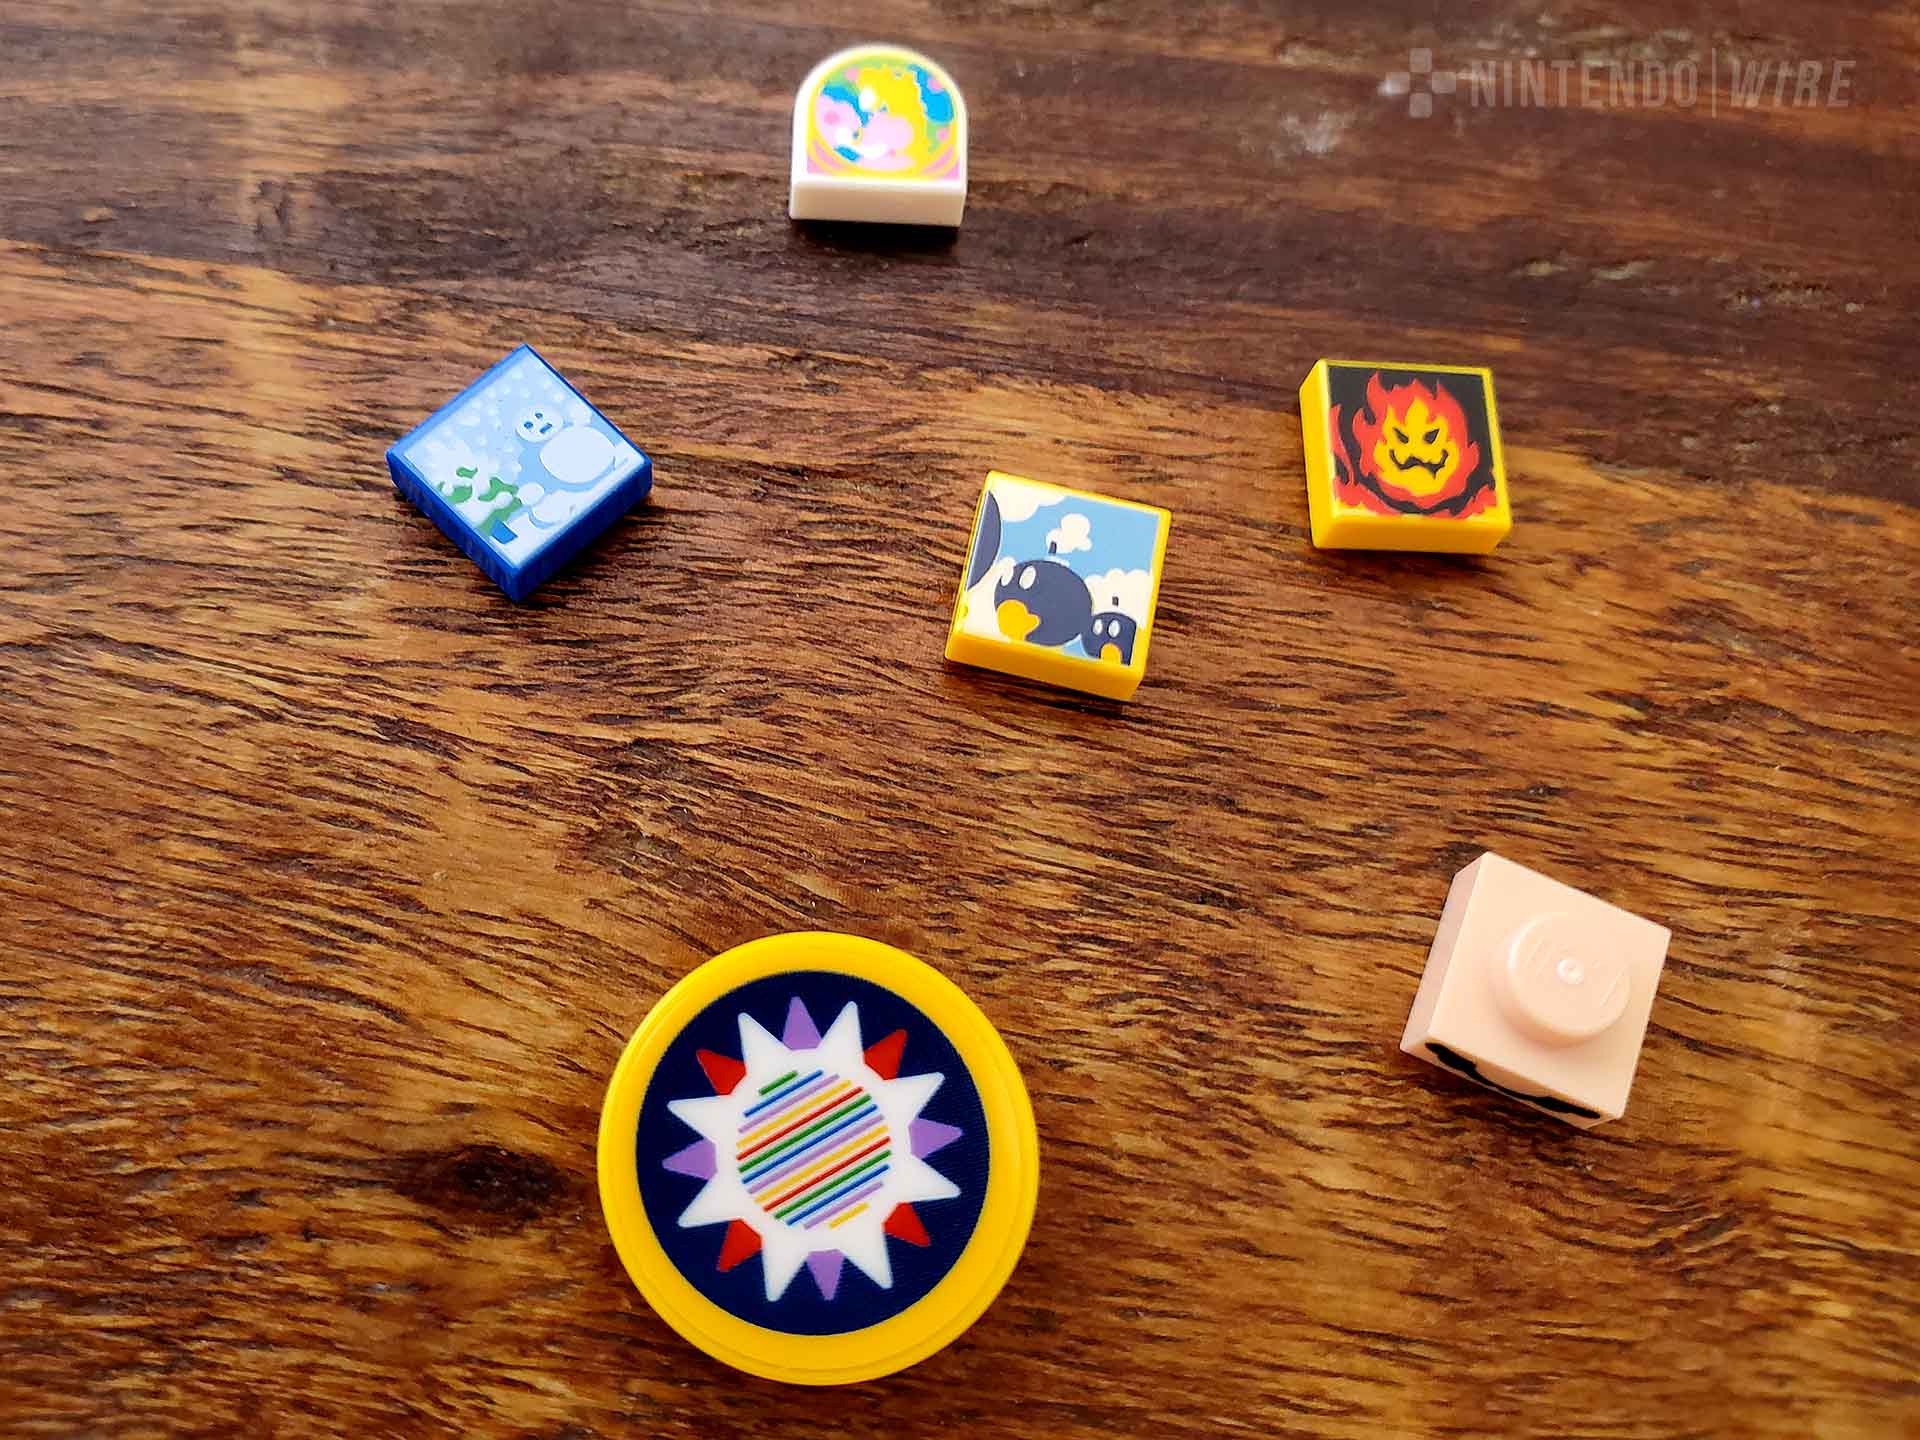
Speaking of those paintings, they finally made their appearance along with a few other icons of Super Mario 64. The castle’s stained-glass window and entryway rug were here, along with the unmistakable facial hair of a certain plumber. Having these set aside may’ve spurred me to rush this part of the build a bit, as I was looking forward to placing them. Actually building the castle in its simplified state was fun, with its red roofing and chessboard floors present and accounted for. Even Yoshi was here, snoozing around back and waiting for players to gather up all the Power Stars. The castle had another neat aspect in the fact that its front can easily be slid up and off, letting you see the paintings and interior without any hassle.
Finally having both Mario and Princess Peach in all her indescribable beauty present had me feeling good, and yet it was when I slotted in Lakitu and realized that the light green piece I had placed was a Warp Pipe that I was struck by pure joy. It’s clear the designers put a lot of thought into replicating things both obvious and subtle within the set, and it’s in these “a-ha!” moments that I had the biggest smile.
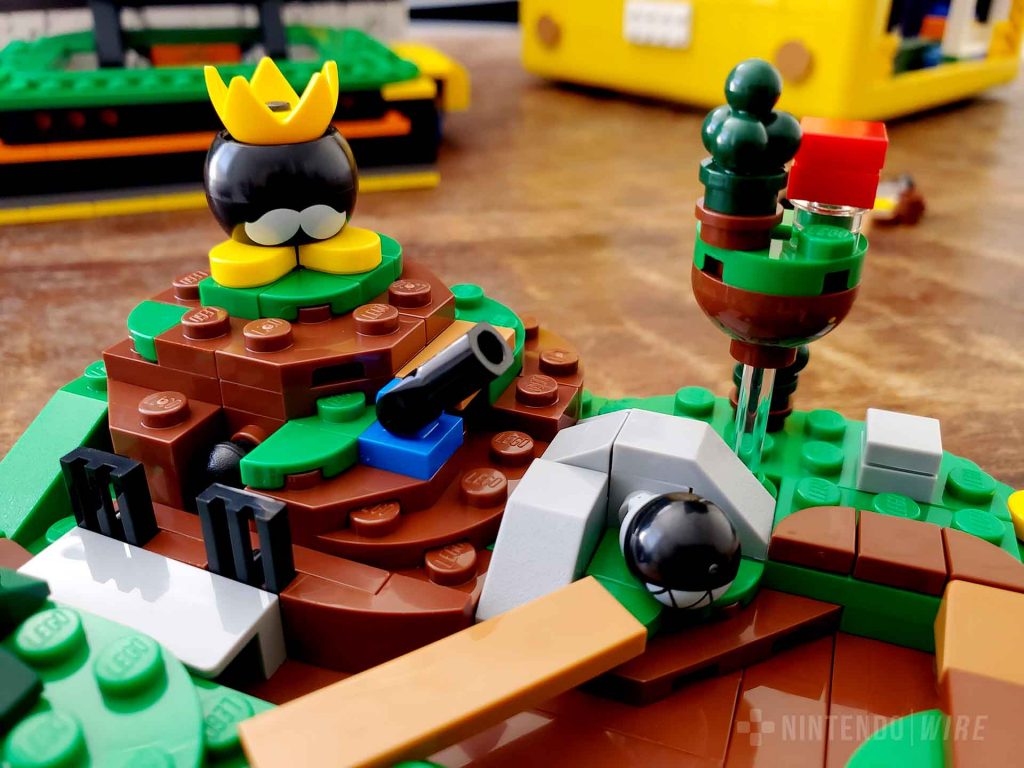
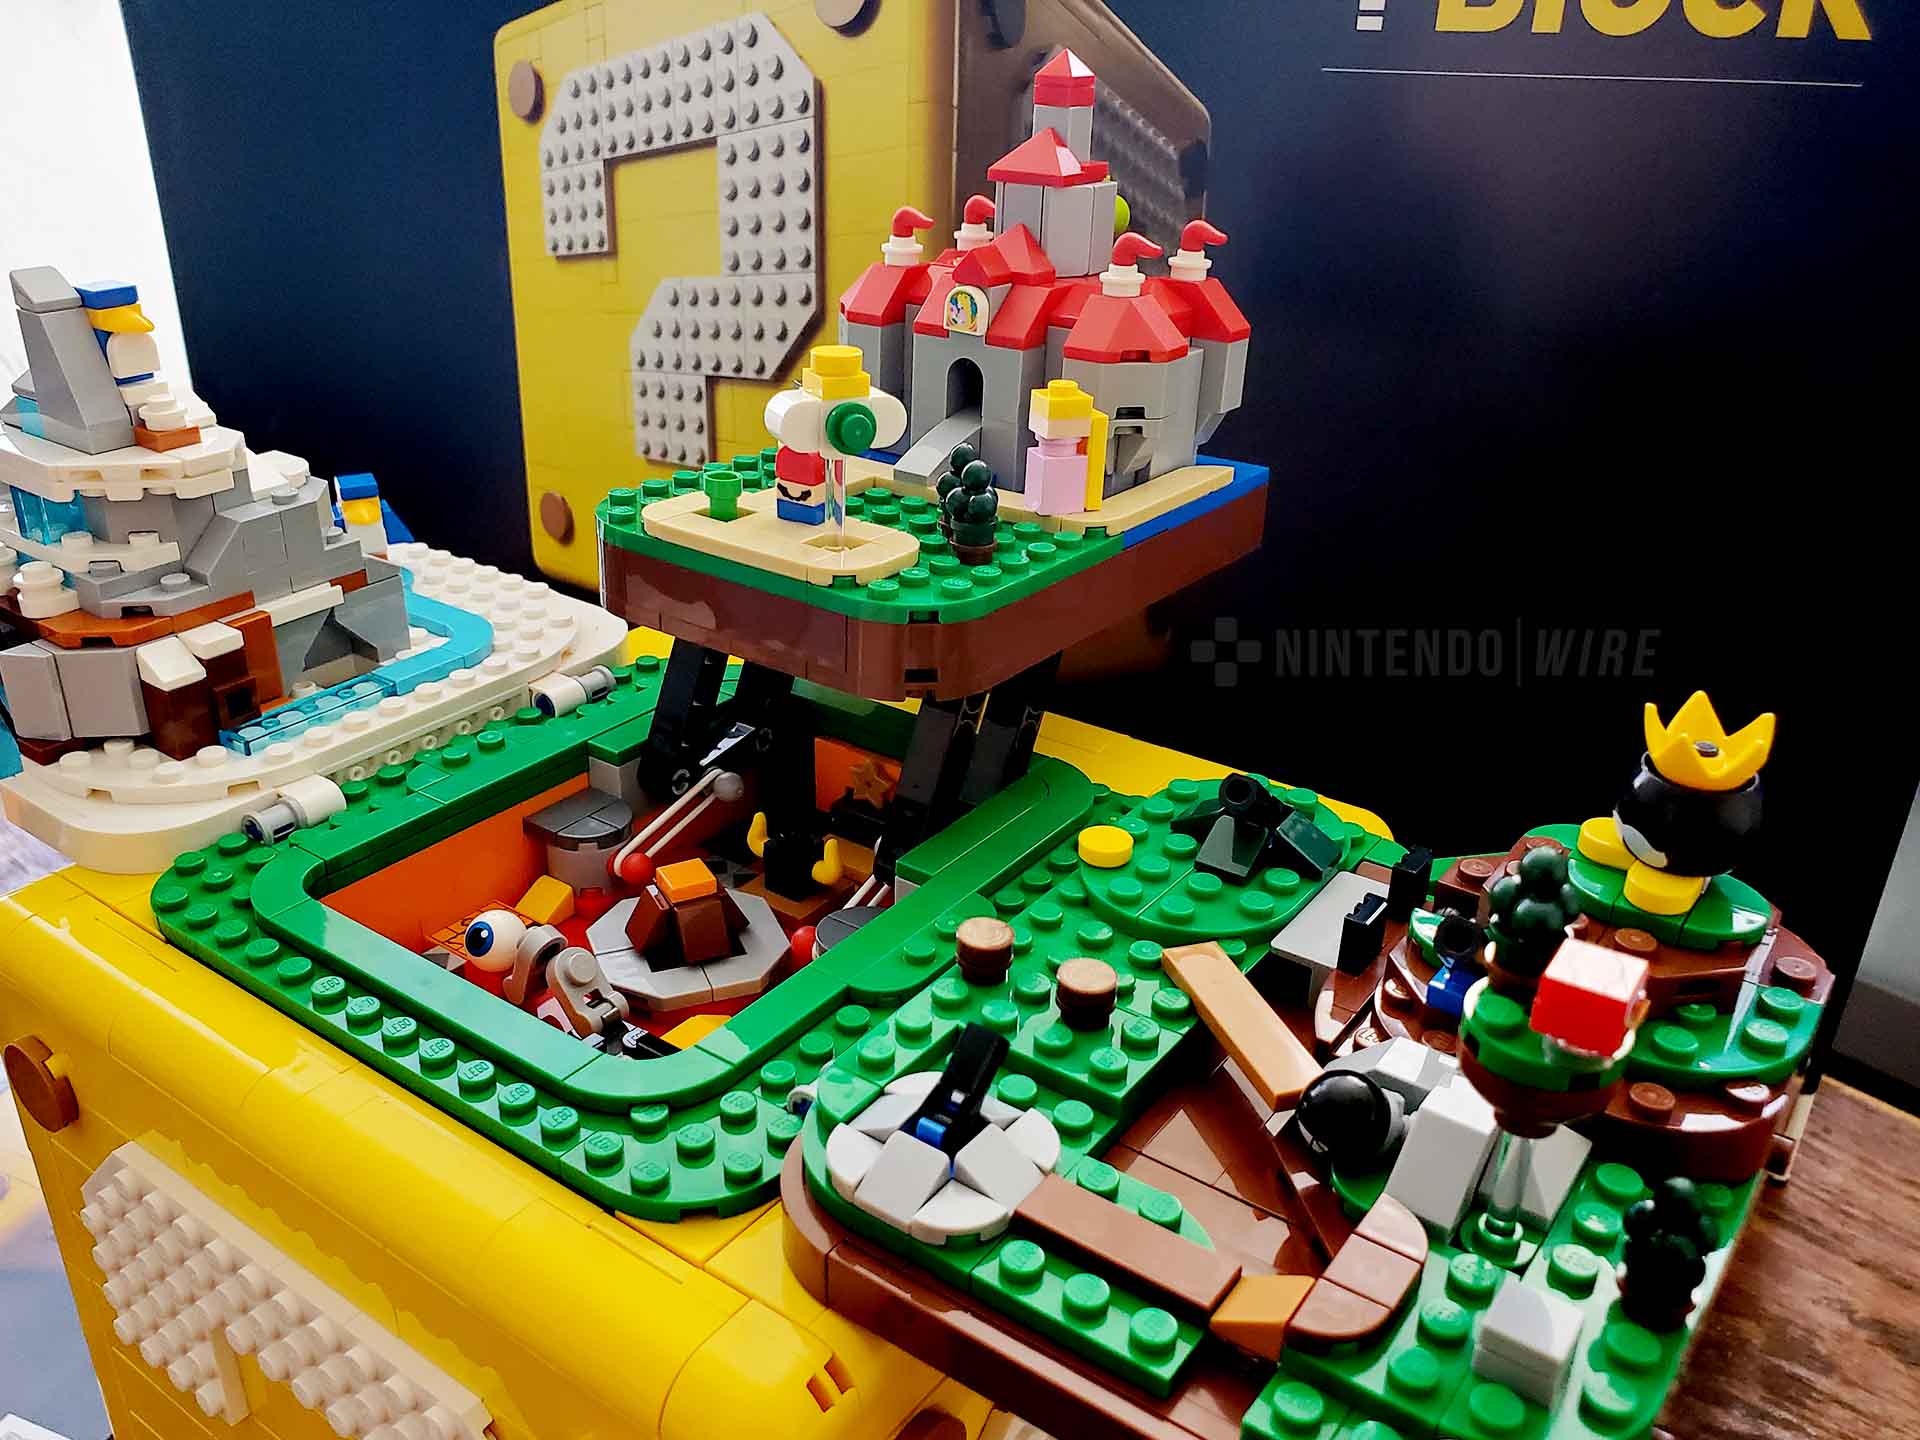
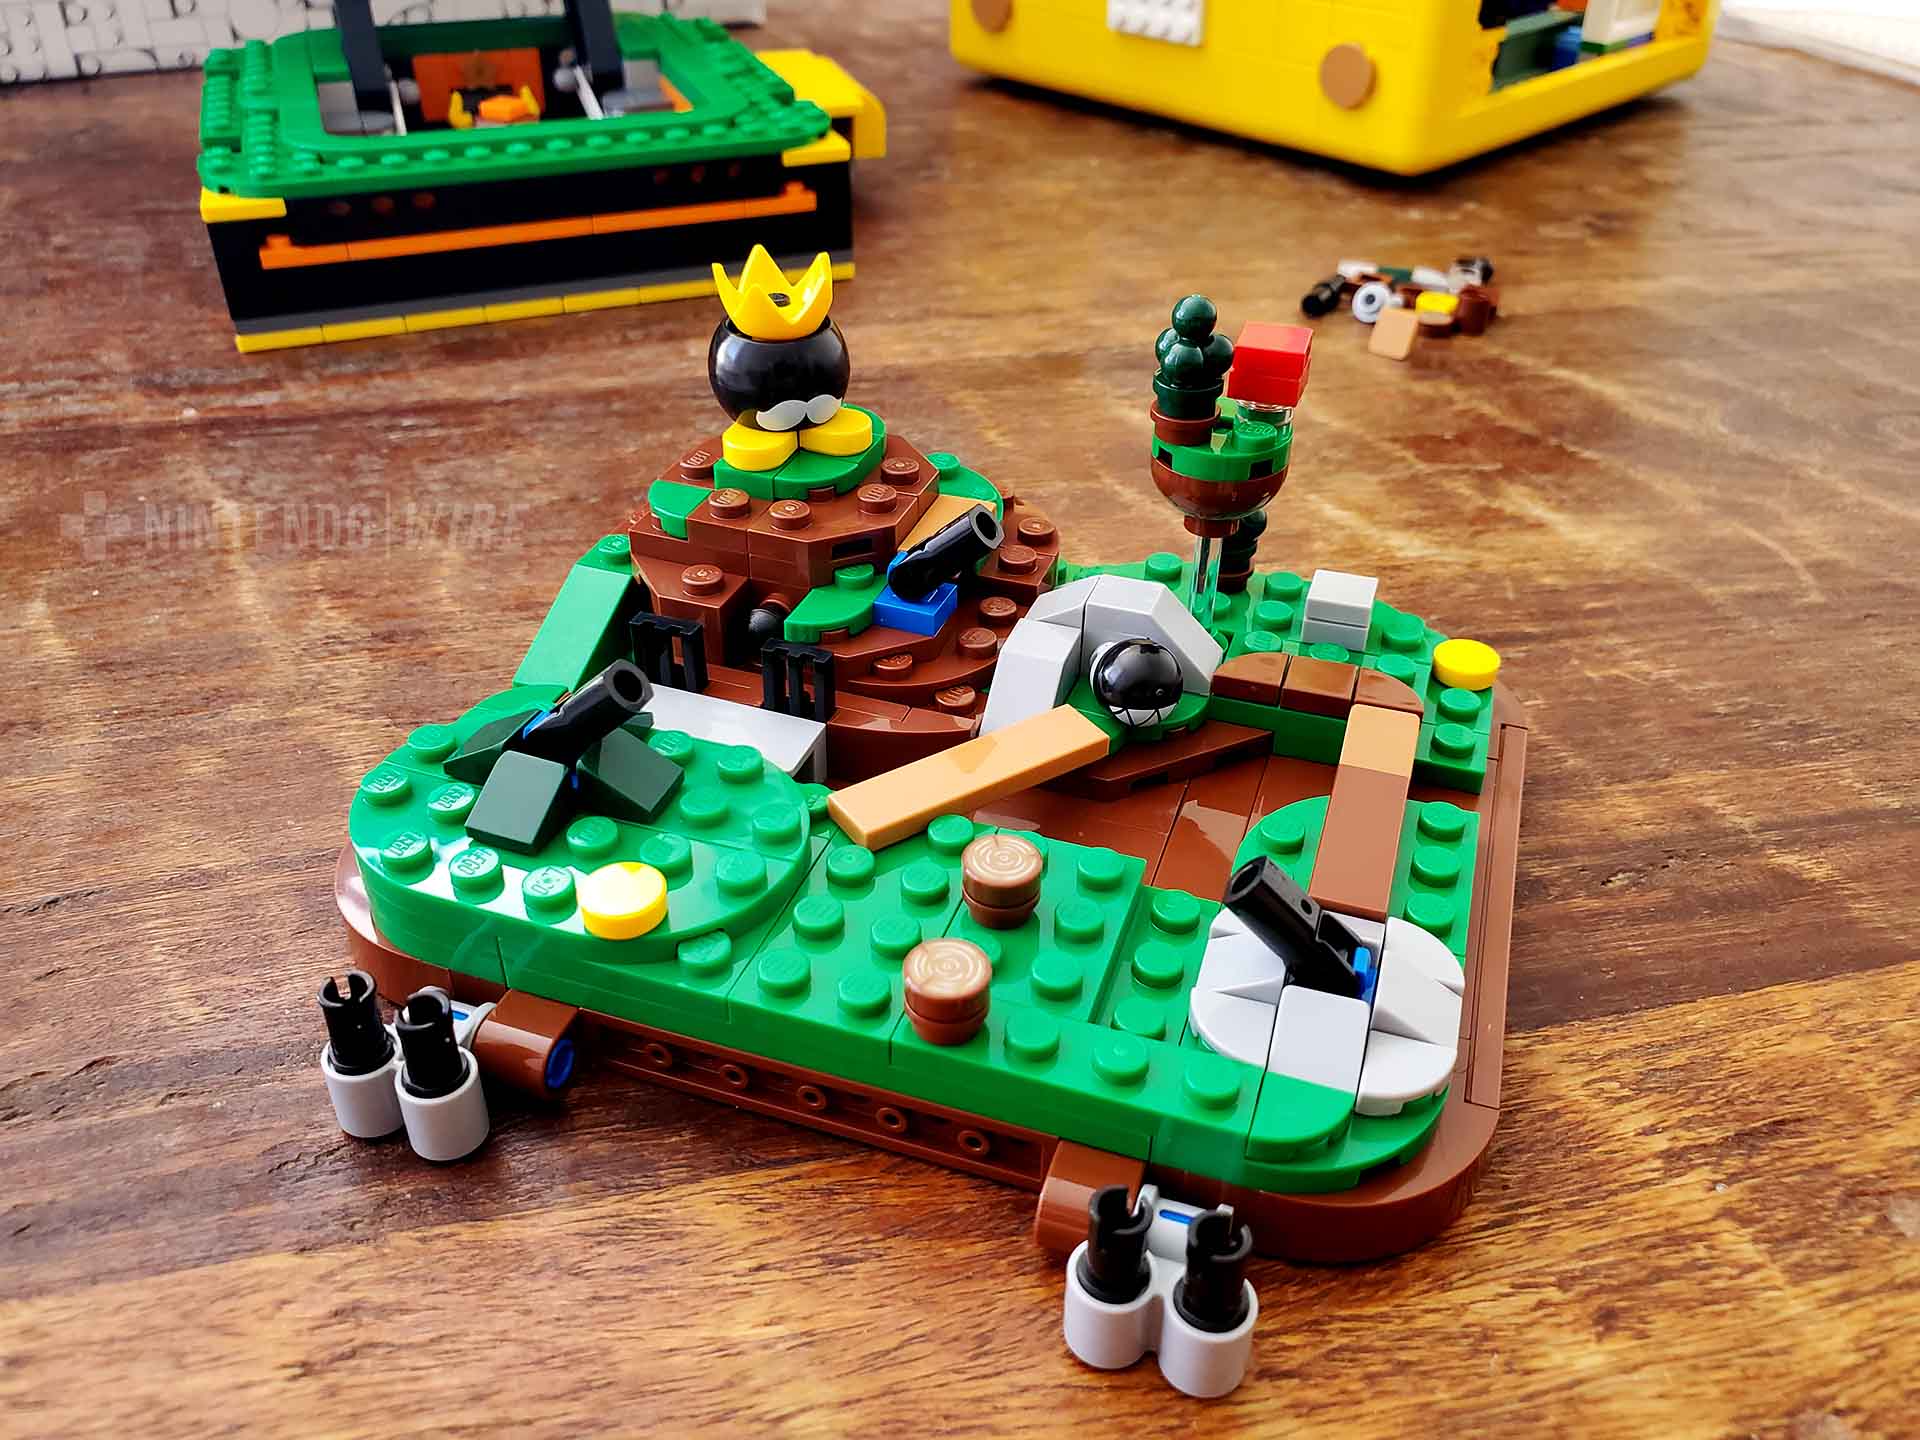
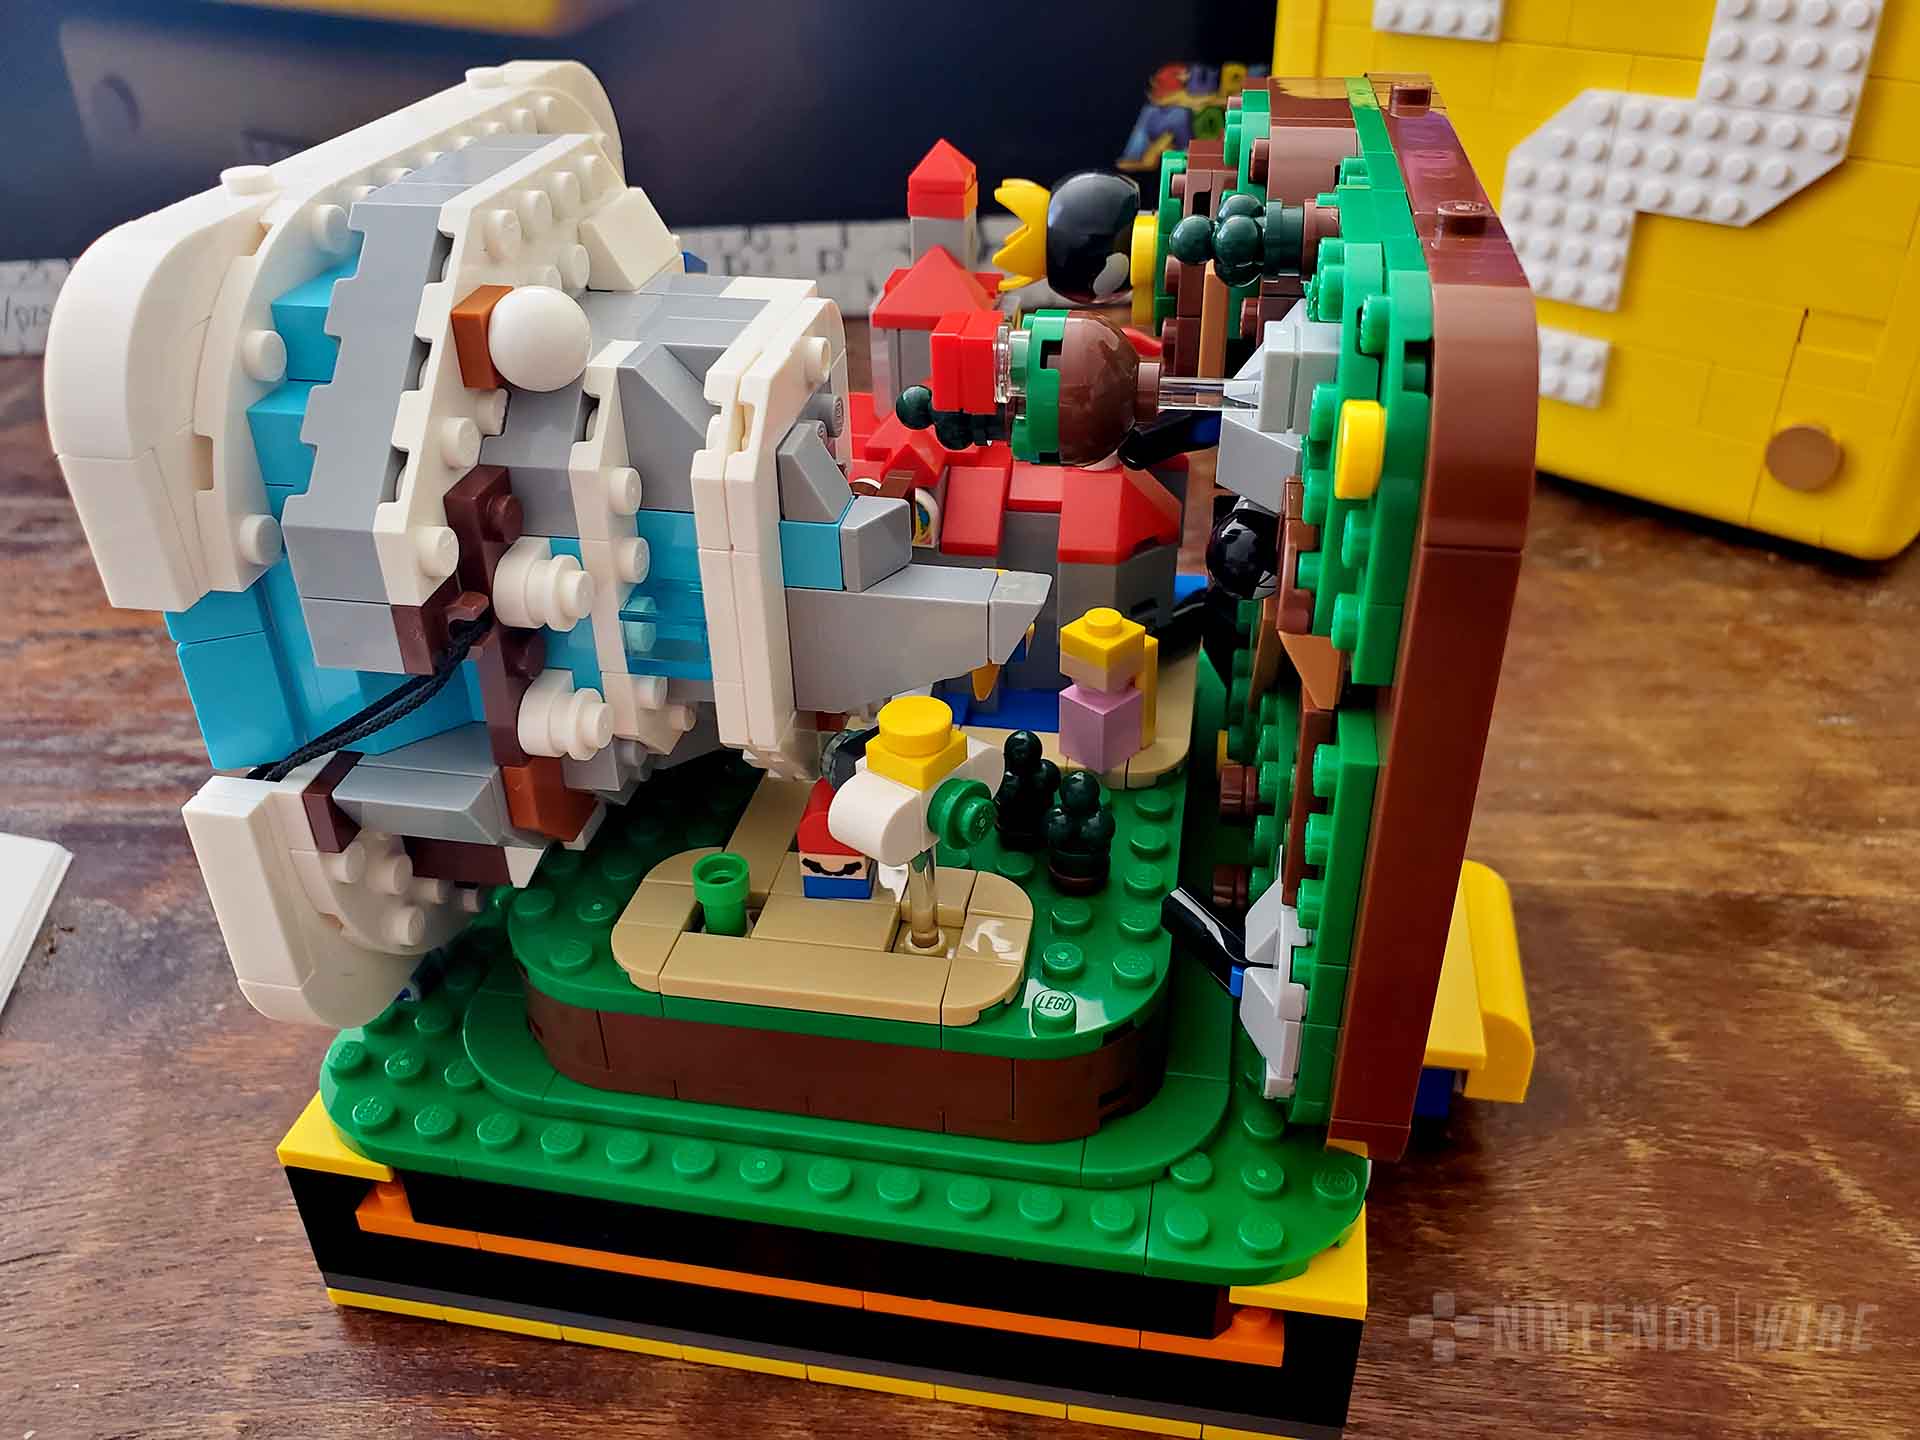
With Peach’s Castle constructed, it was time to move on to the two other worlds of this block. Both Bob-omb Battlefield and Cool Cool Mountain stand out among Super Mario 64’s worlds exceptionally well, and that’s reflected here, too. Just like those mini discoveries I just detailed, I caught myself placing things less by the instructions and more by memory from the game. Of course that’s where the Chain Chomp goes, and floating island is right where it needs to be. King Bob-omb might just steal the show, though, with his simplified appearance being a black orb with his mustache and crown — perfection.
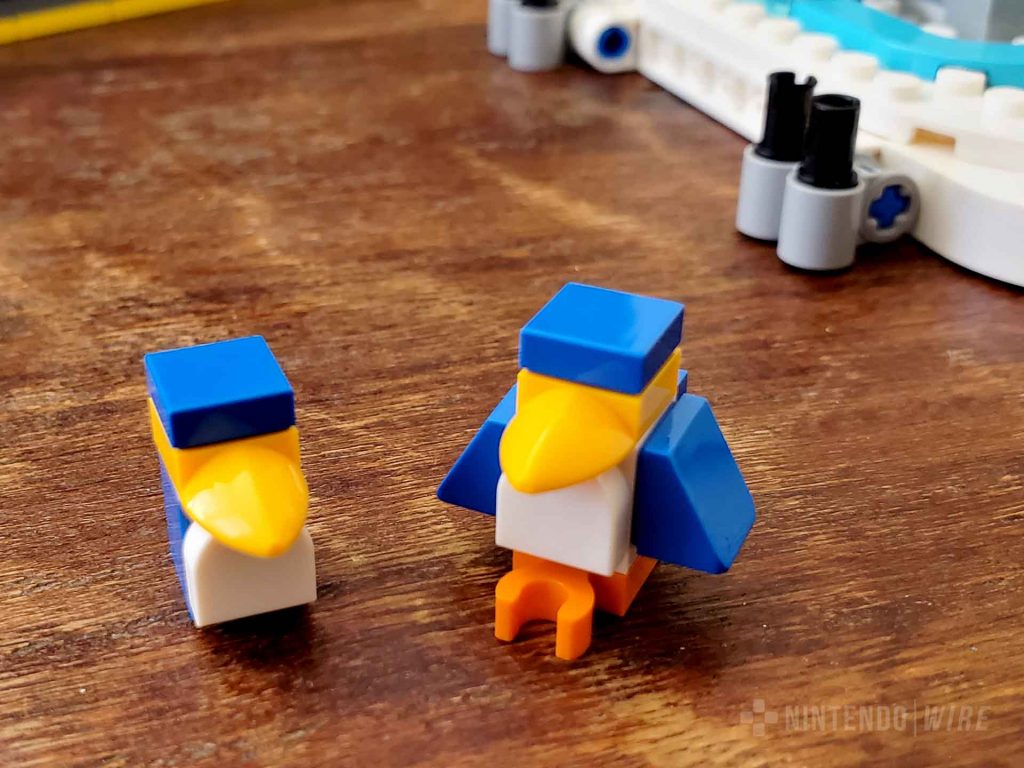
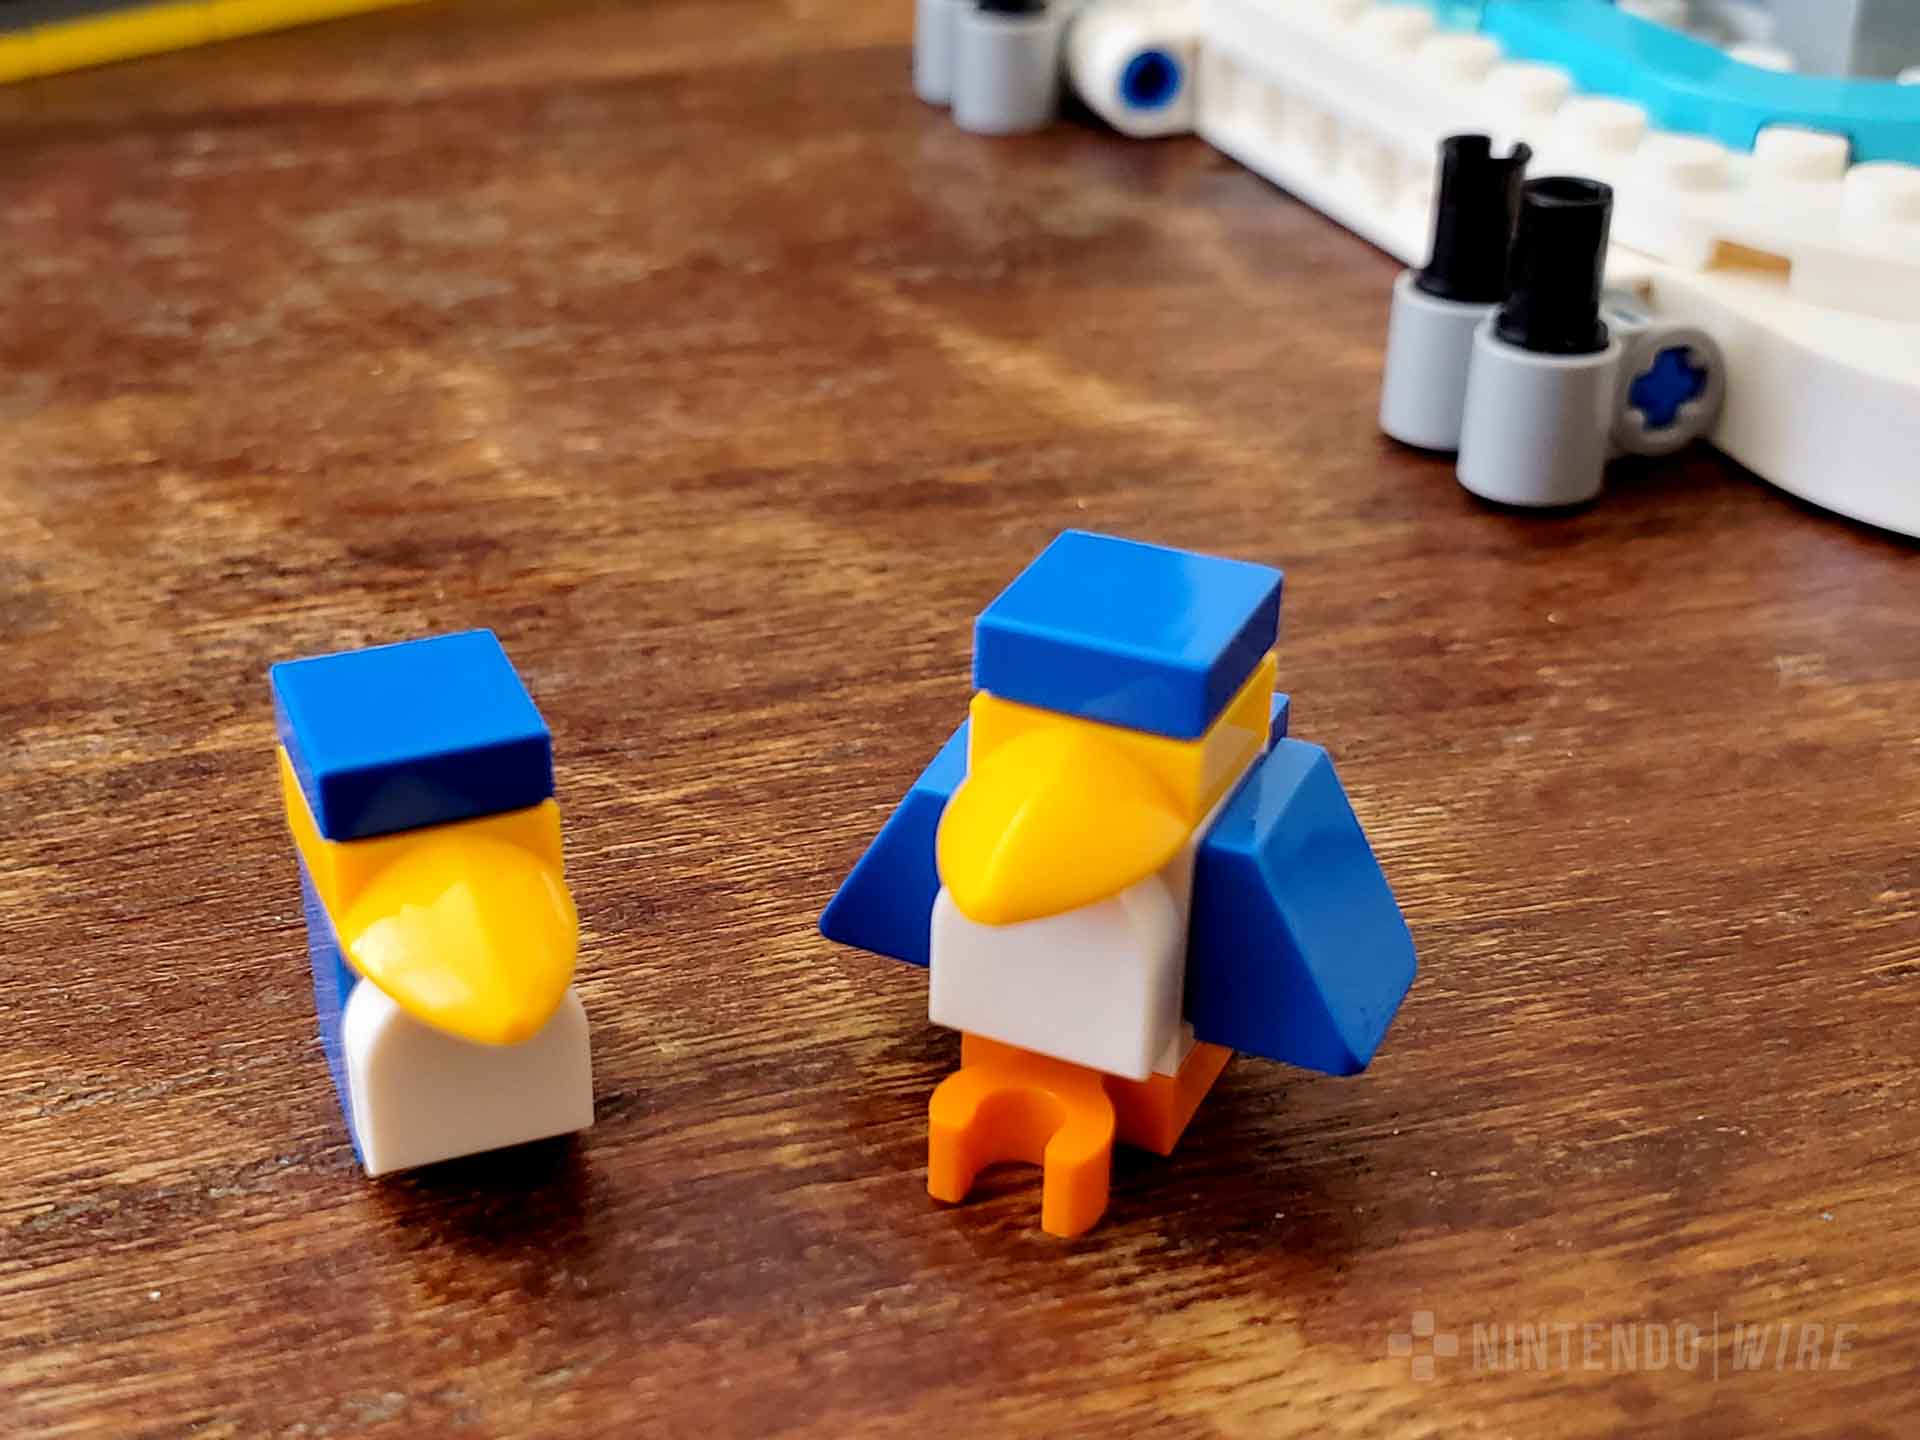
Cool Cool Mountain had its own extra special elements, too. While I wasn’t too keen with how it clashes aesthetically from the castle and Battlefield thanks to all its white, blue, and gray pieces; there’s no denying how “cool” it was to have the racing slide hiding inside the mountain. The ropeway bridge was another nice touch, as were the mother and child penguins.
For all the fanservice of these portions, though, I could definitely feel this was something of a tipping point. Taking on four micro-builds rooted in precision and ensuring you weren’t neglecting and (usually small) pieces was taxing. Fun, and rewarding, but taxing. If you’re an experienced AFOL or absolutely adore this sort of meticulousness, you’ll be right at home. I’d definitely call this a more intermediate build by both piece count and their average size, even if the overall “difficulty” of the build wasn’t too high.
Looking back, my ideal way of approaching this would be alternating between the block and the worlds somehow. That might not work procedurally, but I think it would’ve eased this mini marathon. That, or I could’ve taken more breaks…
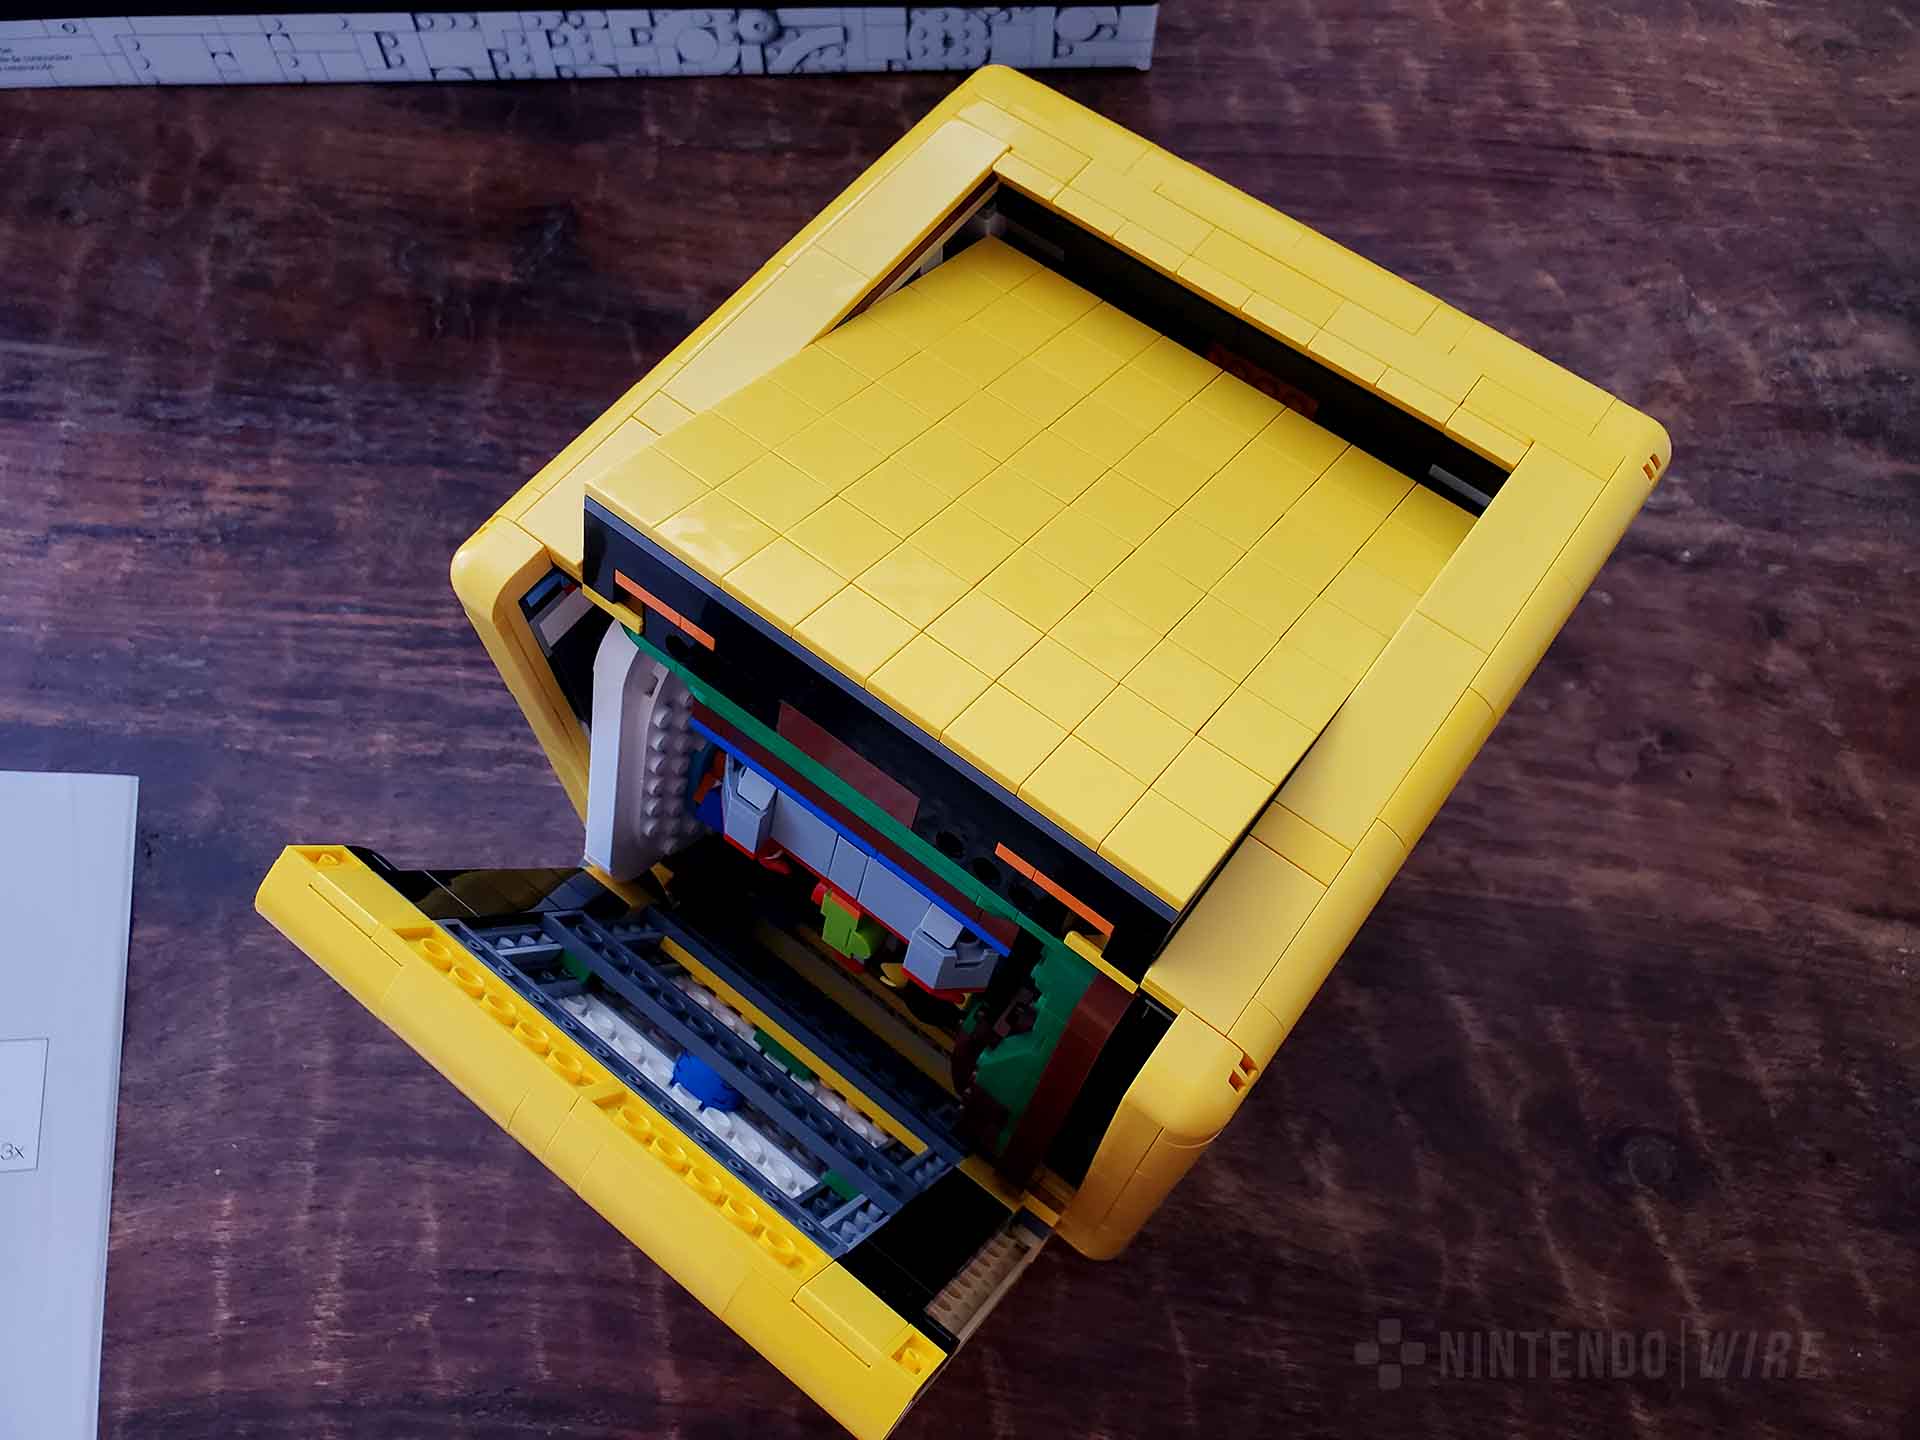
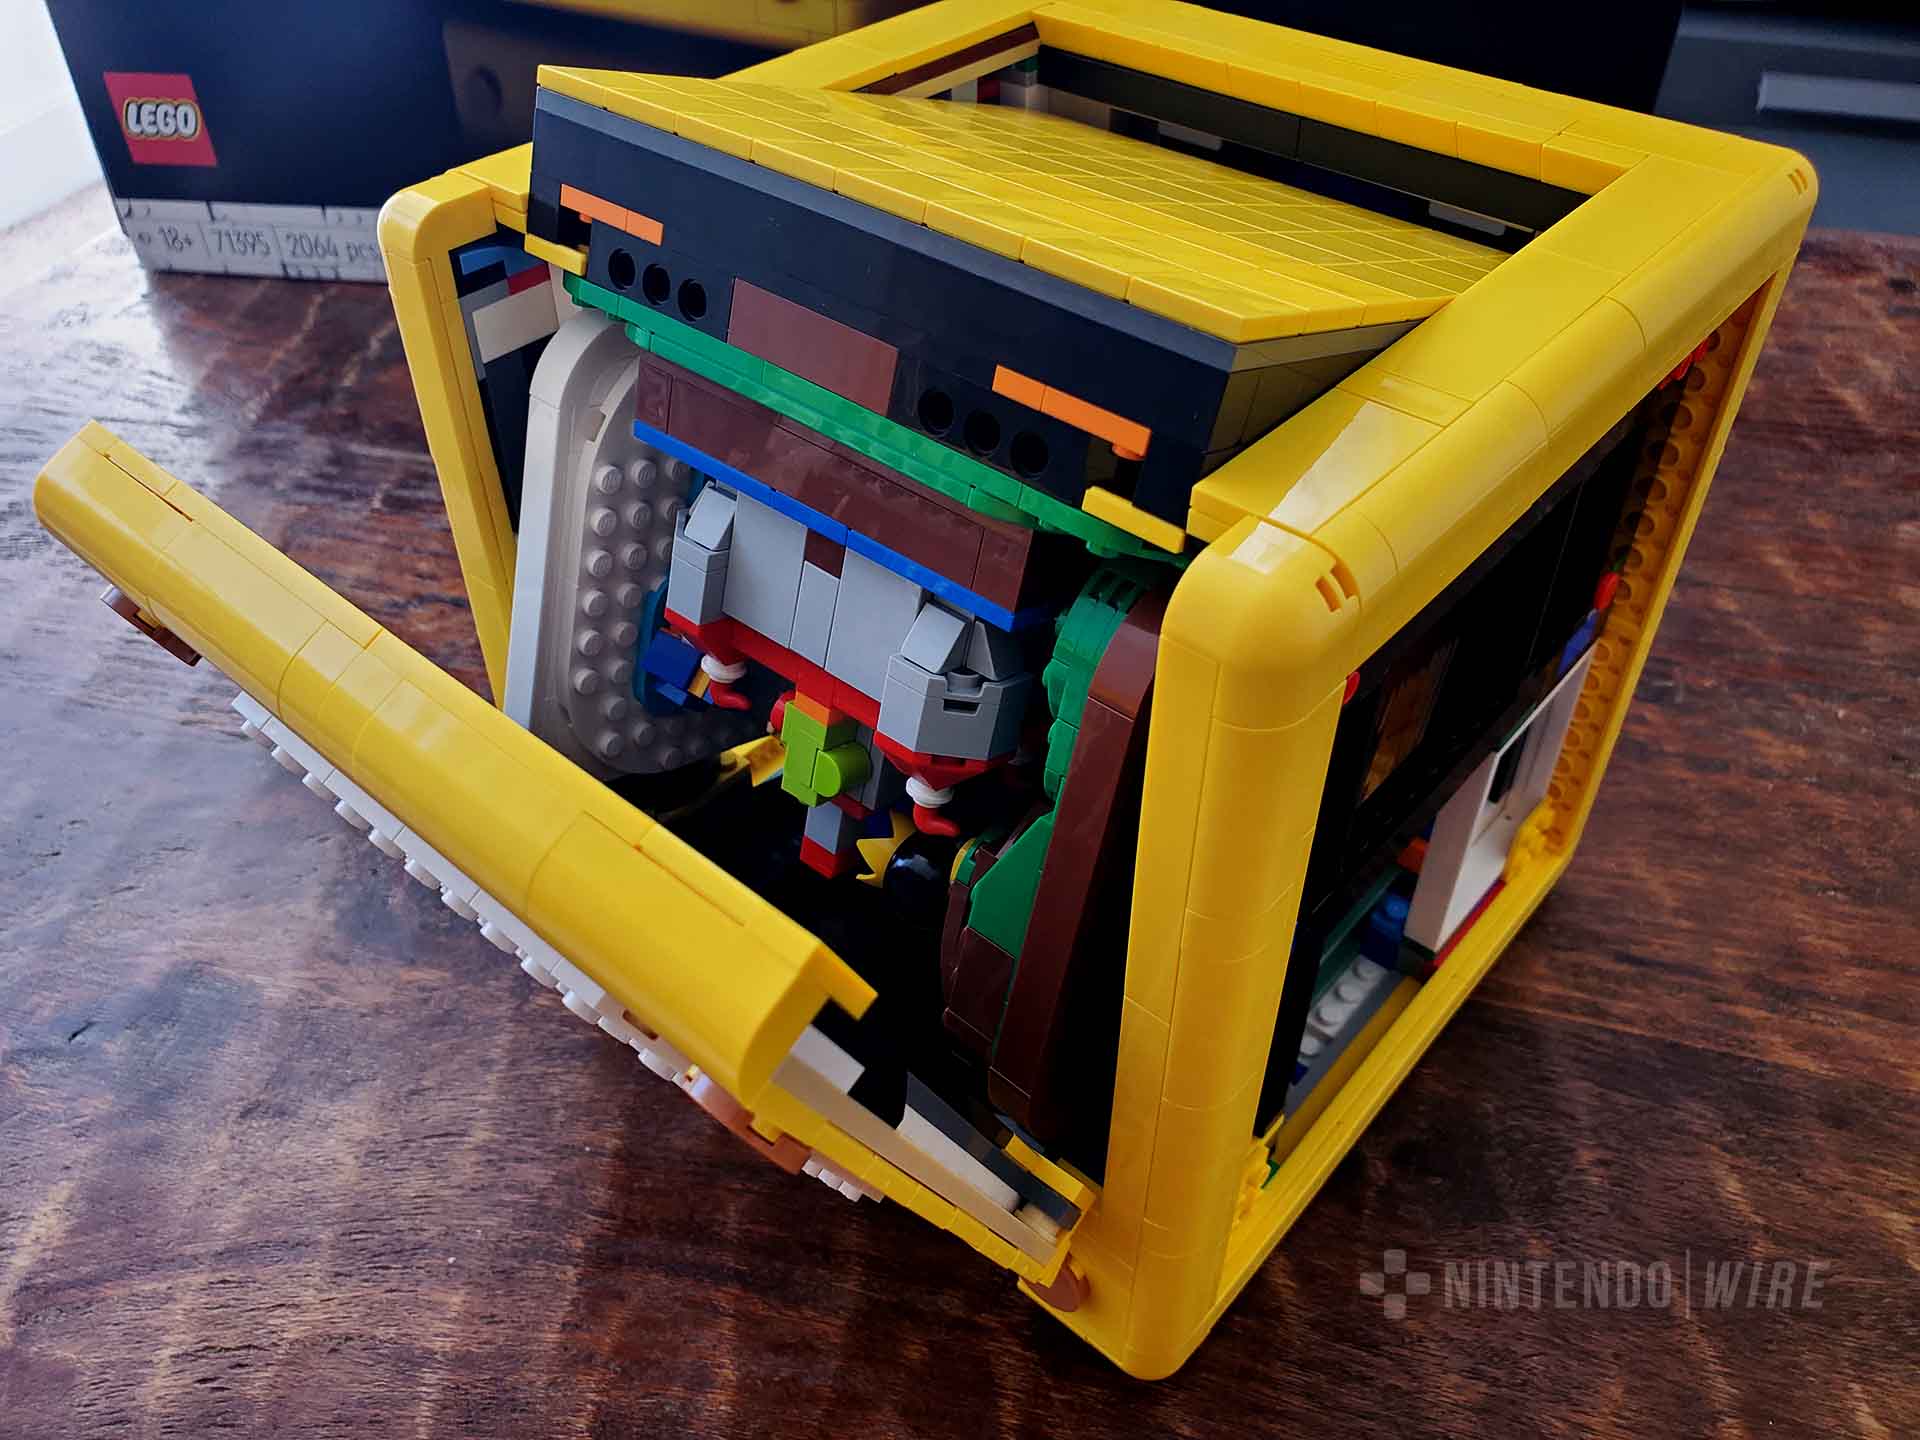
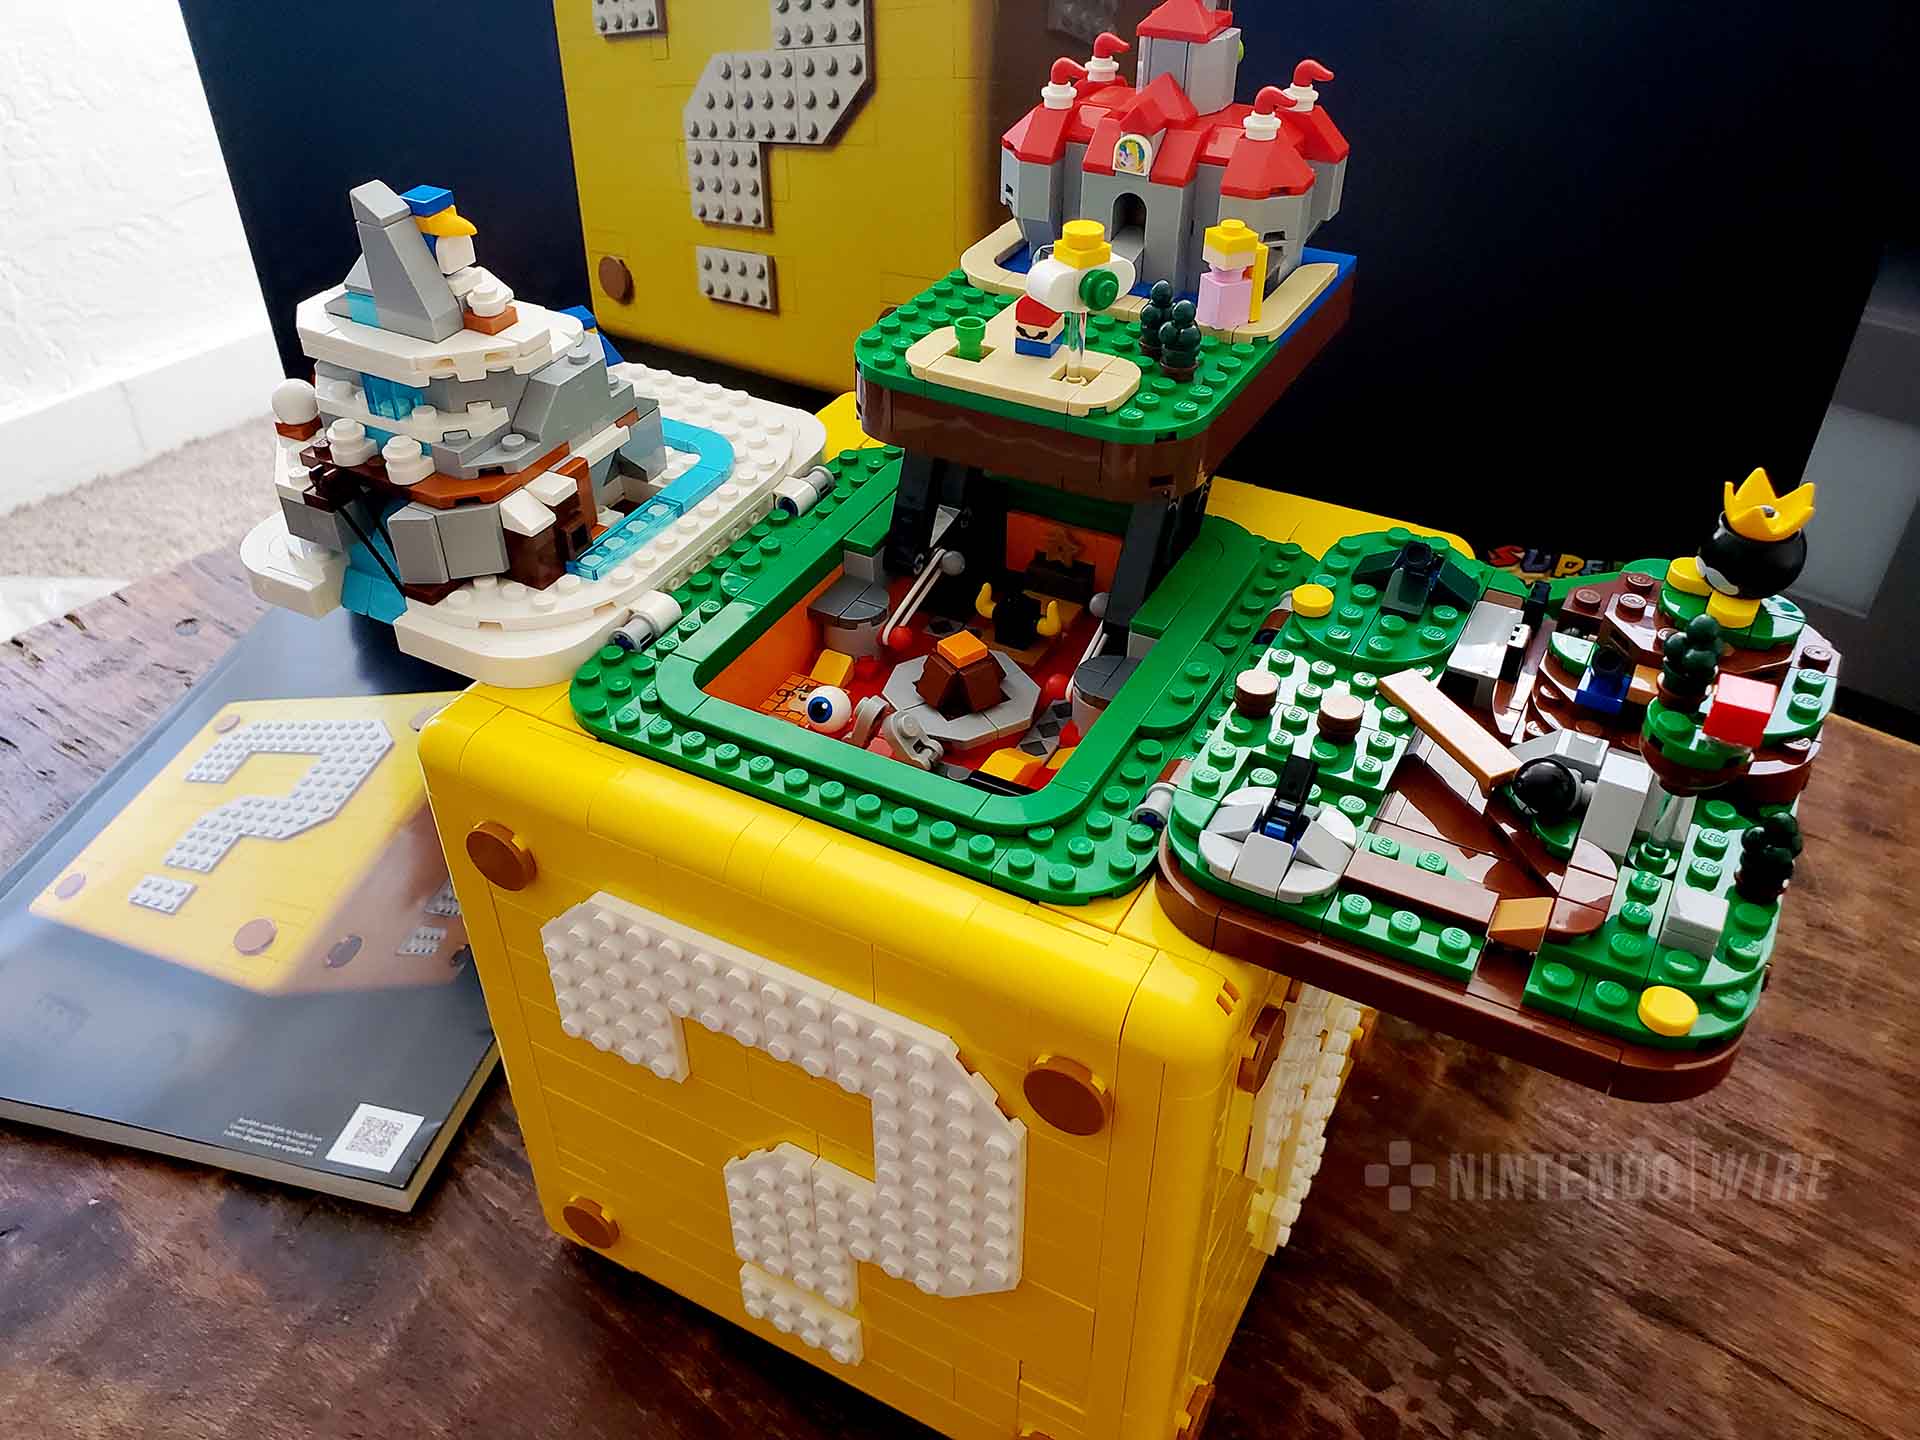
With all four locations built and attached, I was now able to “fold” them into the frame of the block. The first few times I did this weren’t so smooth, but after some practice it’s a quick process. The way they flip over and fit the block, revealing its smooth yellow top, is impressive. Less so was the final portion of the build, that being the two remaining faces. These were nearly identical in construction, making for an underwhelming finale.

Regardless, after nearly five hours, I had my Question Mark Block! And it did have one last charm point. Remember that hidden turntable I mentioned? By placing Mario and Bowser here, you can recreate their “So long, King Bowser!” showdowns.
As a whole, I enjoyed this build and am immensely satisfied with the finished product. I do wish another couple of worlds could’ve been included, be they within the construct itself or as different options, but the ones chosen do a great job of replicating their digital counterparts. Whether open or closed, it’s a wonderful display piece.
The only faults are those that I’ve mentioned, and that it doesn’t do much in the way of play experiences. To be fair, that’s not what it’s trying to be either, but if you’re after something more engaging after the build you’d be better off with the more standard Lego Super Mario line.
I do hope more comes from this collaboration between two brands that deeply defined my childhood. Maybe next we’ll see New Donk City or a gravity defying Galaxy set, but for the here and now the Lego Super Mario 64 Question Mark Block is both an engaging and appealing tribute to a gaming super star.
You can order your own Super Mario 64 Question Mark Block set at the Lego Store for $169.99.
Gallery


Leave a Comment
Written by Ricky Berg
When he isn’t writing for Nintendo Wire, Ricky’s anticipating the next Kirby, Fire Emblem, or if the stars ever align, Mother 3 to be released. Till then he’ll have the warm comfort of Super Smash Bros. to keep him going.